Epicenter Cycling | Bike Shop - Electric & Traditional | Santa Cruz

Electric and traditional bike sales, rentals and service in Santa Cruz County

1730 Mission St, Santa Cruz 831.423.9000 - 8035 Soquel Dr, Aptos 831.662.8100

We love bikes and are your one stop for all things bicycle-related! We offer electric and traditional bikes for purchase; rental/demo bikes; cycling apparel, parts & accessories, an exceptional service department, and a mountain bike shuttle service from our Aptos store. Owned by local Shawn Wilson, and operated by friends & family.

Filtering by Category: Mountain Biking

The All-New Trek Checkpoint Gravel Bike is Here

Welcome to the Gravel Boom – are you ready for adventure?

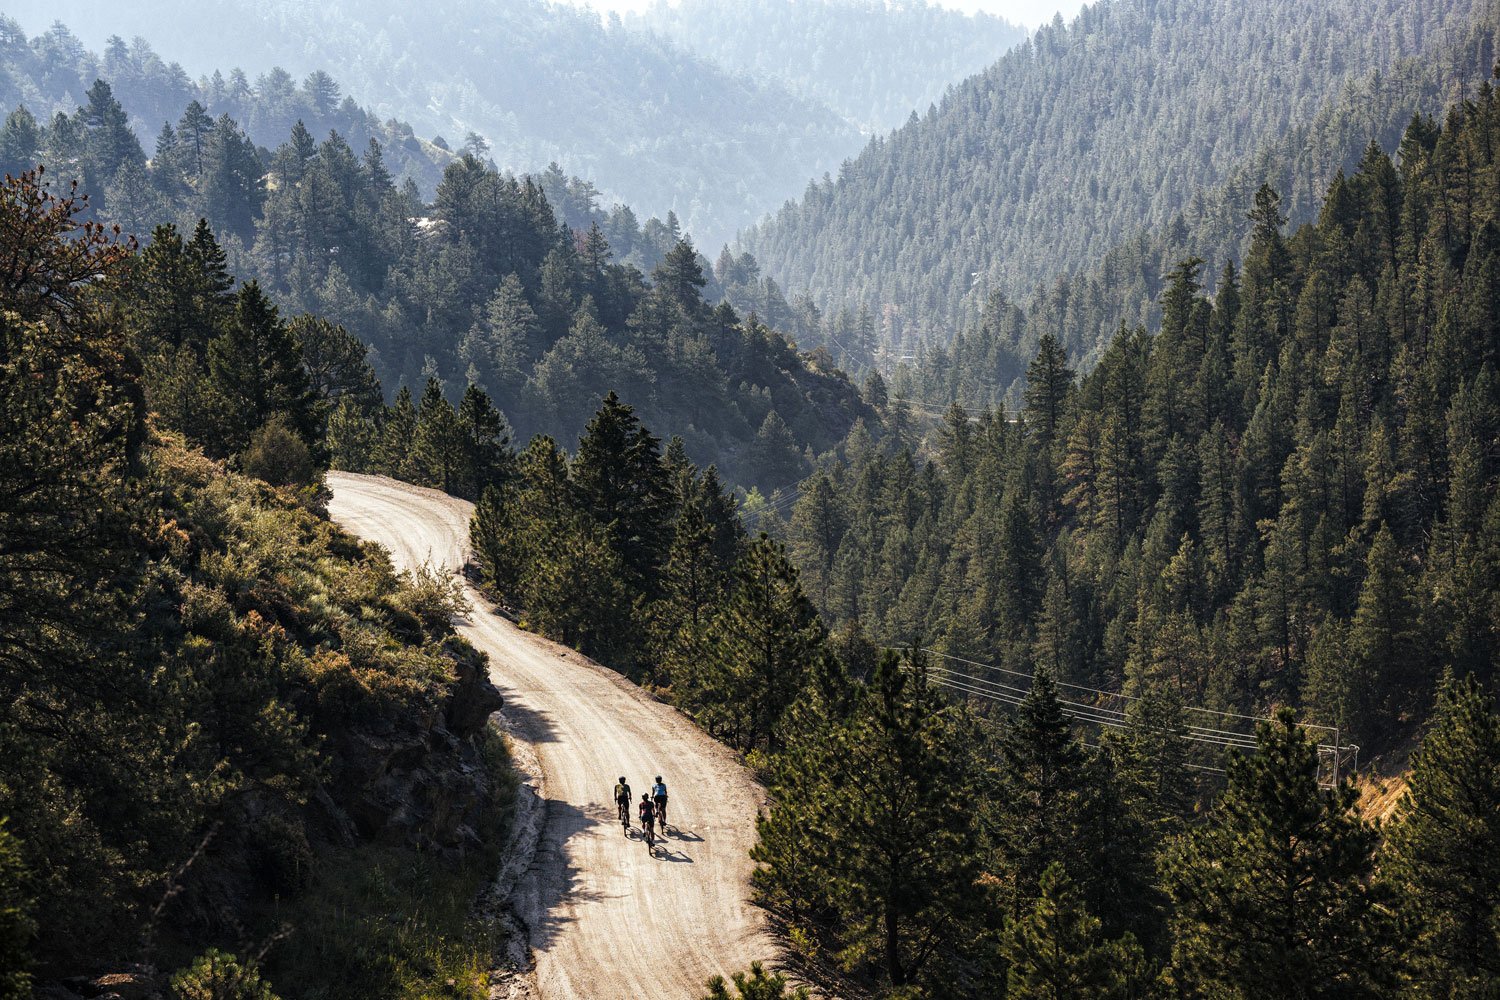
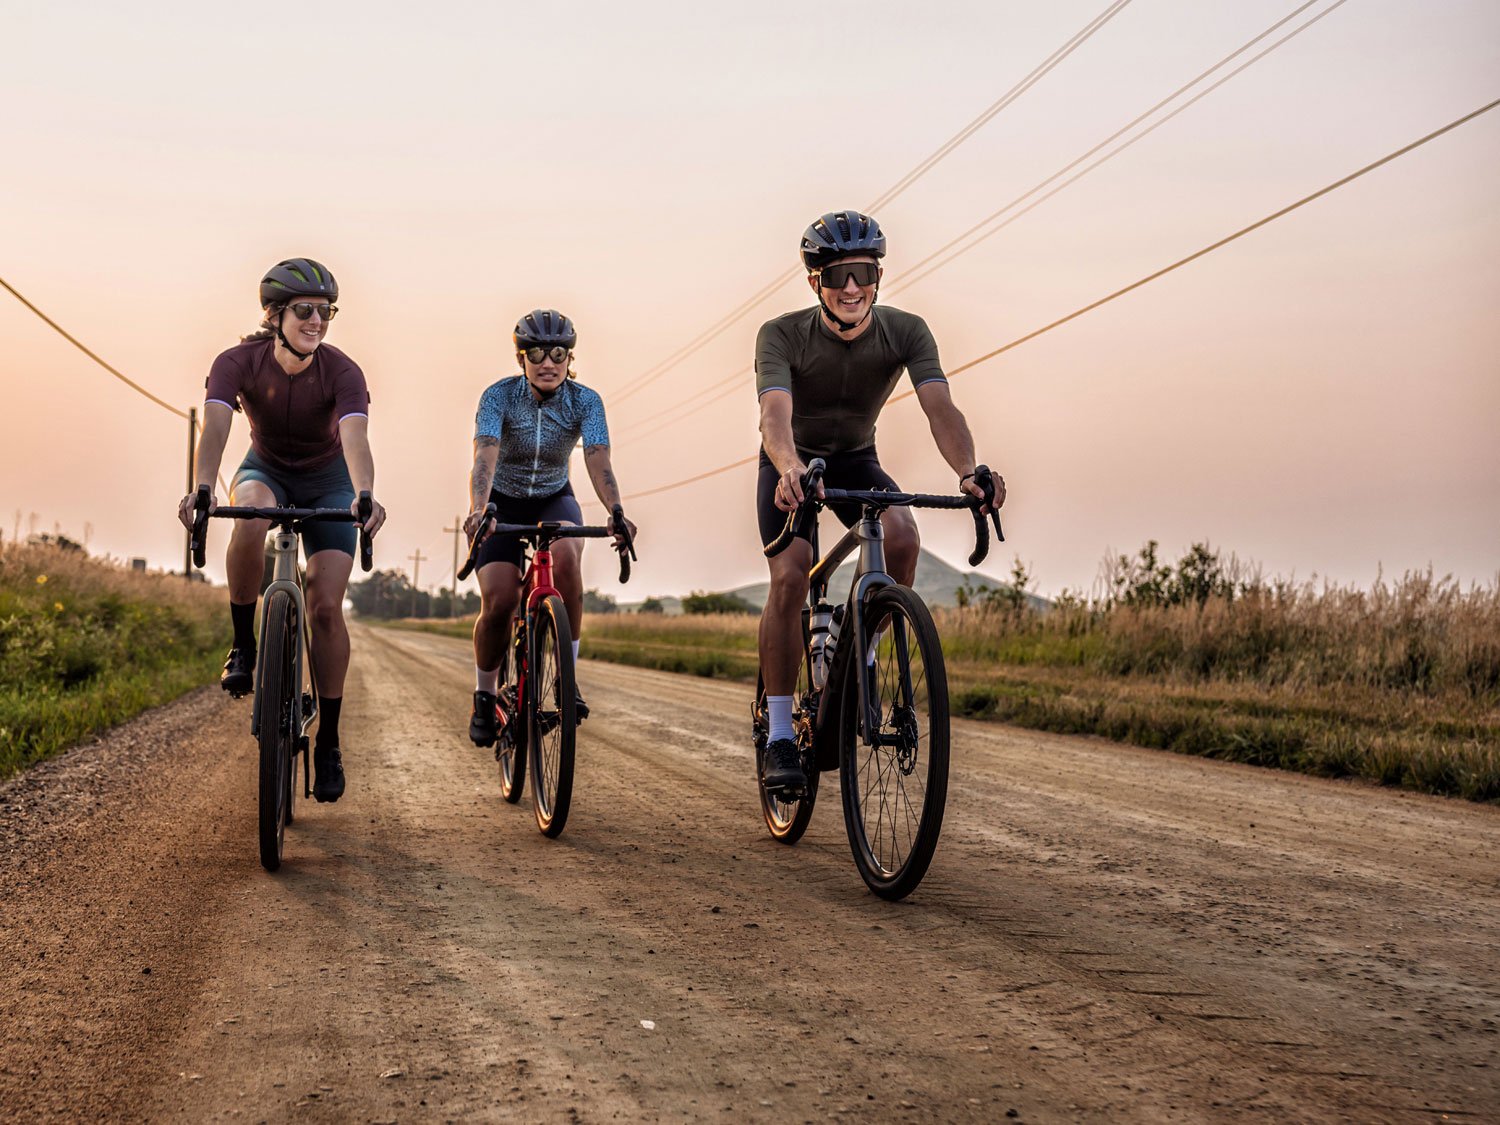
More and more folks are discovering how gratifying biking on gravel roads can be. Whether you’re looking to race, bikepack, or simply explore your local back roads, there’s a Trek Checkpoint gravel bike that’s perfect for you. The Checkpoint can even double as a great everyday commuter bike!

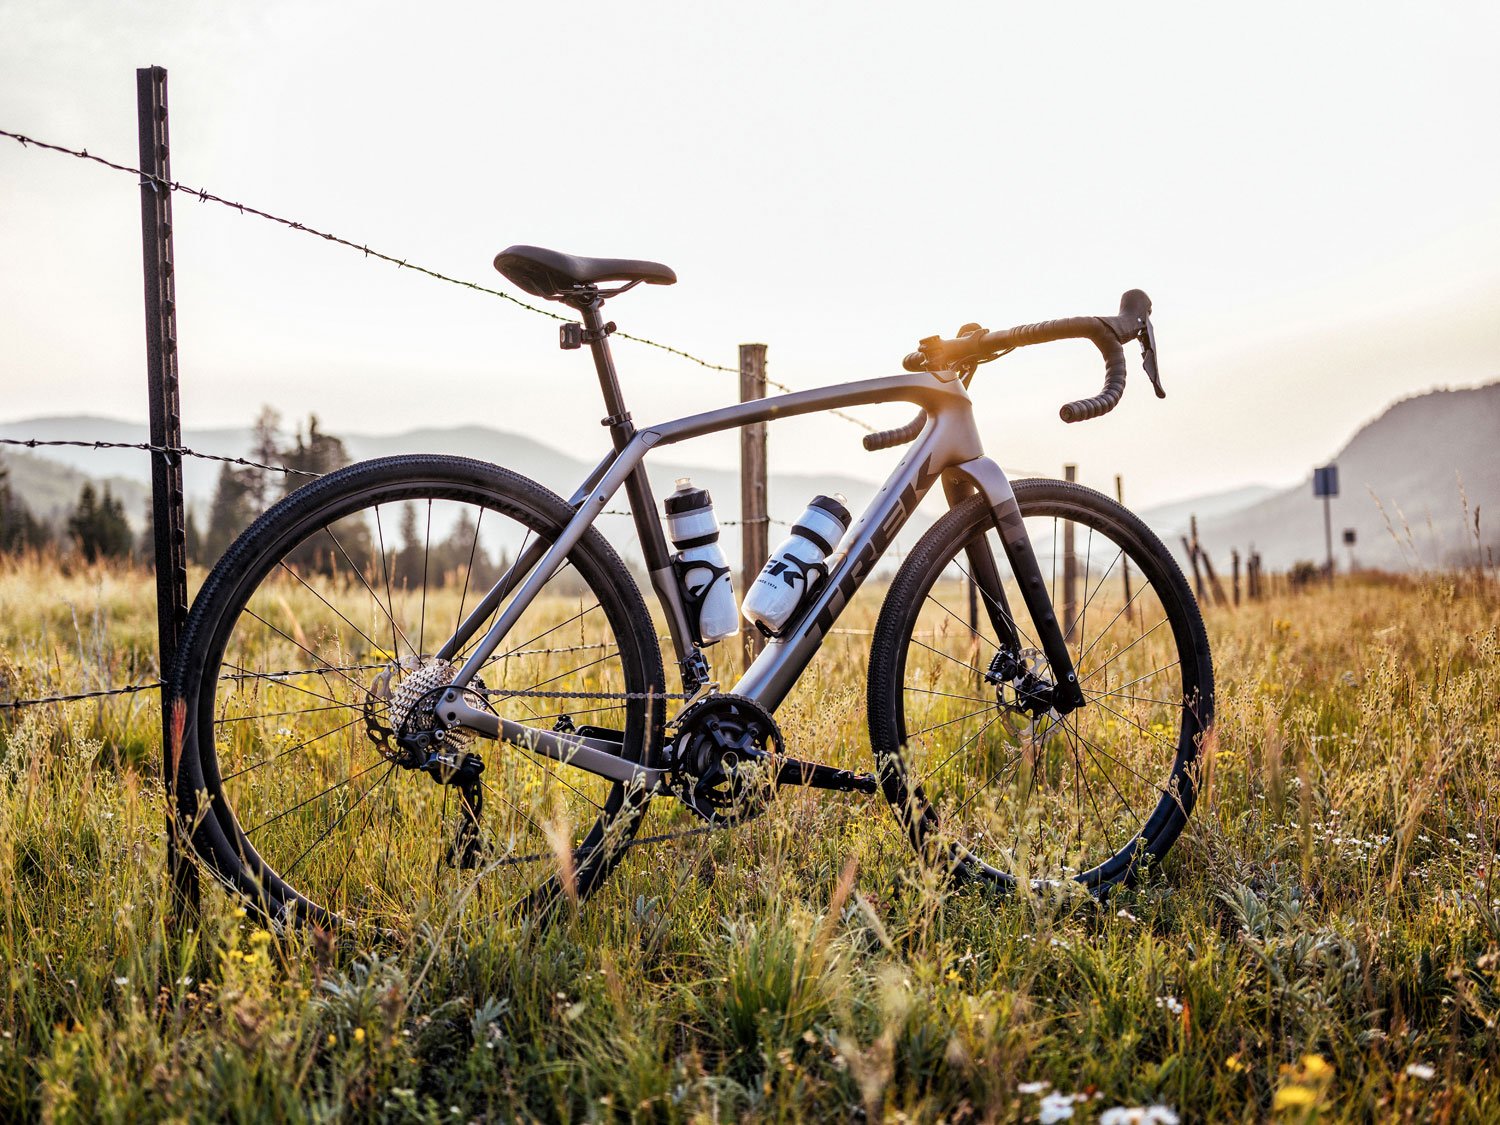
The 2022 Checkpoint is designed to be agile yet durable with progressive geometry that offers superior comfort and capability.

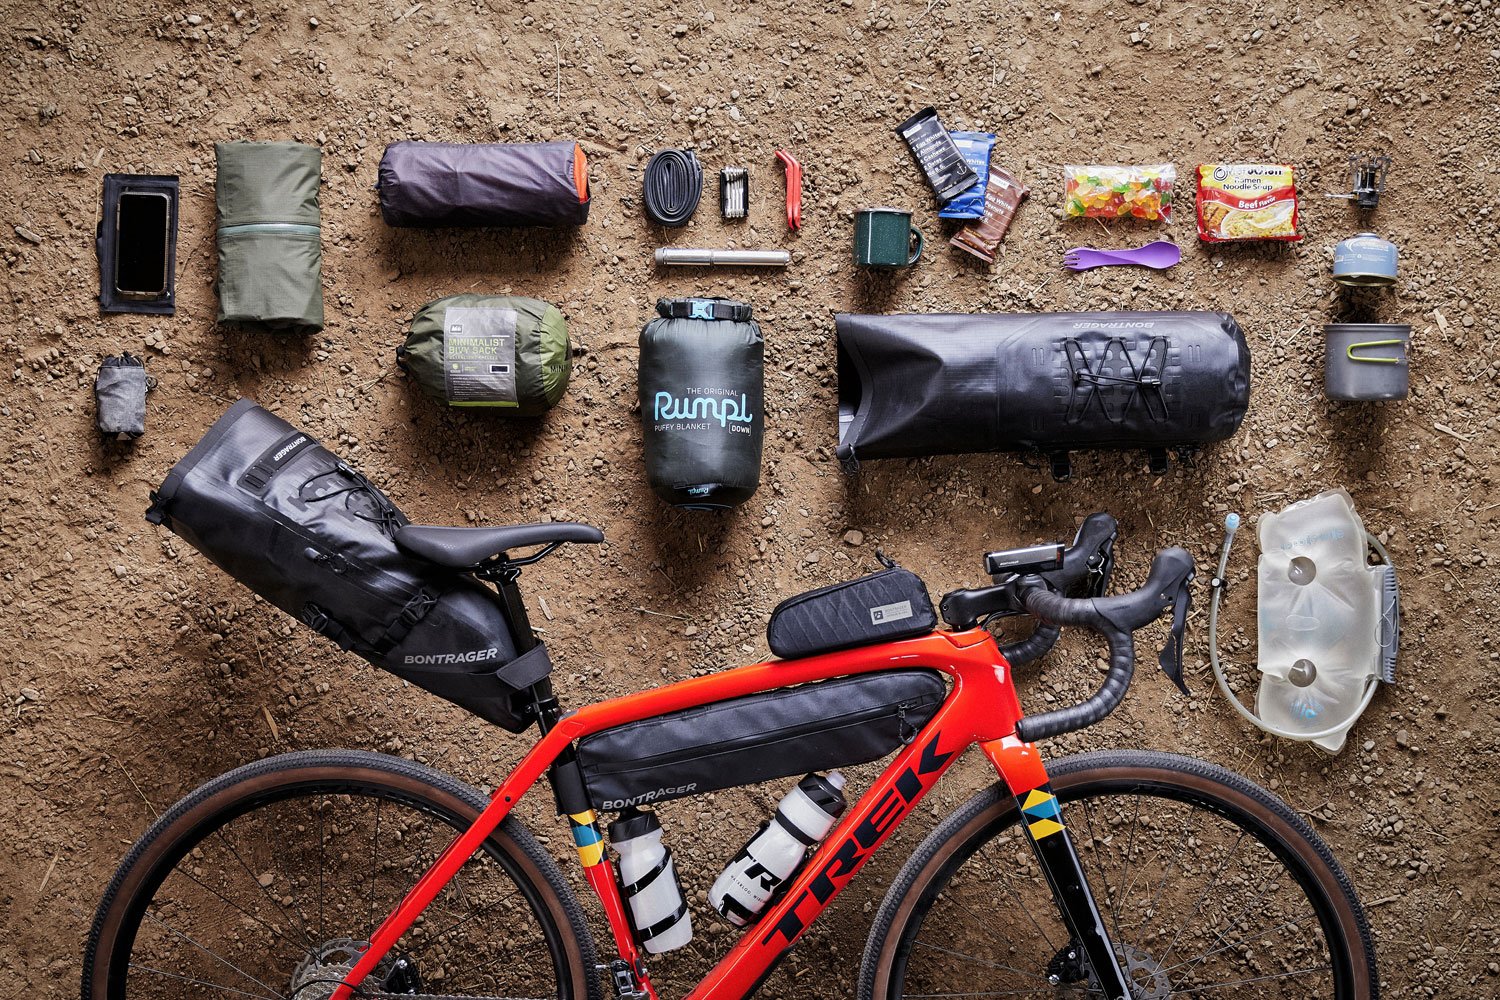
All models feature integrated mounts for frame bags and fenders to make it easy to carry everything you need for epic adventures.

Internal cable routing keeps things neat and streamlined while plenty of clearance allows for knobby tires to smooth out rugged terrain.

Plus, all-new Flat Mount disc brakes are lighter and smaller than traditional disc brakes, and offer outstanding performance and stopping power for precise control.

Read on to learn about the various models in the Checkpoint lineup. No matter which model you choose, you can be assured that your Checkpoint will prove to be an exceptionally capable and comfortable ride. 

Do it all with Checkpoint ALR

Checkpoint ALR 5 offers versatility and durability while being the most affordable model in the Checkpoint lineup. This do-everything bike can handle rugged exploration as well as smooth commutes. Its high-quality build features an alloy frame and GRX drivetrain, as well as the standard integrated mounts, internal cable routing, disc brakes, and more.

Go free range with Checkpoint SL

Checkpoint SL 5 is the next step up from the ALR model. A lightweight OCLV carbon frame and gravel-smoothing IsoSPEED decoupler offer the comfort you’re looking for on epic multi-terrain rides. From hours-long adventures to multi-day bikepacking trips, this is the bike for you.

Built-in storage compartment in the downtube lets you stow tools and gear; along with the standard mounts that allow you to load up all the gear you need. Its top notch build also features a GRX drivetrain, internal cable routing, and disc brakes. Plus … new for 2022: its dropper post compatible, too!

Go wireless with Checkpoint SL 6 eTap which boasts an upgrade to the smart and smooth SRAM Rival AXS wireless electronic drivetrain.

Take that upgrade even further with SL 7 eTap featuring a SRAM Force AXS wireless electronic drivetrain and Aeolus Pro 3V OCLV carbon wheels.

Put your race face on with Checkpoint SLR

Itching to test your mettle on a gravel race? Checkpoint SLR is the steed that will get you across the finish line. Its lightweight 700 Series OCLV Carbon frame boasts Checkpoint’s signature progressive geometry for agility and stability, plus IsoSpeed to smooth out the rough bits. Aeolus Pro 3V OCLV carbon wheels are also standard on all SLR models except SLR 9 eTap (which upgrades to Aeolus RSL 37V). 

Checkpoint SLR 7 includes a Shimano GRX drivetrain that offers smooth shifting, while the standard mounts for gear and accessories lets you carry the nutrition and tools you’ll need to keep rolling.

Go wireless with SLR 6 eTap or SLR 7 eTap which upgrade respectively to the smart and smooth SRAM Rival and SRAM Force eTap AXS wireless electronic drivetrains.

Make the ultimate upgrade to SLR 9 eTap which features a Smart and smooth SRAM RED wireless electronic drivetrain PLUS Aeolus RSL 37V carbon wheels along with integrated mounts, internal cable routing, disc brakes, and other Checkpoint standard features.

Test ride the all-new Checkpoint now

Eager to explore rugged gravel and beyond on the all-new Checkpoint? Whichever model you throw a leg over – from ALR 5 through SLR eTap 9 – this gravel-grinding powerhouse promises the ultimate in rugged exploration.

Swing by any one of our three convenient locations in Santa Cruz, Aptos and Monterey (with a brand new location opening soon in Pacifica) to discover up close and personal just what everyone is raving about.

Learn more about gravel riding in this Trek article.

How to Preorder Bikes 

The world at large has changed post-Covid, and so has the bike industry, for better or for worse. The good news is that Epicenter Cycling HAS bikes in stock, unlike many other bike shops and brands currently. We also have more bikes on order for 2022, which is approaching quickly.

Looking for a new bike? Here is what you need to do:

  1. Short and simple, please call sooner rather than later, as bikes are snatched up quickly. 

  2. Be prepared to put down a fully refundable deposit on your bike of choice. 

  3. Understand that bikes we can get to the store for 2022 are bikes we already have on order. 

This is simply the new “norm” for the foreseeable future. But here at Epicenter Cycling, we are on top of getting orders in quickly so that our stores have bikes readily available. Give us a call or visit us at one of our store locations. Contact us here.

Introducing Trek Rail’s New Bosch Smart System

Bosch is taking a big step into a digitally-connected e-bike. With the new Smart System, Bosch now combines the physical experience of e-biking with the digital experience of using smartphone apps. The Smart System uses the e-bike Flow app, the LED remote Kiox 300, the PowerTube 750 battery, and the Performance Line CX motor. All components are fully connected to each other.

What makes the Smart System so impactful is that it's the first entirely digitally connected e-bike to a smartphone app, such as the Flow app – not just through the display. This comes with a huge advantage for ease of use: software updates can conveniently be installed through the smartphone app at any time. Now, your e-bike will stay up to date even after purchase.

The E-bike Flow App 

The smartphone app connects to your e-bike automatically after registering as a user. The home screen of the app displays everything you need to know about how your Smart System is working, including the e-bike’s battery charge level, the next recommended service appointment, and the total mileage ridden during your ride.

Once you have the app set up, just hop on your bike. The app will automatically start tracking your ride’s analytics. Gone will be the days of forgetting to start your watch, Garmin, or fitness tracking app. In the near future, Bosch plans to connect the Flow app to popular fitness tracking apps so your rides are automatically uploaded.

The LED Remote

Attached to your handlebars, so you can easily take a glance, is the LED remote. This display shows 5 LED lights indicating the charge of your ebike’s battery, as well as the setting of the ride mode which is displayed in different colors. The LED remote is discreet and tidy on your handlebars, so it’s subtle, and not in the way while riding. Many riders prefer the clean look of the new LED remote as opposed to a bulky display. But if you prefer having an on-board computer display for training purposes, you can have this fitted to your e-bike by one of Epicenter Cycling’s shops after purchase.

The Kiox 300

The on-board computer display of the Smart System is perhaps the most compact display on the market. The Kiox 300 is simply the ideal training tool for riders that want to hit markers and set personal bests by tracking their analytics throughout the ride. With the Smart System, the Kiox 300 seamlessly connects to the Flow app so you can track your performance and optimize every e-bike ride. Lastly, the Kiox 300 can be updated through the Flow app after registering. It’s never been easier to own and operate an e-bike.

So there you have it, folks. The new Bosch Smart System redefines e-bike riding for total efficiency, power, and fun. Although recently released, Bosch already has plans for extending the capabilities of the Smart System. Curious what Bosch has in the works for the Smart System in 2023? You can get a sneak peek by clicking here. Moving forward, all new capabilities with be fully compatible with the Smart System.

Contact one of Epicenter Cycling’s stores to learn more about the Bosch Smart System and how to purchase. 


Respect the Trail: How Riding in Sloppy Wet Conditions Impacts the Community

We get it; tacky, amazing hero-dirt comes around once in a blue moon it feels while living in sunny California. 

But we’d like to illuminate the difference between fresh, grippy loam a couple of days after a rainfall and sloppy, soupy, slippery mud… 

When you ride trails in the latter's condition, you ultimately do yourself, your bike, and the community a disservice. 

So What Are the Rules For Riding During the Wet Season? 

Honestly, there aren’t hard and fast “rules” for riding during the rainy months for the year, but certainly there are guidelines that need to be known and respected so we have our mountain bike trails in the best shape possible for most of the year.

Here in our area (Santa Cruz and Monterey counties), riding shortly after a heavy rain often leads to rutted out trails and erosion. It’s key to consider giving the trails a couple of days to dry a bit to reduce impacting the trails. Erosion, in particular, is a concern as it causes damage to our forests’ ecosystem.

Often, you’ll see “trail closed” signs placed by volunteers when trails are simply too wet to ride. Please respect the closures. Doing so helps relations between mountain bikers and land managers.

Plus, waiting a couple of days for the trails to dry (but not dry out) will lead to riding in the most prime dirt. The type of dirt that still has moisture, chocolate-brown, and feels tacky and grippy: the hero dirt! Some of your best rides await a couple days after a solid rain!

Riding in a heavy down pour, or riding when the trails are sloppy wet is not as fun as it sounds.

And it does some things you won’t be stoked about later:

  • Your bike is trashed with mud. 

  • Your trails will dry rutted, eroded, and blown out. 

  • You could slip more easily and raise the risk of injury.

  • You contributed to negatively impacting the ecosystem you’re riding in. 

Not only is cleaning a mountain bike a pain after it’s caked with mud, but there’s now muck and debris in your components and suspension. Mud buildup can lead to damaging parts of your bike, including the common bent derailleur. Save your ride for a drier day and save yourself a few bike part replacements. 

Factors to Consider

Knowing when it’s a good time to ride during the wet season requires some thought, but we’ll give you some guidance on what to consider before you head out to ride:

  • Has it already been raining heavily? Or were the trails very dry before a recent rainfall?

  • What type of dirt is at the trail system I plan to ride. Some soils drain faster than others. 

  • Trail Closures. Likely after a heavy rainpour, trail volunteers place signage indicating a trail is too wet to ride. Please respect closures for the reasons listed in this post, as well as understanding that respecting closures helps the relationship between mountain bikers and land managers. 

What To Do While Waiting for Trails to Dry Out

Waiting a few days for our trails to get into a hero dirt phase can feel reminiscent of waiting for Christmas morning to open our highly anticipated presents. Riding in tacky, amazingly grippy, dirt brings joy at a level very similar to those Christmas mornings.

But, “patience is a virtue” and why not spend those days in preparation for the most joyous riding of the year? Here are some ideas to kill time and even revel in the wait:

  • Work on bike maintenance. Get your shred machine prepped for the weekend! 

  • Binge on bike films, watch professional races, and YouTube bike tutorials. 

  • Go for a gravel or road bike ride. Change it up and adapt! Pavement dries faster than dirt.

  • Route out your mountain bike ride on a map or app like Strava. Hit some personal goals! 

  • Ride an all-weather pump track and work on bike handling skills.

Or, drop your bike off at one of our Epicenter Cycling locations for a tune-up. Riders who purchased their bike from us can enjoy free tune-ups for the life of their bike! Having your bike in the in the shop certainly lessens the temptation of riding in sloppy wet conditions. Contact us today!

We get it, we love bikes, we love good dirt, and we want everyone to enjoy trails that are in the best condition possible. You can do your part to help!

5 Reasons to Buy a Bike from Your Local Bike Shop vs Online

There is no denying we live in a world with an unprecedented amount of convenience thanks to the Internet. Without having to leave our homes, we can purchase anything from toilet paper to food and bikes. Heck, you can buy a house while sitting on your couch!

But does this convenience of online buying always lead to a better shopping experience? Is it the best way to ensure satisfaction with your purchase? In this post, we explore the reasons why online shopping may not lead to optimal satisfaction in the long run.

Especially when it comes to purchasing your next bike, you have much to consider about how to go about finding the bike you want. Online, you have access to essentially any bike brand, new or a resale. Those reasons easily tempt anyone to buy a bike from an online source.

But here, we make a strong case that online shopping for bikes is an inherently risky move. Not only could it lead to an unsatisfying purchase, but you also miss out on perks only available from buying a bike from a local shop.

Before you decide where to purchase your next bike, use this post to help you make a final decision. 

2021 FX_86A3479.jpeg

1. You Can Demo the Bike First Before Buying

Hands down, the most obvious reason why buying a bike from a bike shop is a bright decision. Bike shops offer test rides, so you can get a feel for the bike before committing. After all, the more bikes you hop on, the more you realize that not all bikes are created equal. Some will suit your riding style more than others. 

Don’t get stuck with a bike that makes you feel “meh” while riding. Demo it first. Your local bike shop understands that testing a product out (especially a bike) is the best way to ensure customer satisfaction. If you buy online, what you got is what you get …

See our available bike models here and call us about setting up a free test ride. 

712A1274 copy.JPG

2. Unbeatable Customer Service 

You get one-on-one customer service in real-time at a bike shop. Ask as many questions as you’d like. When you buy your next bike from a local bike shop, you’ve got someone helping you who lives and breathes bikes and will make sure your questions are answered. 

Not to mention, you get custom fittings and set-up with each bike you test ride. With a bike dialed for your body, you get a proper read on how a new bike will suit your riding style. Your online deal will never be as sweet.

Additionally, chatting with a bike shop employee can give you invaluable insight on the local trail and road scene, suggestions on which trails to ride, and where the best brews in town can be found.

True that you can search for just about anything on Google, but a bike shop employee has knowledge about a cycling area you can only get from being a local bike nerd.

3. Professional Set-Up and Maintenance

After purchasing your new bike from a local bike shop, the best perks of purchase are about to come your way. Across the board, bike shops provide service and warranty with your bike. Many bike shops may also include bargains and free tune-ups included with your purchase.

While we can’t speak for all bike shops, Epicenter Cycling provides killer perks to our customers, and we might as well let you know what those are here:

  • Professional set-up of your new bike to ensure optimal performance and ergonomic comfort. 

  • Free and unlimited tune-ups for the life of your bike purchased at either of our shop locations. 

  • Here at Epicenter Cycles, we are authorized and able to service any Trek and Electra bike we sell. Not all shops can say the same. Please do your research ahead of time. 

  • Free test rides. 

  • One-on-one expert customer service, 7 days a week. 

Give us a call now to set up your free test ride or to hear more about our services: contact us

4. Bike Shops Will Only Sell Brands Committed to High-Quality Products

Let’s think about this critically for a moment; ahem: it’s a fact that there are a fair number of online brands that come and go, thus making sourcing replacement parts challenging to do.

A bike shop with a physical place of business has to source bike brands that have been in the game the longest to ensure their chances of staying open are as secure as possible.

Therefore, the brands that have been producing the longest are likely to have been around for as long as they have because they are both high-quality and popular with cyclists. So, your local bike shop stocks the best engineered bikes, gear and components in the industry. 

See our full inventory here

5. You Can Feel Good About Supporting a Local Business

The world is in rapid change post COVID-19. We saw online shopping skyrocket, particularly for some already colossal and global corporations. We saw our beloved hometown restaurants, shops, and businesses close their doors for good. But with the reasons listed in this post, online shopping does not always equate to quality and satisfactory shopping experience.

By supporting local businesses, local bike shops, in this case, we preserve a service that is invaluable to communities everywhere. Often bike shops are a social hub for bike enthusiasts to connect with one another, set up social rides and events, create fundraisers for local trail systems, and much more. These aspects just cannot be recreated in the same fashion by online brands.


To conclude, bike shops offer professional services, top quality products, expertise and personanbility that cannot be replicated by an online shopping experience. Buying online may offer cheaper pricing, but with that can come lesser quality, lesser reliability, and some uncertainty in what you are really purchasing.

Best chances of enjoying the bike you wish to buy? Go visit your local bike shop. You can find Epicenter Cycling in three convenient locations: Santa Cruz, Aptos and Monterey.

We’re here and ready to set you up with your dream bike.

712A3370 copy.jpeg

Basic Bike Tire Maintenance

TK20_Verve 3_St_Petes_Still-life_DR19802179.jpg

You can’t go wrong by informing yourself of essential bike maintenance. The more attuned you are to your bike, the more likely you’ll be able to troubleshoot mechanicals and keep your bike in ride-ready condition.

It may seem overwhelming getting started with bike maintenance. So let’s start with the basics: tires. By the end of this guide, you shall be provided with enough know-how to feel comfortable tackling the basics of bike tire maintenance. 

What to Have in Your Tool Bag for Tire Maintenance

If you ride a bike frequently, it’s in your best interest to pack a few essential bike tools if you get a flat (or some other mechanical) while on your ride. Here are suggestions for what should be readily available in your bike tool bag:

Multitool 

A multitool is compact and handy enough to provide a wide range of minor fixes and unforeseen trailside mechanicals. From allen wrenches to hexes and chain breakers, you won’t want to leave this tool at home. 

Tire Levers

Good luck trying to fix a flat without two of these babies. Tire levers are crucial to removing your flat tire from your wheel and assisting you with guiding a fresh tube or tire back onto your wheel. Many bike-specific multitools will come with tire levers but be sure to double-check before your purchase. 

Hand Pump or CO2 Cartridge & Inflator

You don’t have to wait till you are near a floor pump to inflate your tire. There are plenty of nifty hand pumps small enough to fit into your pack and efficient enough that you’ll have a completely flat tire reinflated before your arm tires out. 

Some cyclists prefer the convenience of using a CO2 cartridge and inflator over a hand pump; this uses pressurized CO2 to fill a tube in a flash.

Spare Tube 

If you get a flat on your ride, a spare tube can save the day. Make sure that your spare tube is the correct size for your tire (27.5”, 29”, etc.). Also, pay attention to the valve type of your tube. Tubes either have a Presta or Schrader valve. Many bike pumps have a feature to convert the type of valve it can inflate but not all. Some pumps only can inflate with Presta valves or Schrader valves. Keep scrolling for our guide on how to fix a flat! 

Tire Plugs 

Having a plug kit with you could be a bright idea if you run tubeless tires. With tubeless tires, tiny punctures are filled by the sealant inside the tire, preventing a flat. But occasionally, we rip a tire too wide for the sealant to do its job. In this case, carrying a plug kit will allow you to plug up that leak so you can finish your ride. 

Tube Patch Kit

If you get a flat with an inner tube in your tire, with no spare tube available, don’t panic. If you brought a tube patch kit, you could still run that tube after patching up the puncture. Patch kits are incredibly user-friendly and offer a speedy fix. 

Basic Tire Maintenance

Checking PSI 

Checking your bike’s tire pressure is good practice, and eventually, this will be second nature before each ride. Finding the proper tire pressure for you is calculated based on your weight, plus the weight of your riding gear, with respect to the conditions of the surface you choose to ride on. 

Each cycling discipline has its recommended tire pressure:

  • Mountain Bike Tires (25-50 PSI)

  • Gravel Bike Tires (40-80 PSI)

  • Road Bike Tires (80-120 PSI)

Start at the lowest recommended PSI (based on the average weight of a cyclist:160 lbs). Cyclists weighing less than 160 lbs may want to run less than 25 PSI, cyclists more than 160 lbs may prefer riding with more than 25 PSI. Mountain bikers and gravel cyclists, also keep in mind the rougher the terrain, the more pressure you may want to run in your bike tires to mitigate the chance of getting a flat.

Pro Tip: A handy dandy tool for PSI is a digital tire pressure gauge. Many pumps will have a gauge built into them, but often they can read inaccurately, or the gauge becomes inaccurate over time. A digital tire pressure gauge is easy to read and sensitively accurate.

Tubeless vs Tubed Bike Tires

Whether it’s tubeless or has an inner tube, your tire set-up is a personal preference along with your bike tire choice. But there are pros and cons to each which you should be aware of. 

A tubeless tire setup is designed to allow the tire and valve to seal on the rim of your wheel without losing air. While setting the tubeless tire, pour a liquid, tire-specific sealant into the tire. Sealant is tubeless tire magic; it fills any small punctures (generally any puncture size under ¼”), thus keeping your tire from losing air! To go tubeless, you either need tubeless-ready wheels or use a tubeless conversion kit with your current wheels.

Need help going tubeless? Bring your bike to one of our Epicenter Cycling locations! Our professional bike mechanics will get you set up quickly. 

While tubeless tire set-ups are faring more on the side of popularity, there are still advantages of riding with a tubed setup. Riding with a tubed tire setup means that there is an inflated rubber tube inside of your tire. This inner tube should match the size of your tire’s diameter size (26”, 27.5”, or 29”). 

Let’s look at the pros and cons of tubeless and inner tube setups: 

Inner Tube Pros

  • Setting up tires with tubes is easier and faster.

  • Worldwide, there are more bikes with tubes, so it’s easy to find replacement tubes almost anywhere. 

  • Patching a tube is easy. 

  • All tires and wheels are designed to use tubes. 

  • Road bikes ride better with tubes than tubeless due to the tendency to run high tire pressure.

Inner Tube Cons

  • Must run more tire pressure to avoid pinch flats. 

  • Tires with tubes are heavier than tubeless. 

  • You’ll likely ride slower. While having to run more pressure in your tire to avoid flats, you’ll also experience less traction and thus are more at risk for washing out on your bike. 

Tubeless Pros

  • You will have fewer flats on average than riding with a tubed tire. 

  • You can run less tire pressure, have more traction, and ride smoother. 

  • Tubeless is lightweight. 

  • Often can repair a flat without taking the tire off the rim. 

Tubeless Cons 

  • They are more expensive and can be tedious to set up. 

  • You should still carry a tube on a ride in case you flat. 

  • Maintenance is more frequent (ex. sealant dries out, and occasionally punctures continue to leak air despite the liquid sealant in the tire).  

  • Tire burps are more frequent.

Fixing a Flat Tire

Flats happen. Bike tires are quite durable these days, but trail and road conditions can still present an unlucky scenario that leads to a flat tire. Bike mechanics will tell you one of the most important repairs you should know is how to fix a flat bike tire. So let’s guide you through the steps.

If you skimmers don’t feel like reading through a list of instructions, no worries.  We’ve got the perfect video on how to repair a flat from Trek. Click here to watch!  

These instructions are for fixing a rear tire flat. The steps are the same for a front tire but easier since you don’t have to move the chain and gears.

Tools and Materials Needed: A multitool, two tire levers, a spare tube, and a pump. 

  1. Keep your bike upright and shift into your most difficult gear.

  2. Stand on the non-chain side of the bike and remove your back tire by loosening the quick release or thru axle on the rear wheel. Hold the wheel down with one hand and lift your bike from the wheel with the other hand.  

  3. Grab your tire lever with the scooped end. Work this end of the lever underneath the edge of your tire. Then attach the hooked end of this lever to the nearest spoke. 

  4. Next, use your second tire lever and work the scooped end underneath the edge of the tire just a few inches away from your first tire lever. Then, continue to work the second tire lever around the whole wheel to remove the tire from one side of the rim completely. 

  5. Beginning at the valve stem, pull the old tube out of the tire. 

  6. Carefully check the inside of your tire for any sharp debris. Then visually check the outside of the tire for anything sticking out of the rubber that may have caused the flat and remove it. 

  7. Get your replacement tube. Inflate it with just enough air to give it some shape. 

  8. Find the valve stem hole on your wheel and place the valve of your replacement tube through it. Then work your way around the tire, tucking the tube carefully into the tire. Avoid having the tube getting pinched in the process. 

  9. Start at the valve stem again and use both thumbs to press the tire back onto the rim of the wheel. This becomes increasingly difficult as the edge of the tire sets back into place. You can use the scooped end of a tire lever to help press the rest of the tire back onto the rim. 

  10. Using a pump, inflate your tire to your desired PSI. The flat is now fixed! Time to get your wheel back on your bike. 

  11. Thread your axel through your hub and tighten it properly. Guide your bike frame back onto the wheel. Spin your wheel to check over the tire and your wheel. 

  12. Take a quick pedal around to make sure everything is running smoothly. 

  13. Resume your ride and have fun! 

Patching Up a Bike Tube

Let’s say you are running tubed tires and flat. With no spare tube? Hopefully, you brought a patch kit. Your ride will be saved, and it will be a really quick and easy fix!

Tool and Materials Needed: A multitool, two tire levers, a patch kit (or patches, glue, sandpaper), and a pump.

Pro Tip: If you are patching a tube at home, fill a tub or bucket with water. Inflate the tube and submerge it into the water. Watch for bubbles – they will indicate when the puncture is. 

  1. Find the leak. Closely inspect the tube for air hissing or submerge the tube into water to detect the puncture site. 

  2. Decide whether to fix the tube or replace the tube. Some punctures are too big to patch. 

  3. Clean the area where the patch will go. Rough up the surrounding spot with sandpaper to help with adhesion. 

  4. Spread the glue and apply the patch. Hold the patch firmly in place until the glue is dry. 

  5. Inflate your repaired tube with a pump. 

  6. Start with Step 7 of this article’s section on Fixing a Flat. This will provide instructions on how to put your replacement tube back into your tire. 

When to Replace Bike Tires 

The tell-tale signs of when it’s time to replace your bike tires are something you should know off the top of your head. Running old and worn-out bike tires increases your risk of flatting, losing traction, and having a generally less safe riding experience.

Signs that it’s time to replace your bike tires: 

  • Worn out tread. 

  • The fabric inside your tire pops out. 

  • Bumps form on the sidewall of your tire. 

  • Asymmetries appear while spinning your tire. 

  • Tire labels are starting to fade. Your tires have been put to work!

You may also consider replacing your tires if you are riding in different trail conditions. Stay tuned for our guide to choosing mountain bike tires – coming soon. In the meantime, give us a shout or stop by for more info.

Additionally, you may want to switch out tires when going for long rides to accommodate the conditions you’ll be riding in and save the tread pattern on the tires you typically run. 

Cyclists that race frequently switch out their tires to optimize for their race experience. Worn tires are less efficient, unsafe, and less fun to ride on. When racing, you’ll want to increase your odds of riding well in any way you can. Running fresh tires is a surefire way of making sure you do. 

Feel free to browse Epicenter Cycling’s impressive selection of bike tires from top brands next time you come by the shop. Or give us a call to hear what we have in stock. We are happy to assist you.

BONTRAGER_SE5-00452.jpeg

Coming soon: Our comprehensive guide to choosing the right mountain bike tires!

Electric Bike Postures: What Suits You and Why

Before we talk about posture on an electric bike, what type of riding are you interested in?

Do you see yourself sliding through berms and sending it down singletrack? Or are you looking for an e-bike that will double as your daily commuter and source of early morning joy?

Click on How to Choose the Right Electric Bike for Your Lifestyle to get some answers quickly. 

Once you’ve got that sorted, let’s talk about:

Electric Bike Postures

Getting an e-bike that positions your body in the optimal posture for you is very important. Purchasing the wrong e-bike can not only wear down your body but your bike as well.

If you were to purchase a comfort/cruiser bike and went off-pavement, chances are your knees and hands will be feeling it the next day after getting jostled down a dirt trail. Not to mention, your bike was not designed to be ridden off-road.

Read further to determine what type of e-bike posture is meant for you. 
Upright Position: Comfort/Cruiser Electric Bikes 

1200-800-TowniePathGo5iStepThru_20_29099_E_Accessory2.jpg

Picture yourself hopping on your e-bike for a leisurely pedal to the market, a coffee shop, or to work? Consider Electra or Trek’s city cruiser e-bikes. Perfect for city touring or commuting. Equally important, if you experience lower back pain, you will be most comfortable in an upright position. Comfort and exercise can co-exist! 

Also, if you prefer a lower standover height than a standard bike, Trek’s Verve+ Lowstep and Townie Go! models are for you. With one of these e-bike choices, you’ll avoid having to swing your leg over the saddle and will stand over your bike at a stop with complete ease.  
The upright position on these e-bikes ensures you’re engaged with your surroundings, taking it all in. Handlebars on cruiser e-bikes are shaped into a gentle upward curve for effortless steering. Riding a cruiser e-bike has never felt so pleasant! 

Active Position: Hybrid Commuter e-Bikes 

2019-07-22_Allant-481-crop.jpg

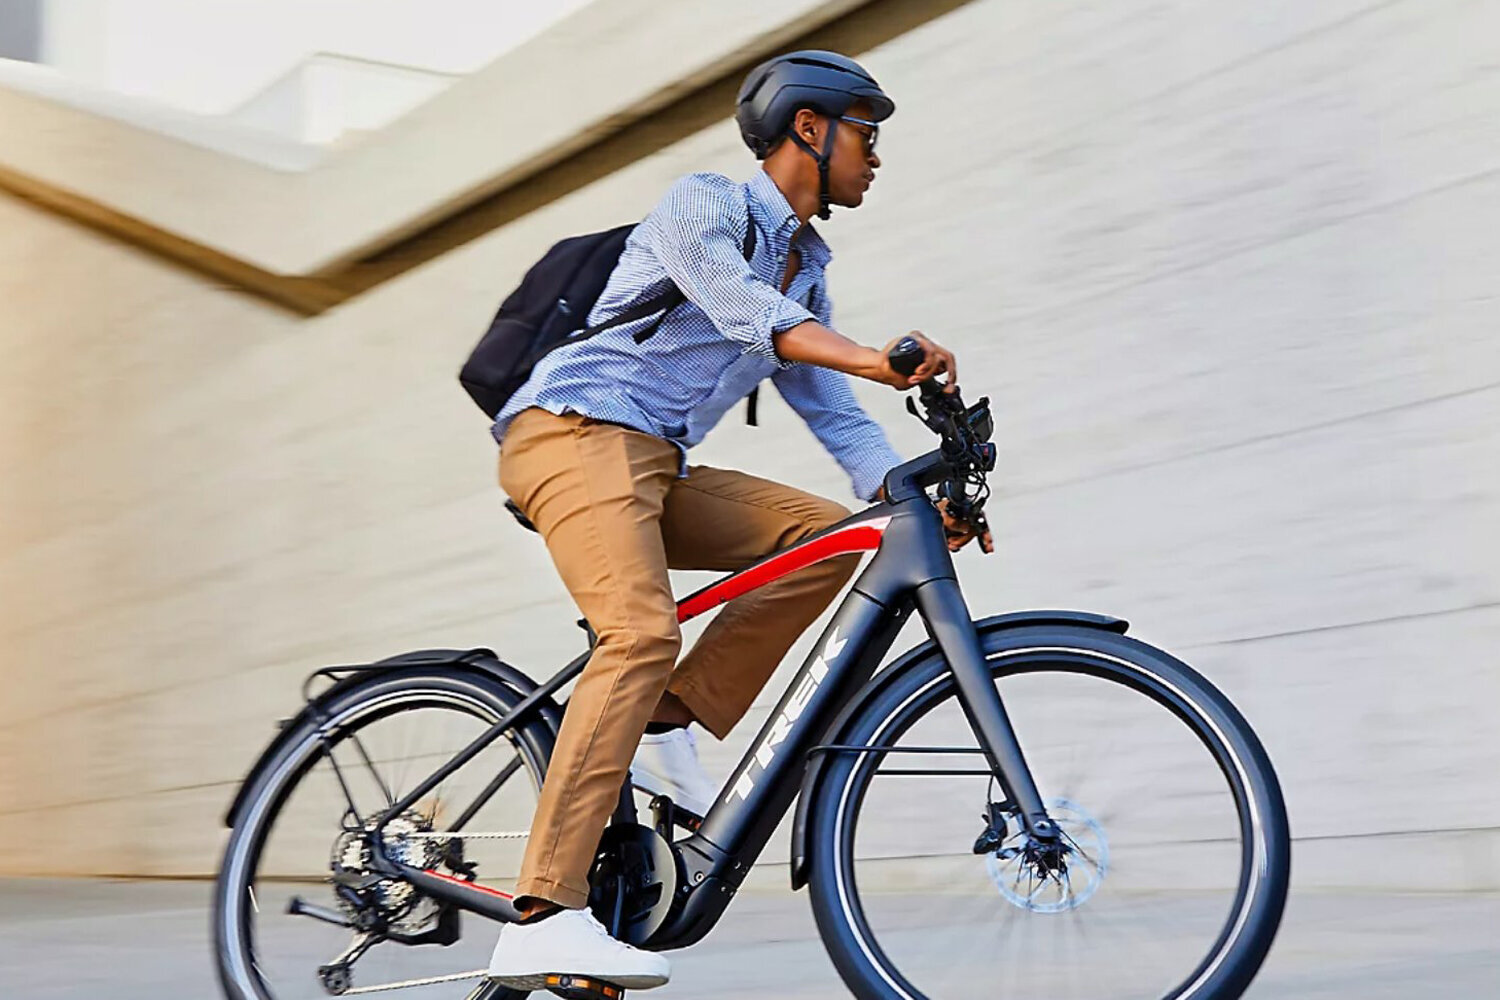
Meant for cyclists who desire high-performance on the pavement as they power past morning traffic. These e-bikes are designed to be sleek and lightweight for commuters.

In the active position, your body is leaned slightly forward for optimal pedaling efficiency and speed. This forward position increases your aerodynamics as well.

Need a reliable mode of transportation that will get you there quickly? Trek’s Allant+ models are for you. 

Active Position: Electric Mountain Bikes

Powerfly-1500.jpg

Like a regular mountain bike, Trek’s electric mountain bike geometry is designed for stability, control, and smoothness on the rowdiest of trails.

Seated, your body is slightly leaning forward to allow for pedaling efficiency.  On the downhill, your legs are in a squat position, chest over the handlebars, and eyes forward as your maneuver your way down some single-track.

Active position equals adventure position here.

Performance Position: Electric Road Bikes

TrekDomanePlus_Oct2019_Nice_-929-crop.jpg

Your electric road bike gets you moving at top speed, for a distance you thought unachievable on a traditional bike.

With drop handlebars, you have the ability to tuck low over the e-bike and let it fly. Your body is as leaned forward from the hips as you can get: it’s time to get serious.

High-performance, smooth, and designed to set the pace, check out Trek’s electric road bikes.

Conclusion

With many e-bike options, it’s important to know what type of riding experience you want.  Additionally, knowing what your body prefers in terms of posture on a bike makes or breaks those long rides.

If you purchased the type of electric bike best suited for your needs, you can be sure to have an experience where you are present in the moment, enjoying every pedal stroke.

But you don’t want to make any guesses! Refer back to this blog post and be sure to connect with our professional mechanics here at Epicenter Cycling to ensure you get the electric bike best suited for you.

Rule of thumb: the e-bike for you should be functional, stylish, comfortable, and fun. 


Stay Warm Cycling this Fall and Winter

1905E_BK_D3A0464.jpg

2020 sure turned out to be the Year of the Bike. People of all ages and abilities discovered — and rediscovered — the numerous benefits of cycling during COVID-19 stay-at-home orders in the spring. Bikes quickly became essential for transportation, physical fitness, mental health, family connection, and of course, plain old fashioned FUN.

As the year progressed, bikes continued to boom even as stay-at-home orders were lifted. Summer weather made it easy to choose the bike over the car, and getting around by bike was certainly safer than using public transportation or ride sharing considering the ongoing pandemic.

With cold and wet weather ahead of us, though, will the momentum continue? We know cycling is good for our health (mental, physical and emotional!), our community, and our planet no matter the season or weather. However, to many, the idea of riding in inclement weather can be quite daunting.

If you're one of these people, these tips on staying warm and dry will keep you on track and reaping the biking benefits throughout the colder months.

Stay Dry to Stay Warm

There’s an old Norweigian rhyme, “Det finnes ikke dårlig vær, bare dårlige klær” which translates to a saying we all know well, “There is no such thing as bad weather, only bad clothing.” 

It’s so true. The right apparel choices make all the difference when cycling in the colder months. Layers in season-appropriate materials are key.

Certainly, being wet on a chilly day will quickly make you miserable. We can get wet while cycling by sweating and/or getting caught in the rain. Stay warm by staying dry! The most important body parts to pay attention to in this regard are your core, head, hands and feet.

Core

Your body considers your core (torso) its most important part, as it’s where your vital organs reside. A cold core will hoard blood to keep those organs and your brain warm. A warm core generously shares that warming blood with your hands and feet.

So, pay special attention to keeping your core happy. Keep in mind that a few light layers will warm you up better than one thick layer.

Base Layer

Start with a light-weight moisture-wicking base layer top  to pull moisture (read: sweat) away from your skin and to the fabric’s exterior where it will evaporate faster.

This primary base layer should be snug but not tight. Choose quick-drying active wear made of polyester, nylon, polypropylene or even merino wool; skip anything made of cotton as that tends to soak up and hold moisture against your skin.

It’s a good idea to have long sleeve, short sleeve and sleeveless options available depending on the weather forecast and your ride ambitions for that particular day.

Middle Layer

Your second layer will serve as insulation. If your base layer has long sleeves, this middle layer could be a wool vest. Alternatively, if your base layer is sleeveless, this middle layer might be a wool long-sleeve.

Every body is different, so you’ll want to try different combinations to find your personal sweet spot. Anyway you do it, though, it’s helpful if this layer can be unzipped, either all the way or partially, for ventilation as you warm up along the way.

Jacket

Top your base layers off with a breathable jacket. Obviously, choosing a waterproof, breathable jacket/shell is crucial for a rainy ride. Some jackets are specially designed to protect you from wind; others are a hybrid, offering protection from both rain and wind.

A couple of our most popular jackets are the Bontrager Circuit Cycling Wind Jacket and the  Bontrager Vella Women’s Cycling Wind Jacket.

Head

That well-vented helmet is wonderful for cooling down your head in the summer heat, but in the cold months, you’ll want to cover up with a thin cap.

The best cycling caps for cold weather cover your ears as well, such as the Bontrager Windshell Cycling Skullcap or Bontrager Thermal Cycling Cap.

A balaclava such as the Bontrager Windshell Cycling Balaclava will offer ultimate warmth and protection from the cold as it covers your head, ears, and neck and can even be pulled up to cover part of your face. 

If fully covering your head is too much, a headband such as the Bontrager Thermal Cycling Headband or neck gaiter such as the Bontrager Convertible Cycling Neck Gaiter may be just the ticket.

Hands and Feet

Cold hands and feet are a common deterrent to outdoor exercise during the chilly months. As we talked about earlier, it’s important to keep your core warm which in turn keeps your extremities warm.

But that’s usually not enough. Keep your hands from going numb with cycling gloves designed especially for cold weather. Some cycling gloves even boast a special pocket for hand warmers.

For super cold rides, layer up with a liner and outer glove ... or invest in the  Bontrager OMW Winter Glove with all its bells and whistles. Bar mitts are another option, giving your hands a warm shelter on your handlebars.

Layers for your feet work wonders as well. As with layering for your core, you’ll want to try different combinations of layers to find the sweet spot. Generally, you’re looking at a thin moisture-wicking base sock with a thicker layer on top.

Be sure your shoes are roomy enough and that your socks aren’t too tight. Too much snugness will restrict blood flow, and also make your feet sweat a great deal. And sweat = moisture = cold!

It’s not a bad idea to pack an extra pair of socks in case your feet do sweat. Changing out your socks can make the difference between a great ride and a miserable one.

2021_Trek_Powerfly_Equipped26 copy.jpg

A few more tips

REMOVe layers

It’s important to note that removing layers is just as important as layering up when it comes to staying dry and warm. Be proactive and don’t wait until you’re already sweating to peel off a layer or unzip your jacket.

Take advantage of any built-in venting features that your apparel might have, as well.

CARRYING THE LAYERS

As you shed layers, you’ll want to have a place to stash them. Conversely, if your ride starts out warm, you may want to pack extra layers for a colder finish.

Be sure to outfit your bike with a set of panniers or a basket, or wear a roomy enough backpack to fit your things.

Be organized

It also helps to keep your clothing organized at home, so it’s easily accessible when it comes time to ride.

warmers

During transition seasons, when the early part of your ride will be chilly but the day warms up fast, arm, leg and knee warmers with your normal cycling kit might be all you need. These items can be removed easily and stashed in a jersey pocket.

We carry an assortment of warmers including the Bontrager Thermal Cycling Knee Warmer, Bontrager Thermal Cycling Arm Warmer, Pearl Izumi Elite Thermal Arm Warmer, Pearl Izumi Elite Thermal Knee Warmer, and the Fox Knee Warmer.

Fenders

Lastly, to keep rain and mud from splashing on your back as you ride, install fenders on your bike. There are many different types of fenders to choose from; ask us about styles we carry that are designed for mountain biking, road riding, and bicycle commuting.

Bokanev-Trek-03756.jpg

#GoByBike

So, keep up that momentum from the fair weather days and stick to your cycling habit all year ‘round — the benefits far outweigh the little bit of effort you’ll put into dial in your comfort.

Don’t forget that our crew is here to support your journey … give us a shout or swing by with any questions or concerns you might have.

Let’s not stop with the Year of the Bike … imagine the 20s as the DECADE of the Bike … and beyond!

2021_Trek_Slash_53.jpg


Getting Around by Bike: Carrying Your Stuff

TK _BLX_Action_X500TREK _9155.jpg

Riding a bike is an excellent alternative to driving a motor vehicle for a number of reasons including personal well-being (great exercise!), community health (less traffic!), and the welfare of our planet (reduced emissions!).

Cycling has also become a popular alternative to using public transportation and ridesharing (Uber and Lyft) amid concerns about COVID-19.

If you, too, are interested in getting around by bike, you may be wondering how to carry your essentials. For example, how do you haul groceries home, bring your laptop and lunch to work, or even take your cat to the vet?

The good news is there are lots of options — read on to discover the best option for your needs.

Bontrager City Shopper Pannier: a simple, elegant pannier that is quickly installed or removed and includes a handy shoulder strap for easy shopping and loading for the ride home.

Bontrager City Shopper Pannier: a simple, elegant pannier that is quickly installed or removed and includes a handy shoulder strap for easy shopping and loading for the ride home.

Pannier

We’re giving the pannier the spotlight in this post because it’s an incredibly versatile option for carrying your things, with an extensive range of styles to choose from. It’s hands down the most popular choice among experienced bicycle commuters.

The pannier is a bag that attaches to a rear rack on your bike, securely hanging alongside the rear wheel. It’s roomy, stylish, and easy to pack … you can carry just about anything in a pannier!

Many cyclists opt for a pair of panniers which distributes weight more evenly and offers added storage. That said, even a single pannier keeps weight distributed more efficiently and allows for much easier steering than is the case with a heavy front basket or bag.

Fun fact: the word pannier derives from a Middle English borrowing of the Old French panier, meaning “bread basket.” (Electra Rattan Pannier Basket)

Fun fact: the word pannier derives from a Middle English borrowing of the Old French panier, meaning “bread basket.” (Electra Rattan Pannier Basket)

Some panniers are even designed with a rear trunk for optimal carrying capacity. Scroll down for more information on rear trunks.

Pannier styles range considerably to suit just about any situation or budget. From simple grocery bags to elaborate set ups with compartments designed to hold specific items such as laptops and other essentials, the ideal pannier is out there for you.

The Ortleib Back-Roller Classic (shown above in yellow-black) and Sport-Roller Classic panniers are a crew favorite. Also available in Ortleib’s High Visibility Line (HVL) in which the entire bodies of the bike bags are manufactured to reflect …

The Ortleib Back-Roller Classic (shown above in yellow-black) and Sport-Roller Classic panniers are a crew favorite. Also available in Ortleib’s High Visibility Line (HVL) in which the entire bodies of the bike bags are manufactured to reflect light.

As would be expected, panniers come in a wide variety of sizes and are constructed from a myriad of durable materials. For example, if you’re planning to use your bike as transportation during the rainy season, a waterproof pannier or one that comes with a built-in rain cover is clearly a must. For a romantic picnic at the beach, a rattan basket pannier perfectly serves mood and purpose.

Most panniers are designed to be easily removed once you arrive at your destination and park your bike. Some feature a haul handle or shoulder strap; others can be worn as a backpack or messenger bag.

Other features to look for in a pannier are reflective and hi-vis materials that increase visibility, quick release systems, and add-on accessories.

Tips for using panniers:

  • For best balance while riding, choose a pair of panniers and try to keep the weight even on both sides

  • Choose the appropriate size for what you’re using them for

  • Pack the heavier cargo at the bottom of the bag to keep your center of gravity low

  • Pack the items you need fast access to (such as rain jacket or wallet) at the top.

Bring your feathered friend or other small pal along for your two-wheeled ride with Electra’s Basil Pet Carrier.

Bring your feathered friend or other small pal along for your two-wheeled ride with Electra’s Basil Pet Carrier.

Rear Rack

A rear rack can accommodate a number of storage/carrying alternatives. Your setup can be as simple as a crate, basket, tray or pet carrier secured to the rack with cargo netting or bungees. Of course, there are racks that securely accommodate a child seat, as well.

The next level up would be a crate, basket, tray or pet carrier designed to work specifically with a particular rack. This type of set up offers superior security and is designed with a quick release that makes it super easy to attach and remove.

The ultimate set up for getting around by bike is a rear trunk or trunk/panniers combo designed specifically for a specific rack with quick release and other convenient features.

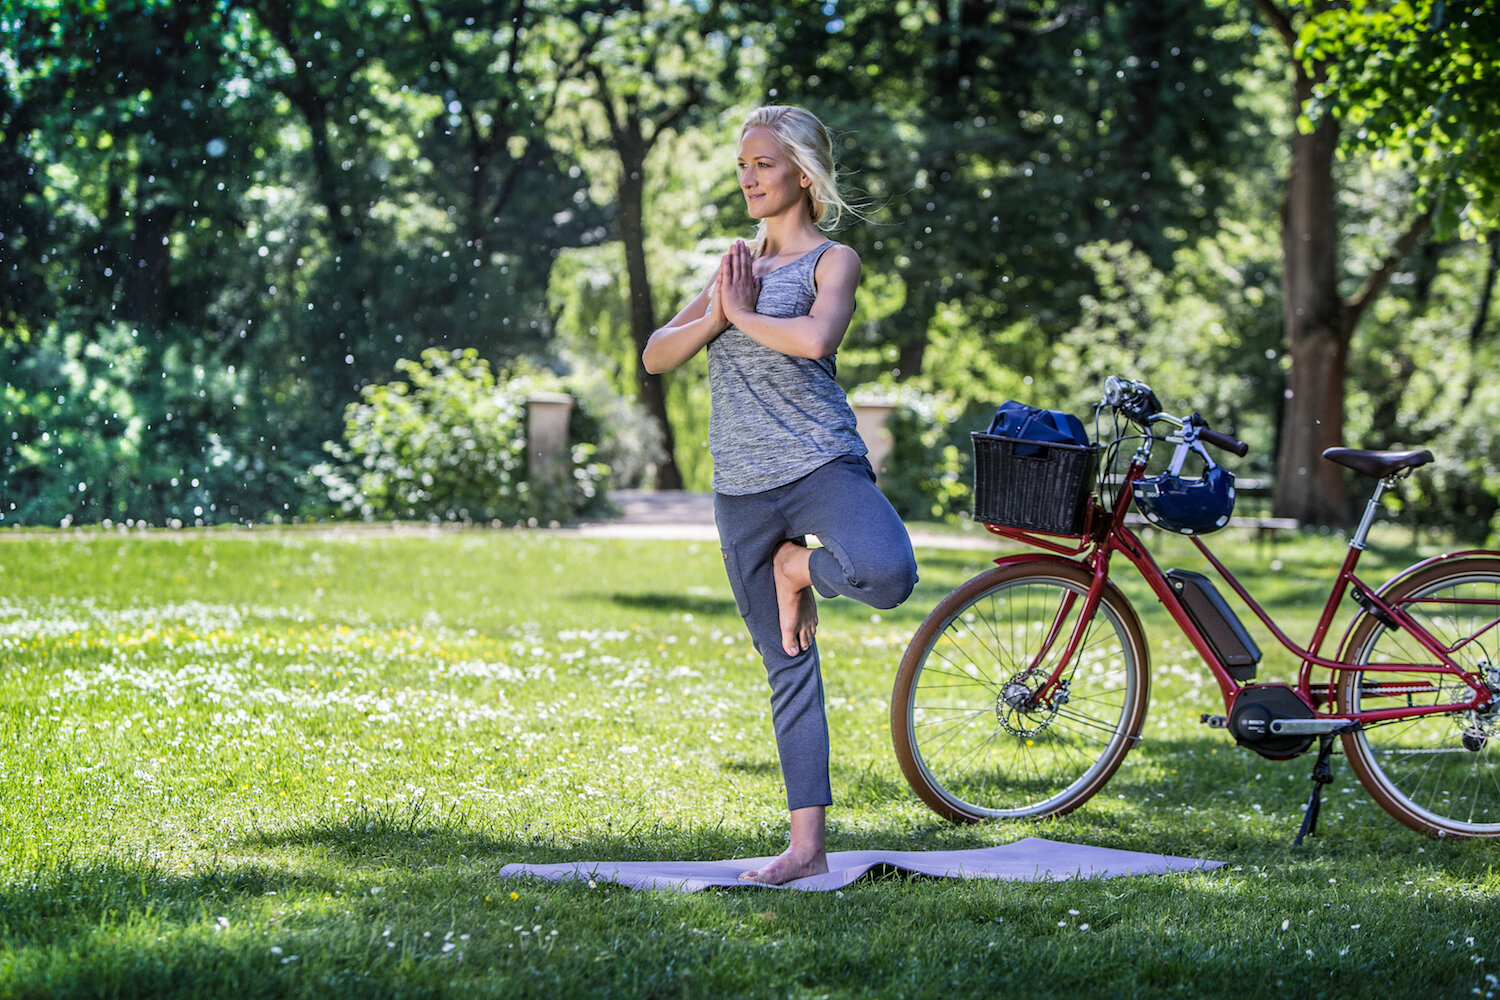
A roomy front basket is just the thing for carrying your yoga props.

A roomy front basket is just the thing for carrying your yoga props.

Front baskets, trays and bags

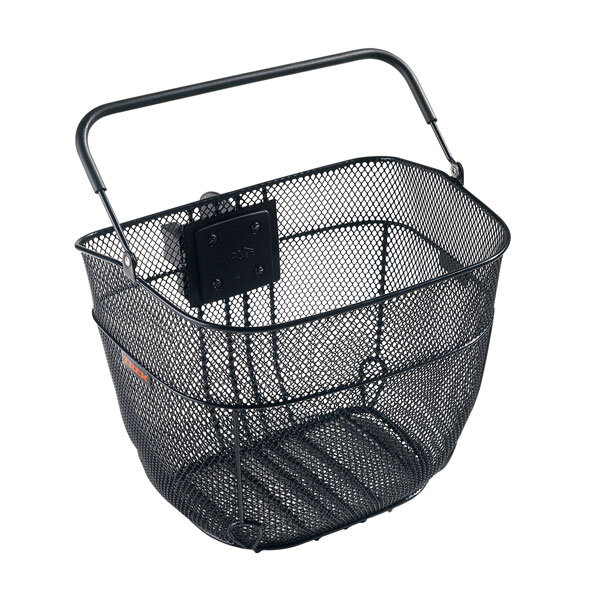
The Bontrager Interchange Handlebar Basket features mesh construction, a padded handle and easy installation/removal.

The Bontrager Interchange Handlebar Basket features mesh construction, a padded handle and easy installation/removal.

Front baskets, trays and bags are all great options for carrying lightweight items such as towels, snacks, and sunscreen for a morning at the beach.

You can choose from a wide range of styles and materials from the classic basket to a modern bag. There are styles that are secured to the bike in a more permanent manner (i.e. needing tools to remove) and others that feature a quick release to make it easy to attach and remove.

Keep in mind that the heavier the front load, the harder it is to steer your bike; opt for rear storage if you’re regularly carrying heavier loads.

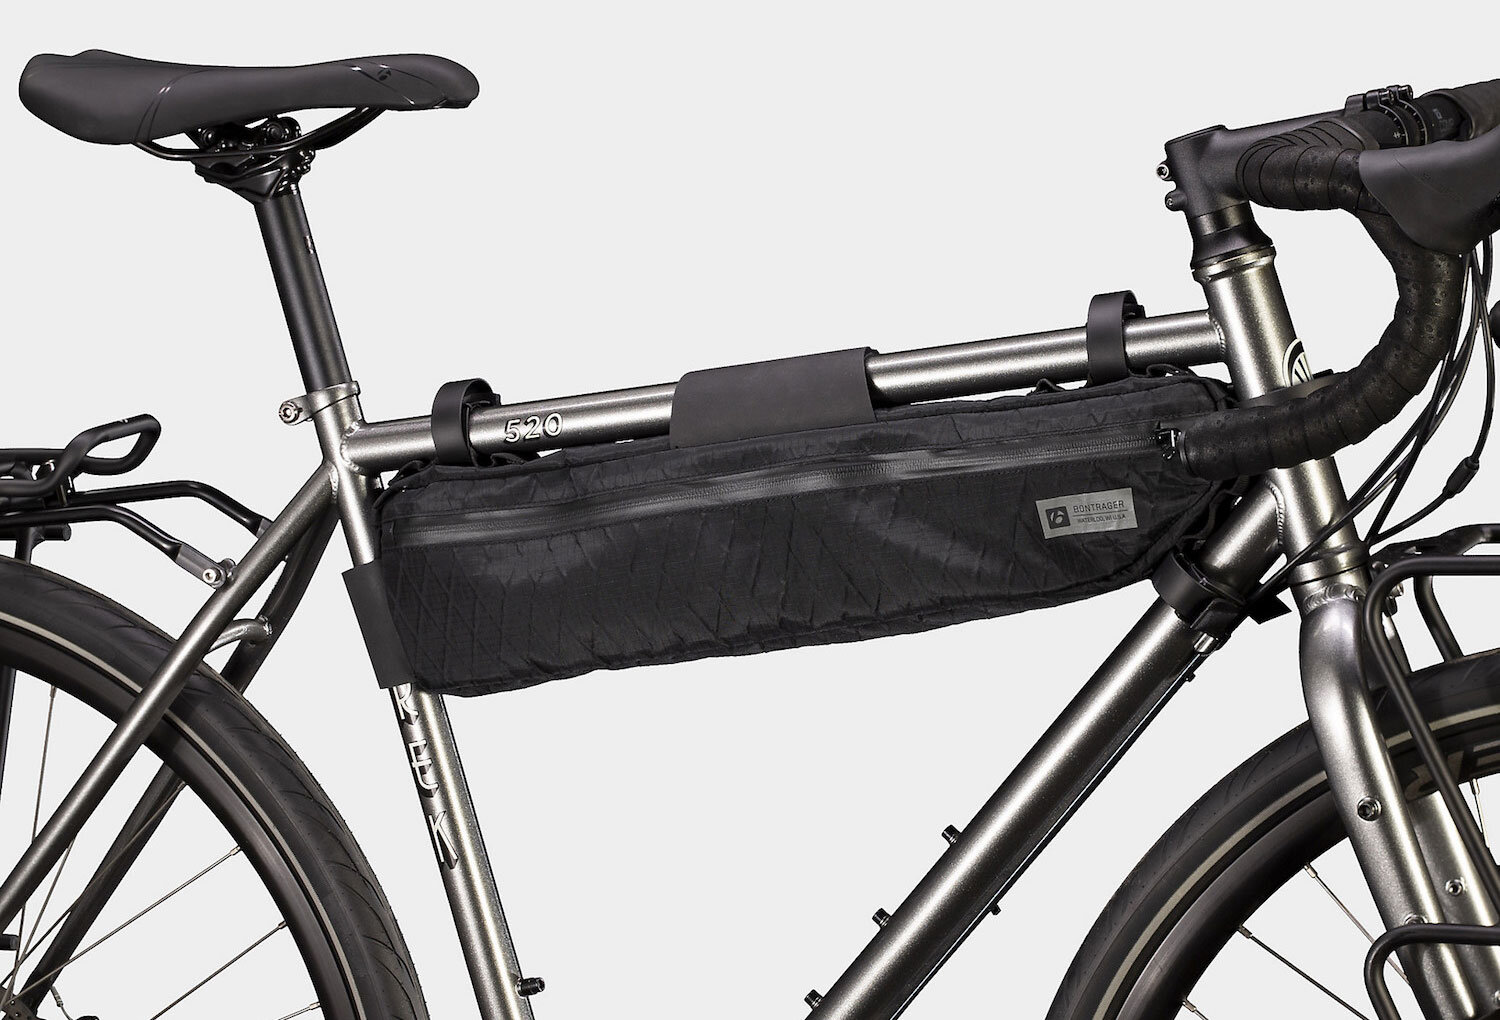
The durable Bontrager Adventure Frame Bag is made with water resistant construction that’s ready to add versatility and adventure to your bike.

The durable Bontrager Adventure Frame Bag is made with water resistant construction that’s ready to add versatility and adventure to your bike.

Frame, Handlebar and Seat Bags

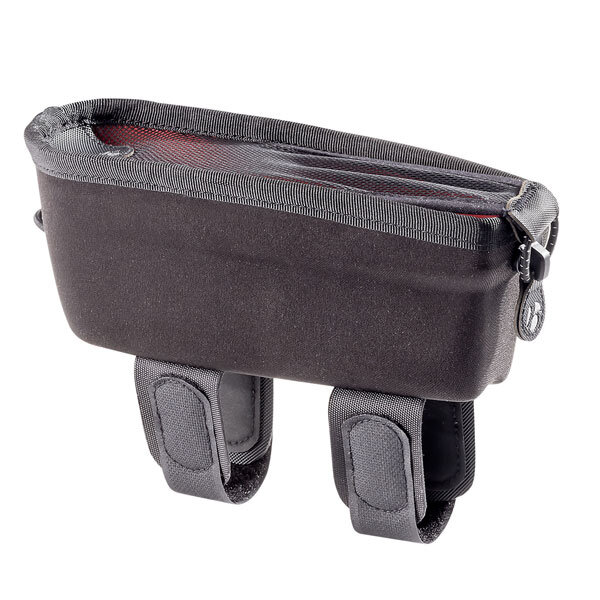
The Bontrager Hilo Speed Box is one of our best selling frame packs.

The Bontrager Hilo Speed Box is one of our best selling frame packs.

Frame, handlebar and seat bags are usually used for bikepacking, but bicycle commuters and find them useful as well.

As their names suggest, these bags secure to the bike frame, handlebars, and back of the saddle.

Some of these bags are designed with a quick-release system, but most are secured by straps that take a little time to fuss with. 

The OG way to schlep your things … a good ole backpack.

The OG way to schlep your things … a good ole backpack.

Backpack / Messenger Bag, Hip Pack, Hydration bags

When you need to bring just a few essentials, the Bontrager Rapid Pack does the trick.

When you need to bring just a few essentials, the Bontrager Rapid Pack does the trick.

Of course, there’s the OG method of schlepping your stuff: a backpack, messenger bag, or hip pack works just fine for the basics. Choose from a wide range of styles and sizes, with or without hydration bladders included.

The downside to carrying your stuff on your person is, well, you’re carrying it on your person. (Hello sweaty back or wonky balance.) The upside, though, is the sheer simplicity: get to where you’re going, hop off the bike, lock it up, and off you go. 

Bontrager’s Integrated Tool Storage (BITS) is the easiest and cleanest way to carry a flat kit, and it tucks right into the in-frame storage of select Trek bikes.

Bontrager’s Integrated Tool Storage (BITS) is the easiest and cleanest way to carry a flat kit, and it tucks right into the in-frame storage of select Trek bikes.

Other handy accessories

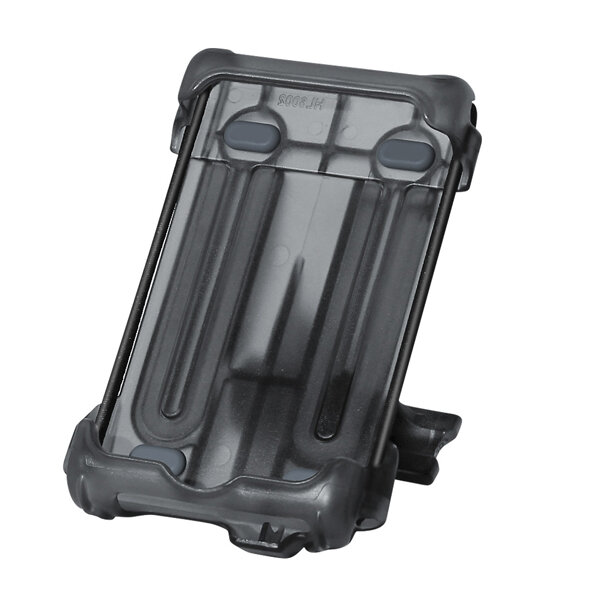
Securely mount your phone to your handlebar or stem cap with the Delta Smartphone Holder and easily access apps and maps while riding.

Securely mount your phone to your handlebar or stem cap with the Delta Smartphone Holder and easily access apps and maps while riding.

Let’s not overlook some small but mighty storage accessories such as drink holders for that coffee on the go and phone/cycling commuter holders to track your ride or provide navigation.

For the smallest of essentials, consider a storage bottle designed to slip into the bottle cage on your bike frame. This is ideal for your flat repair kit, snacks, even an emergency rain poncho.

Similarly, some higher-end bikes now feature in-frame storage for these smaller items. 

The Xtracycle Edgerunner Swoop electric cargo bike lets you carry virtually anything … only with superhuman strength.

The Xtracycle Edgerunner Swoop electric cargo bike lets you carry virtually anything … only with superhuman strength.

bike Trailer / cargo bike

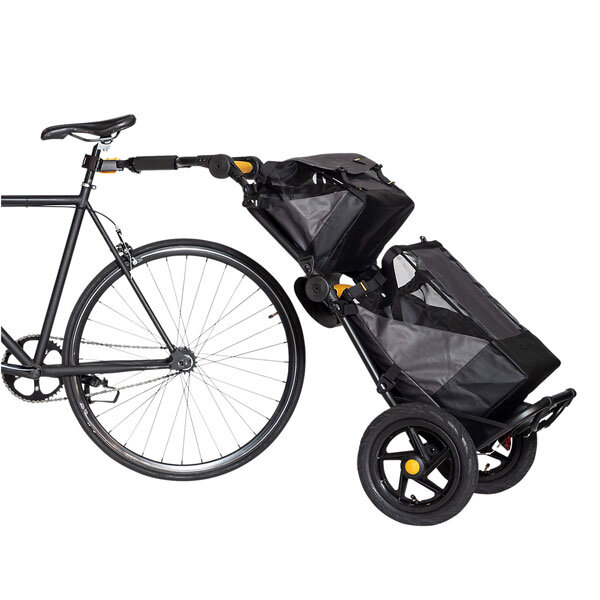
The Burley Travoy trailer is the perfect tool for nimbly hauling the day’s groceries, luggage, or gear by bike.

The Burley Travoy trailer is the perfect tool for nimbly hauling the day’s groceries, luggage, or gear by bike.

Finally, for the ultimate hauling capability, consider a bike trailer or even a cargo bike.

Trailers range from simple designs built for securely transporting your most precious cargo (kids and/or pets) to more elaborate set-ups constructed to accommodate specific styles of bags and boxes.

Cargo bikes come in both traditional and electric styles, and can “haul it all” including groceries, kids, sports equipment and more.

#GOBYBIKE

Now matter how you decide to schlep your stuff, now that you’re getting out by bike so much more, inspire a cultural movement by tagging a photo of your ride on social with #GoByBike. Plus, have some added fun by playing #GoByBike Bingo by downloading your free bingo card here!


“Carrying Your Stuff” is part of a series of blog posts designed to help you get the most out of riding a bike as an alternative to driving. Check out our first post “Route Planning” here, and stay tuned for posts on bicycling laws, safety, what to wear, and more.

Cycling, Wildfire Smoke and Staying Safe

BT17_Spring_Summer_Womens_Apparel_23.jpg

Many people in our community are rightfully concerned about exercising outdoors because of the smoke from the wildfires in our area.

With more folks now than ever using a bike for transportation, exercise and recreation, cycling has become a crucial aspect of life. How do we determine if it’s safe to ride?

There’s a number of factors that contribute to the answer to that question. But before we get into those factors, let’s take a look at how smoke affects our health.

The Not-So-Good News

What’s of most concern in an area affected by wildfire are the fine particulates in the smoke which can have a serious and lasting effect on our lungs. These particulates (PM2.5) are too small to see, and require a special filter or mask* to remove from the air we breathe.

Even just a minimal amount of smoke can irritate and inflame our eyes and respiratory tract, causing a scratchy throat, coughing, and increased mucus. Breathing high levels of smoke can reduce lung function, and increase the risk of stroke, asthma and heart attack.

Naturally, effects are more serious for those who already suffer from lung-related medical issues, as well as chronic heart disease or diabetes. Children (under 18), seniors (over 65), and expectant mothers are also considered to be at higher risk, no matter how healthy they might be.

Likewise, active people may be at risk because exercise causes deeper breathing which causes more particulates to move through our respiratory system.

The Oh-Yay-This-Is-Good News

On the upside, there are plenty of resources and tips to help inform those of us who depend on a bike for transportation and physical and mental health.

With a little research, planning, and flexibility, you should be able to spend quality time with your beloved two-wheeled steed while protecting your health as well.

Assess the AQI

The best gauge for determining whether it’s safe to hop on your bike is to assess your area’s Air Quality Index (AQI).

Established by the Environmental Protection Agency (EPA), AQI provides real-time updates and forecasts on the pollution levels in our air. This is very useful information when planning for outdoor activities.

The EPA reports the AQI for five potentially harmful air pollutants that are regulated by the Clean Air Act. Those pollutants are ground-level ozone, particle pollution, carbon monoxide, sulfur dioxide, and nitrogen dioxide.

During a fire event, we’re most concerned with particle pollution, which is also referred to as particulate matter (PM2.5 and PM10). Refer to this EPA guide for more information on particle pollution and how you can reduce your exposure, protecting your health.

For your local air quality forecast, visit airnow.gov or purpleair.com. Don’t despair if the forecast is unhealthy. There may still be times during the day when air quality is okay for outdoor activities.

Since air quality can change rapidly, be sure to check regularly to see if it’s a good time to be active outdoors.

Monitor Wind Direction

It may take some practice and patience, but tracking wind direction via weather satellites can help in planning a route that avoids downwind smoke.

Take Advantage of Clear Windows

Longer smoke events generally have windows of time during which air quality improves. If your schedule allows, be ready to hop on that bike at any given opportunity.

Prepare for these opportunities by having your cycling kit ready, essentials packed, tires pumped up, chain lubed, etc. You don’t want to waste a blue sky on digging around for that favorite chammy!

Be Flexible, Take It Easy

For those riding for recreation or exercise, it’s best to reschedule smoky rides for a better time. Alternatively, consider reducing your exposure by choosing a less strenuous route, or shortening your ride time.

It’s not so simple for those of us who rely on our bike for transportation and don’t have control of our schedules. If you absolutely must pedal your bike in unhealthy air, reduce your exposure by going as slow and easy as you can.

Remember, the more exertion, the more particles you inhale. Try to breathe through your nose vs. your mouth if possible. Our nasal passages boast a natural filtering ability which can help cut down on the pollution delivered to your lungs.

If you can’t avoid traveling by bike during a smoke event, perhaps check with your doctor to see if a respirator such as the N-95 mask is a viable option for you.*

Keep Hydrated

Consistently drinking water can reduce the amount of smoke that travels into your lungs. This is a good tip for anyone in a smoke zone, whether you’re active or sedentary.

Stay Informed

Another safety precaution worth mentioning here is to stay in the loop on updates about the fire’s perimeters and growth, as well as any road closures and damage that might affect your route.

In Conclusion

We hope this information helps you plan your bike rides and stay safe during the wildfire crisis in our area.

Please keep in mind that although the content above has been collected from various credible sources and is accurate to the best of our knowledge, Epicenter Cycling assumes no responsibility or liability for any errors or omissions in the content.

Furthermore, this content is for informational purposes only and not for the purpose of providing medical advice. Contact your doctor to obtain advice with respect to any particular issue or problem.

We recommend browsing the websites listed below as references to further familiarize yourself with wildfire smoke-related issues.


*Regular dust masks, surgical masks, and the face coverings we’re using for COVID will not filter out the fine particles. Masks that are effective for smoke, such the N-95, may be hard to come by during the pandemic as there’s a great demand for them for frontline health care workers. Moreover, keep in mind that this type of mask can make it more difficult to breathe, so you have to be especially careful with your level of exertion; it’s meant for slow, regular breathing. It’s also important to consider that wearing a respirator may increase the risk of heat-related illness, especially when active.


Mountain Biking Essentials

Mountain biking at Wilder Ranch State Park. Photo: Trek Dirt Series / Bruce Dorman.

Mountain biking at Wilder Ranch State Park. Photo: Trek Dirt Series / Bruce Dorman.

Bikes are booming these days as more and more people discover (and rediscover!) the benefits of cycling. Freedom, joy, fitness, health, transportation, family connection — whatever the reason for opting for two wheels, one thing is for certain: bikes are essential. 

But what are the essentials you need for your rides?

“Mountain Biking Essentials” is part two of a three-part “Essentials” series. Get road riding essentials here and stay tuned for bike commuting essentials here!

Trek Slash is the trail bike of trail bikes. This long-travel 29er enduro bike is built to be fast, smooth, and fun in the wildest terrain.

Trek Slash is the trail bike of trail bikes. This long-travel 29er enduro bike is built to be fast, smooth, and fun in the wildest terrain.

The bike

The first essential needed for mountain bike riding is, of course, a bike!

Whereas you can ride pavement on just about any bike, riding dirt trails and gravel roads require a bike specially designed for rough riding — a mountain bike.

All mountain bikes boast wide, knobby tires and straight, broad handlebars for increased stability on irregular terrain. Beyond that, however, models vary depending on a number of factors such as the rider’s goals and desired terrain.

When choosing a bike, you'll consider questions like these: Cross country or all mountain? Hardtail or full suspension? 29er or 27.5"? Aluminum or carbon? Slack or steep geometry? Electric or traditional?

This may sound like a different language to those new to the sport. Have no fear — we can interpret, and help you learn the lingo. Learn all about mountain bikes and the models we recommend here.

A helmet specifically designed for the type of cycling you’re doing is absolutely essential. Knee pads are also highly recommended. Photo: Trek / Ian Collins.

A helmet specifically designed for the type of cycling you’re doing is absolutely essential. Knee pads are also highly recommended. Photo: Trek / Ian Collins.

Protection

Protective gear is essential for your safety on the trails. The most crucial piece of protective gear, of course, is your helmet. Protect your head with a helmet specifically designed for the type of mountain biking you are doing.

Half dome helmets are suitable for cross country (XC) and all mountain (AM) riding. For even better AM protection, choose a helmet with a removable chin bar. For downhill, you’ll need a full face helmet for optimum coverage.

Check out the helmet technology and the lids we recommend in our helmet guide.

Elbow and knee pads are always a good idea, especially for trails with rougher terrain. Pads come in a range of protection, and you can choose between hard or soft, pull-on or wrap-on, and other options.

Additionally, protect your eyes with sunglasses or goggles. Some eyewear are made with interchangeable lenses for a range of lighting conditions; goggles are best suited for dusty, downhill runs.

Lastly, keep your hands protected with gloves, which also absorb shock. Be sure to choose a full fingered style with padding that aligns with the type of terrain you’ll be riding.

Many mountain bike models can accommodate a water bottle cage on the downtube for easy access to hydration. This Trek Fuel EX is not only equipped with a water bottle cage, but also a  storage compartment neatly tucked behind the cage.

Many mountain bike models can accommodate a water bottle cage on the downtube for easy access to hydration. This Trek Fuel EX is not only equipped with a water bottle cage, but also a storage compartment neatly tucked behind the cage.

Nutrition and hydration

It’s always best to carry plenty of water and nutrition even when heading out on a fast lap. Don’t underestimate the lure of the trail — sometimes those quickies turn into a longer adventure than you planned.

Most mountain bikes can accommodate a water bottle cage on the frame. You can also carry water in a hip pack or backpack equipped with a hydration bladder and/or water bottle holder. For epic rides, consider bringing a water bottle filled with an electrolyte solution plus a hydration bladder full of water.

Be sure not to skimp on nutrition. Depletion of glycogen stores in your muscles and liver can cause sudden fatigue and energy loss commonly known as “bonking.” Stay fueled up with energy bars, gels, and/or blocks.

Check out this article on what to eat and drink during rides of any length.

Choose clothing that you’ll be comfortable in on and off the bike. Photo: Trek / Ian Collins.

Choose clothing that you’ll be comfortable in on and off the bike. Photo: Trek / Ian Collins.

Apparel

As far as clothing goes, although technically you can ride in just about anything, you’ll be most comfortable in a tech tee or wicking jersey. You can choose between two different styles spending on your personal preference: tailored or loose.

Tailored jerseys are commonly preferred by cross country (XC) riders, while all mountain (AM) or enduro and downhill riders tend to prefer a boxier fit.

Tailored jerseys are often designed with back pockets that you can stow energy bars or gels in. They are typically designed with short sleeves; add a pair of arm warmers for those chilly mornings. Loose fit jerseys come in short sleeve, ¾ sleeve, and long sleeve options. 

Most mountain bikers prefer to wear a chammy short under baggies (loose fitting shorts), although some XC riders opt for spandex padded shorts. In colder weather, padded cycling tights are a great choice on their own or layered under baggies. Chammy cream will help prevent chafing on long XC rides or rides with extended climbs.

Be prepared for a change in weather with a breathable waterproof or water resistant windbreaker. An extra layer is a good idea, too, on those days that start off chilly but end up warm. Just be sure you save space in your pack or jersey back pockets to stow anything you end up shedding. 

A cycling shoe specific to the type of pedal on your bike (clips or flats) and a sock made of a suitable material for the season complete your kit.

A lighting system designed for mountain biking will keep your path well lit on night rides.

A lighting system designed for mountain biking will keep your path well lit on night rides.

Lights

If you’re riding to the trail head, be sure to run front and rear daytime running lights (DRLs) to keep you visible to motorists. Most DRLs are easy to remove and stash away in your pack while you ride the trails.

For night rides on the trails, opt for an MTB-specific lighting system. You’ll want to run lights on the handlebars as well as one on your helmet.

Storage

Depending on the length of your ride and how much gear you’ll be carrying, choose either a backpack or hip pack equipped with a hydration bladder, or a hip pack that accommodates a water bottle.

A backpack, naturally, will offer more space and some are even designed with back protection in case of a crash.

Some Trek mountain bikes have a built-in storage compartment that’s ideal for carrying a flat kit.

Some Trek mountain bikes have a built-in storage compartment that’s ideal for carrying a flat kit.

Bontrager’s BITS Internal Frame Storage Bag is specifically designed to fit in the storage compartment shown at left.

Bontrager’s BITS Internal Frame Storage Bag is specifically designed to fit in the storage compartment shown at left.

Tools & tire care

Essentials you will hopefully NOT need but should carry anyway include a multi-tool, zip ties, patch or plug kit, tire levers, tube, and hand pump or CO2 cartridge and inflator. Even if you run tubeless tires, it’s a good idea to carry a tube as that’s an easy fix in case your sealant fails.

Some Trek mountain bikes boast integrated storage in the downtube, which frees up space in your pack. This “secret compartment” — Bontrager Integrated Tool Storage (BITS) — is the simplest and cleanest way to carry a flat kit.

The BITS Internal Frame Storage Bag is specifically designed to fit in this spot, and easily accommodates your spare tube, tire levers, and CO2 cartridge and inflator.

First aid kit

Don’t hit the trails without a well-stocked first aid kit. There are pre-made kits available, or you can put together your own using a baggie to hold everything.   

Beyond essential

Certain accessories may not be “essential” but certainly offer added safety, convenience and/or comfort.

Consider a GPS cycling computer for navigation and to track your ride stats, and/or fenders to minimize water and mud spray.

If you plan on stopping for a well-earned post-ride meal and bevo, be sure to carry a sturdy bike lock and, of course, your wallet. Don’t ever leave your bike unattended, even when when locked. 

For more information on bikes, apparel, protection, and accessories, browse the Trek website, then swing by or give us a call to see what we have in stock. Special orders available.

Happy trails! Tag us in your social posts — we’d love to share your stoke!

Bike, shoes, helmet, hip pack … check. Photo: Ian Collins

Bike, shoes, helmet, hip pack … check. Photo: Ian Collins


Mountain Biking at Soquel Demonstration State Forest (SDSF / Demo) | Cycling in Santa Cruz

SDSF offers an unforgettable mountain biking experience, complete with exceptional trails in a spectacular setting. Photo: Ian Collins

SDSF offers an unforgettable mountain biking experience, complete with exceptional trails in a spectacular setting. Photo: Ian Collins

Soquel Demonstration State Forest (SDSF), known colloquially as “Demo,” is a world-renowned mountain biking destination located in the Santa Cruz mountains off California’s central coast.

Each trail within the forest boasts its own unique character, but all offer an extraordinary experience riding amongst the coastal redwoods.

The 2,681-acre SDSF, dedicated in 1990, is one of eight California Demonstration State Forests operated by CAL FIRE. These forests, which total 71,000 areas throughout the state, are responsibly harvested to fund resource management programs.

As with the other Demonstration State Forests located throughout California, SDSF offers opportunities for forest management research and education projects, as well as public recreation such as cycling, hiking, and horseback riding. Wildlife habitat and watershed protection are provided for as well.

SDSF is a popular destination for Santa Cruz County and Bay Area mountain bikers, as well as visitors from around the globe. Trails are suited for intermediate and advanced riders, with extensive climbs and challenging descents.

Riders can choose from several exciting downhill runs that branch off from the crest of the mountain. Taking on just one “lap” is often more than enough for some riders because of the significant amount of pedaling involved riding at SDSF.

Mountain Bikers of Santa Cruz (MBOSC) crew and volunteers help build and maintain the trails at SDSF. Photo: MBOSC

Mountain Bikers of Santa Cruz (MBOSC) crew and volunteers help build and maintain the trails at SDSF. Photo: MBOSC

Especially fit and experienced riders can opt for multiple laps, sampling the diverse terrain found in the forest. Anyone riding at SDSF should have strong mountain bike handling skills and fitness.

All of the downhill trails ultimately finish at Hihn’s Mill Road, a dirt service road that is closed to public vehicle access (although you may encounter CAL FIRE vehicles now and then).

In the “How to Get There” section below, we explain how to get to the Santa Rosalia overlook and the start of Ridge Trail, as well as how to get back out of SDSF from the bottom of the downhill runs.

Because it’s a pretty big day on the bike, it’s important to be prepared with ample hydration and nutrition in order to avoid bonking. Also, although much of the riding is shaded, there is still plenty of sunshine so sunscreen is a must. Bug spray isn’t a bad idea, either.

Before you head out, review your route and refresh yourself on this basic trail etiquette:

  • Do not pedal or push up a downhill trail

  • When you need to pass a rider, do so on the left when safe.

  • On multi-direction service roads and trails, downhill riders must give way to those ascending

  • All bikes must yield to horses and hikers. Stop your bike, and step off to the side. Be nice! Say hi! We want everyone to love mountain bikes. Respect all trail users.

  • Practice physical distancing and other safety measures to protect yourself and other trail users from COVID-19.

Please note that electric bikes are strictly forbidden at SDSF. There are no public facilities available, nor potable water sources. The forest closes at dusk; no night riding or camping allowed. Do not block gates or fire lanes. Due to the popularity of this riding destination, weekend visits are discouraged by CAL FIRE SDSF.

It’s also important to note that SDSF is located in a very remote area, with little to no cell signal. Be sure you’re prepared for an emergency such as an injury or bike mechanical. CAL FIRE SDSF asks that you exercise caution and ride within your limits. 

Download the SDSF brochure and trail map here.

To stay in the loop about trail and road closures, follow the CAL FIRE SDSF Facebook page.

This rustic bridge on Sawpit Trail was made from lumber milled right here in this working forest. Photo: Bruce Dorman

This rustic bridge on Sawpit Trail was made from lumber milled right here in this working forest. Photo: Bruce Dorman

The Trails

Ridge

Ridge is an intermediate level singletrack trail that serves as a launching point for SDSF’s celebrated downhill runs. The start of Ridge is located at the Santa Rosalia overlook, at the top of your climb to the crest.

Ridge is a super fun descent in its own right, with a couple of punchy climbs that will keep you on your toes. The trail ranges from smooth and wide to rocky and tight. Although Ridge is primarily ridden in the downhill direction, keep in mind that folks do climb it as well, so stay aware.

Corral

Corral is the first trailhead you come to on Ridge, just .6 miles from Ridge/Aptos Creek Fire Road intersection. When you veer off on Corral, you avoid the most technical parts of Ridge as well as its toughest climbs.

Corral starts off with a half mile of prime singletrack, then continues on for another 1.2 miles of primitive logging road that features fun water bars to get a little air off of and dirt wall rides varying in difficulty from easy-peasy to highly advanced.

Some riders kick off a multi-loop day with Corral, but we recommend skipping it and putting your time and energy into the tracks further along.

Riding Corral as a “one and done” could be a good introduction to SDSF for a rider leery of a much bigger day, but we think you should just buck up and take on the extra pedaling to sample the legendary Flow Trail instead (scroll down for description).

Braille

Ahhh, Braille. This is OG Demo. The second trail you come to along Ridge, Braille serves up some of the steepest descents on the mountain, and is arguably the most technical of all the trails out there.

The 1.4-mile run is chock full of optional features such as log drops and jumps. It finishes with a tight, fast dash through the trees.

Flow

If you’re an intermediate to advanced rider more interested in flowy, smooth terrain, you won’t want to miss the renowned Flow Trail.

The Flow Trail delivers miles of smiles. Photo: Bruce Dorman

The Flow Trail delivers miles of smiles. Photo: Bruce Dorman

The third trail out, this 4-mile purpose-built mountain biking trail attracts riders from all over the world and features big swoopy berms, plenty of rollers and optional jump lines.

Flow was designed and built by Mountain Bikers of Santa Cruz (MBOSC) volunteers, and features six separate sections that criss-cross Tractor Road, a decommissioned logging road. If you loved a certain segment, climb back up Tractor to hit it again!

Each segment has its own unique characteristics, and your face will hurt with smiling so much at the finish.

Note that Flow is officially a multi-use, multi-directional trail, although activity other than downhill mountain biking is strongly discouraged. Be sure to stay aware, though!  

Sawpit

Sawpit is the last and furthest singletrack trail at the end of Ridge. It was recently resurrected by CAL FIRE SDSF and MBOSC after being temporarily decommissioned due to a timber project.

What makes this particular trail so special is that it was completely hand-built and its character has been kept very natural. Technical, narrow, rocky, and rooty are some words that describe this track well.

Learn more about Sawpit’s resurrection here. Get the “Sawpit Loop from Epicenter Aptos” Ride Spot route map and elevation profile here.

How to Get There

Epicenter’s comfortable 14-passenger van and Huckwagon trailer.

Epicenter’s comfortable 14-passenger van and Huckwagon trailer.

Take Our Shuttle

Although the shuttle is currently not running due to COVID-19, we hope to be back in biz soon. Read on to prepare for an incredible adventure, and keep an eye on the Epicenter Shuttle website or follow us on Facebook for updates. Scroll down for alternative ways to access SDSF. 

The easiest way to access the SDSF trail system is by utilizing Epicenter Cycling’s mountain bike shuttle service. Catch this comfortable, scenic lift from Epicenter’s Aptos store to the top of the Forest of Nisene Marks State Park, from which point you’ll pedal about three miles to the Santa Rosalia overlook — gateway to SDSF’s celebrated downhill runs.

From here, you’ll have the option to ride just one run, or dig deep for a multi-loop day. After sampling as much SDSF singletrack that you can take, enjoy the 11+ mile descent back to the shop.

It’s very important to know that there is a significant amount of pedaling once you get to SDSF; this is not your typical “shuttle run.” Be sure you’re prepared with water, nutrition, and plenty of rest time throughout the day in order to avoid bonking. Also, although much of the riding is shaded, there is still plenty of sun so slather on the sunscreen.

The adventure begins

Our comfortable van and Huckwagon trailer will shuttle you and your mountain bike up to our drop-spot at Buzzard’s Lagoon Road. The drive takes about 50 minutes, depending on conditions. You’ll enjoy inspiring scenery including rivers, redwoods, waterfalls and canyons as we wind through picturesque Corralitos and up into the Santa Cruz mountains.

🚲After unloading from the shuttle, you’ll start out with a moderate climb on Buzzard Lagoon Road — a dirt service road — for nearly a mile. Be sure to stay alert for vehicles because this first section of your route is open to motorists.

The road will take a sharp left about half a mile in, and you’ll pass through an open gate. When you come to a fork in the road, you’ll bear right for Aptos Creek Fire Road and continue on it for another two miles. Be sure to stay on the main fire road, avoiding any logging spurs along the way.

Although you’ll be mostly climbing to the crest at Santa Rosalia, the road serves up an occasional downhill section to keep things lively. You’ll encounter some bumpy, rocky areas as well, both uphill and downhill.

Along the way, about a mile after the Buzzard Lagoon/Aptos Creek intersection, at the bottom of a short descent, you’ll walk your bike around a locked gate. You’ll be pedaling an especially exposed section for a bit, so if it’s a hot day, be sure to take advantage of this spot to drink some water.

You’ll know you’ve arrived at the end of your climb by Santa Rosalia’s expansive clearing with a bench overlooking a spectacular view, and a SDSF sign at the start of Ridge Trail, a singletrack trail that serves as a launching point for SDSF’s downhill runs described in the “The Trails” section above.

All of these trails descend to Hihn’s Mill Road, a dirt service road that is closed to public vehicle access (although you may encounter CAL FIRE vehicles now and then).

One “lap” is usually more than enough for the average rider. However, if you’re exceptionally fit, you can take on multiple loops utilizing these trails. Just remember that at the end of each trail, you’ll have a significant climb out before heading back down Aptos Creek Fire Road to the shop.

To take on another loop from the bottom of Braille, Flow or Sawpit, you’ll make a right onto Hihn’s Mill Road and begin your .8 to 1.8 mile pedal to Sulphur Springs Road. Bear right onto Sulphur Springs, which makes a sharp turn to the right a little way up, at the bottom of Corral. Up, up, up you’ll go until you reach Ridge about 1.5 miles down from where you first set out from Santa Rosalia. Take a right on Ridge and pick your next run.

🐌At the bottom of your last ride down, you’ll make a right onto Hihn’s Mill Road to begin your pedal back to Santa Rosalia* and your downhill finish to a big day. Keep in mind that this pedal out is significant, so be sure you’re prepared with water, nutrition, and plenty of rest time throughout the day in order to avoid bonking.

Depending on which trail you finished on, you’re looking at a 2.3 to 4 mile climb at mild to moderate grade to the SDSF parking lot. You’ll cruise a short distance downhill, taking a right at the bottom onto Highland Way.

Be sure to watch for cars from the parking lot to Highland, and on Highland itself for the 1.9 mile climb to Buzzard Lagoon where you were dropped off earlier. Retrace that earlier route back to Santa Rosalia, then continue on down Aptos Creek Fire Road all the way back to Epicenter — a whopping 11+ miles!

Although it’s a pretty mellow descent to start off with, the grade steepens after Sand Point Overlook (a perfect place to enjoy the view and regroup), especially in a section known as the “Incline.” After crossing Aptos Creek, the road starts to level out and undulate as you navigate through the towering redwoods along the creek.

Toward the end of your ride, you’ll cross a bridge, then pass through a gate. From here on out, be alert for vehicles. The dirt road will turn to pavement not long before your return to Epicenter.

* Although you can technically get back up to the Santa Rosalia overlook via Sulphur Springs and Ridge Trail, we don’t recommend it as that route is steep and arduous; not to mention that you’ll be riding against the downhill traffic flow on Ridge. It may be more mileage to get back to the overlook via Hihn’s Mill/Highland/Buzzard Lagoon, but it is actually faster and much more pleasant.

Coastal redwoods immersion. Forest bathing is good for the heart, mind, body and soul. Photo: Ian Collins

Coastal redwoods immersion. Forest bathing is good for the heart, mind, body and soul. Photo: Ian Collins

Pedal from our Aptos store

For a truly epic adventure on your mountain bike, you can pedal the 11+ miles up (2,708 feet in elevation gain!) through the Forest of Nisene Marks State Park into SDSF from our Aptos store.

Once you reach SDSF, you have the option to ride just one lap, or dig deep for a multi-loop day. After sampling as much SDSF singletrack that you can take, it’s an easy breezy 11+ mile descent (those 2,708 footies!) back to the shop.

Begin your journey on Aptos Creek Fire Road, which starts off as pavement outside our back door. The road eventually turns to dirt, passes through a gate, then crosses the creek via a bridge.

For some variety to start your day off, explore the singletrack trails that run along the fire road before the bridge. Note that the trails located past the bridge are for hiking only, and closed to bikes. (Also, don’t forget you have a significant amount of riding ahead of you, so don’t use up all your gas right from the start!)

Sand Point Overlook is a great place to regroup and refuel en route to the top.

Sand Point Overlook is a great place to regroup and refuel en route to the top.

Past the bridge, you’ll start to climb, reaching a steeper section known colloquially as “Incline” that luckily only lasts about a mile. From there, the grade relaxes a bit to about 3-5%, offering an enjoyable yet still challenging climb for about three more miles to the Sand Point Overlook.

Santa Rosalia Overlook is another perfect spot to take in the views and regroup at the top of the climb.

Santa Rosalia Overlook is another perfect spot to take in the views and regroup at the top of the climb.

The Sand Point Overlook is the perfect place to break for a snack and take in the view. From here on up to the top, the grade slacks off even more and it’s a sweet pedal to the Santa Rosalia overlook.

You’ll know you’ve arrived at the end of your climb by Santa Rosalia’s expansive clearing with a bench overlooking a spectacular view, and a SDSF sign at the start of Ridge Trail, a singletrack trail that serves as a launching point for SDSF’s celebrated downhill runs.

From here, follow the directions at the 🌲under “Take Our Shuttle” above.

At the bottom of your last run down, you’ll make a right onto Hihn’s Mill Road to begin your pedal back to Santa Rosalia and your downhill finish to a big day. Follow the directions at the 🐌under “Take Our Shuttle” above.

Ribbons of chocolatey perfection. Photo: Ian Collins

Ribbons of chocolatey perfection. Photo: Ian Collins

Drive to SDSF

You can drive out to SDSF, but keep in mind that in doing so, you’ll miss out riding half of the mountain (the 11+ miles through the Forest of Nisene Marks State Park)!

SDSF offers two legal access points: one is open to cyclist and hikers only via Aptos Creek Fire Road as described in the “Pedal from our Aptos Store” section above. The other is the SDSF parking area at 29400 Highland Way. Please note that there is no longer vehicular access on Aptos Creek Fire Road from Buzzard Lagoon.

The SDSF parking area off Highland Way offers ample parking. Be aware that it’s a long, winding, often very narrow, and sometimes rutted route to SDSF from either direction (Bay Area via Hwy 17 or central coast via Eureka Canyon). In the rainy season, there can be landslides, and in nicer weather there may be road work. Check the CAL FIRE SDSF Facebook page for updates on access.

Be sure not to leave any valuables in your car when parking in the lot. Also, of course, bring plenty of hydration and nutrition for a big day on the bike.

After parking your vehicle, you’ll actually pedal back out to Highland Way, versus venturing into the forest on Hihn’s Mill Road. Although you can technically get up to the staging area via Hihn’s Mill, we don’t recommend it as that route is steep and arduous. It may be more miles going around, but it is actually faster and much more pleasant.

To do this, make a right onto Highland Way out of the parking lot driveway and begin the 1.9 mile pavement pedal to the Buzzard Lagoon intersection. This stretch of Highland Way is mostly shaded and a moderate grade. Be aware of vehicles on the road.

From the Buzzard Lagoon intersection, follow the directions at the 🚲under “Take Our Shuttle” above.

At the bottom of your last run down, you’ll make a right onto Hihn’s Mill Road for your pedal back to the parking lot. Keep in mind that your pedal out can be up to four miles depending on which trail you finished on.

Sawpit Mountain Biking Trail at Demo | Cycling in Santa Cruz

The resurrected Sawpit Trail was designed to be so natural, it blends beautifully with its forest surroundings. Photo: Bruce Dorman

The resurrected Sawpit Trail was designed to be so natural, it blends beautifully with its forest surroundings. Photo: Bruce Dorman

Sawpit, a popular Santa Cruz-area mountain biking trail that was decommissioned in 2017 for timber harvest in Soquel Demonstration State Forest (SDSF), was brought back to life in May 2020 thanks to a partnership between CAL FIRE SDSF and Mountain Bikers of Santa Cruz (MBOSC).

What makes this particular trail so special is that it was completely hand-built with an objective of keeping its character as natural as possible. Think technical and narrow, chock full of rocks, logs, and roots … surrounded by redwoods, moss, and that incredible light filtering through the canopy. Artisan singletrack!

MBOSC’s Trails Program Manager Drew Perkins explains that in keeping the feel of the original, the remake is “really natural, minimally constructed, open and fast in some places, steep in some places.” He adds, “Should be really fun to ride; hopefully people won’t miss the old trail that much.”

Bridge construction. Photo: MBOSC

Bridge construction. Photo: MBOSC

Bridge artistry. Photo: MBOSC

Bridge artistry. Photo: MBOSC

Demonstration State Forests also offer opportunities for forest management research and education projects, as well as public recreation such as mountain biking, hiking, and horseback riding. Wildlife habitat and watershed protection are provided for as well. It’s a win all the way around.

The 2,681-acre SDSF, dedicated in 1990, is located in the Santa Cruz mountains just inland from California’s central coast. The forest is a mix of redwoods and hardwoods, as well as riparian ecosystems. It’s a renowned mountain biking destination featuring world class trails that include a four-mile flow trail and an OG gem — the technical, steep Braille trail.

The original Sawpit trail was also a favorite among mountain bikers until it was decommissioned in 2017 when CAL FIRE commenced the Meridian timber harvest. Initially a logging road, Sawpit transformed over time into a relatively primitive singletrack trail that wound through varied terrain.

When the timber harvest project began, the historic logging road was restored, which meant farewell to the beloved singletrack. At the completion of the harvest, however, a plan to resurrect Sawpit as a natural singletrack trail was set in motion by CAL FIRE SDSF and MBOSC.

Volunteers have put in a whopping 1,400 hours alongside the MBOSC trail crew to bring this beloved trail back to life. We urge you to get out there and check it out!

Get the “Sawpit Loop from Epicenter Aptos” RideSpot route map and elevation profile here.

Keep in mind that you should have strong mountain bike handling skills and excellent fitness for riding at SDSF. Also, please note that electric bikes of any kind are strictly forbidden at SDSF.

Get other important tips for riding SDSF plus details on how to get there and the various routes you can ride here.

The trail crew making a dream a reality. Photo: MBOSC

The trail crew making a dream a reality. Photo: MBOSC

Natural, flowing lines are a hallmark of the resurrected Sawpit Trail. Photo: MBOSC

Natural, flowing lines are a hallmark of the resurrected Sawpit Trail. Photo: MBOSC

Coastal Bluffs Mountain Bike Ride | Cycling in Santa Cruz

Enjoy incredible coastal views on this beginner-friendly mountain bike ride along the bluffs at Wilder Ranch State Park.

Enjoy incredible coastal views on this beginner-friendly mountain bike ride along the bluffs at Wilder Ranch State Park.

This mellow mixed terrain ride from our Mission Street store is ideal for beginners and is a family favorite; it’s also e-MTB friendly!

The beauty of this route (besides the remarkable scenery, that is!) is that you can make the ride as short or long as you like (go all the way to 4 Mile Beach for a 9+ mile round trip ride!) … just be sure to take time to enjoy the views and local fauna and flora!

You’ll start out on surface streets, pick up a paved bike path, then enter Wilder Ranch State Park for a pedal on dirt double track. Enjoy a ride along Wilder’s scenic coastal bluffs for as long as you like before turning around to retrace your route back to the shop.

To get there, turn right onto Baldwin Street from our parking lot; then turn left onto King Street. Pedal along King until you hit Mission Street; then turn right. Turn left onto Swift Street, then take an immediate right to stay on Mission which comes to an end at Shaffer. Cross Shaffer and you’ll be on the County Bike Trail, a paved bike path.

Enjoy this beautiful pedal alongside fruit and vegetable fields until the paved path comes to an end at Wilder. Turn left, hop off your bike and walk it through the farmstead. On the other side of the farmstead, turn right and pedal up to the state park’s parking lot.

Here’s where you pick up the dirt, starting at Old Cove Landing Trail on the west end of the parking lot; the route will continue on to Ohlone Bluff Trail. Both trails are wide and relatively level, so there’s plenty of space for getting into your groove if you’re fairly new to riding dirt.

Old Cove Landing Trail runs out toward the ocean where you’ll discover a perfect photo spot pretty early in your ride. You’ll continue along this double track as it hugs the coastline before turning inland to skirt a ravine.

When you arrive at the railroad tracks, follow them until you pick the trail back up. The trail is now Ohlone Bluff Trail and it’ll take you back out to the bluffs where you’ll soak up even more spectacular views of the ocean and beaches below. Keep your eye out for whales, dolphins, sea lions, seals, sea otters, pelicans, cormorants, and more.

The trail will again turn inland and follow the railroad tracks once more, but in no time you’ll be back out on the coastal bluffs.

Ride as far as you like, then turn around and enjoy a whole new perspective as you make your way back!

Tag us in your social posts — we’d love to see your pics from this ride! @rideepicenter #ride831


Video: How to Change a Flat Bike Tire

Knowledge is power 💪Don't let fear of a flat keep you from getting out for a spin!

p.s. Keep in mind that although flats do happen, you'll lower your risk significantly by running quality tires appropriate for your bike and the terrain you are riding. Be sure to keep them inflated with the proper amount of air for your particular tire.

Don't hesitate to call us with any questions about your own set-up! Santa Cruz: (831) 423-9000; Aptos: (831) 662-8100.

Electric Bikes to the Rescue

1905E_CS_0Q0A5774.jpg

Those of us who ride bikes regularly already know that cycling is a great way to keep  physically and mentally fit. During stressful times such as the current COVID-19 pandemic, it’s more important than ever to strive for optimum health.

Here at Epicenter Cycling, we’re happy to see a surge in biking. Lots of folks new to cycling — or coming back to it after a long hiatus — are getting on bikes for physical and emotional well-being.

Electric bikes, whether for road or trail riding, are proving to be especially popular during this time. Pedal assist technology makes cycling accessible to those who otherwise aren’t able to ride, or those who may be intimidated by the effort needed to ride a traditional bike.

What IS pedal assist? It’s exactly how it sounds. When you start pedaling, the e-bike’s motor kicks in and gives you this nice, subtle “assist” … like somebody is gently pushing you along from behind.

Pedal assist is remarkably intuitive — you’ll be surprised at just how easy it is! And, you can adjust the level of assist to meet your needs.

Who can benefit from riding an electric bike powered by pedal assist? ANYONE AND EVERYONE, including:

  • Anyone who … has physical barriers that prevent them from riding a traditional bike. Examples of such barriers include arthritis, sore knees, weight issues, low fitness, and recovering from illness or surgery. An e-bike will make getting out for some much-needed movement a joy, not a chore! Plus, the pedal assist levels the playing field for families or households of varying skill, fitness and experience looking to get out for fresh air together. 

  • Anyone who … wants to get some low impact, quality exercise without pushing to the edge of exhaustion. E-bikes aren’t just for people who have physical issues — they offer a legit form of exercise for just about everyone!

  • Anyone who … dreads hills. No shame in that — hills can be soul crushers. But imagine pedaling up a hill with ease, feeling like the wind is at your back. Now your spirit will be soaring!

  • Anyone who …. wants to save money. Electric bikes are a viable and sustainable transportation alternative whether supplementing car usage or ditching the four wheel gas-guzzling monster entirely. Save on gas and parking at the very least, and perhaps even those ever-escalating registration and insurance fees if you ditch the car for good. Plus, the cost of bike maintenance and repairs is naturally a fraction of that for autos.

  • Anyone who … wants to save the Earth. Be at peace knowing that your choices and actions are making a powerful impact on your community and planet. The less you use your car, the less emissions are being let into the air — what a ripple effect that would make as more people opt for two wheels over their vehicles. During this pandemic, we’re seeing how reduced vehicle use in our own region as well as the bigger cities is positively affecting air quality. Imagine this being the norm! 

  • Anyone who … enjoys biking to essential errands or an essential job, but doesn’t necessarily want to arrive sweaty. (You can always get your heart pumping on the trip home by simply adjusting the level of assist!) Traffic and parking hassles naturally dissipate as well.

  • Anyone who … likes having FUN! Because that’s the BEST thing about e-bikes — they are a BLAST!

So, don't let a bum knee, creaky joints, low fitness, excess weight, fear of hills, distaste for sweat, or any other issue keep you from discovering the benefits of cycling. Pedal assist to the rescue!

➡️Learn more about electric city and mountain bikes in our Guide to Choosing an Electric Bike.

➡️Browse the brands and models we recommend here.

➡️Discover where you can ride an electric mountain bike in Santa Cruz County here.

➡️And most importantly, get guidelines for cycling during the COVID-19 pandemic here.

Cycling During the COVID-19 Pandemic

Being active outdoors locally is an acceptable — and of course, downright healthy! — activity during Santa Cruz County’s Shelter In Place order, as long as social distancing requirements are being followed. Be safe and responsible! Photo: Ian Collin…

Being active outdoors locally is an acceptable — and of course, downright healthy! — activity during Santa Cruz County’s Shelter In Place order, as long as social distancing requirements are being followed. Be safe and responsible! Photo: Ian Collins / Trek.

UPDATES

(originally published 3/21/20)

12/16/20 Regional Stay-At-Home order goes into effect. Again, bike shops are not affected, and we continue to be open with COVID-19 protocol in place. Furthermore, although leisure travel is restricted, travel for essential purposes is allowed, including for exercise. Read the press release.

11/16/20 Santa Cruz County moves back to Purple Tier with travel, business, and gatherings restrictions. Bike shops are not affected, and we continue to be open to serve our community with social distancing and other precautions firmly in place. Read the press release.

7/27/20 Santa Cruz County put on California Department of Public Health monitoring list, modifying or closing operations in several sectors. Bike shops are not affected, and we continue to be open to serve our community with social distancing and other precautions firmly in place. Read the press release.

6/25/20 Santa Cruz County announced that it will reopen all of its beaches starting Friday, June 26.

6/9/20 Face coverings and social distancing continue to be required as Santa Cruz County opens up even more. See the 6/9/20 press release about the latest health order which allows lodging restrictions to be lifted.

5/26/20 Face coverings and social distancing continue to be required as Santa Cruz County opens up. See the 5/26/20 press release about the latest health order which allows early Stage 2 activities to proceed.

5/1/20 Face coverings now mandatory. See the 4/23/20 health order and updated Shelter-in-Place order for more information.


It’s important to note that even when restrictions are eased, we must not let our guard down. Officials urge residents to continue staying close to home, recreating in local parks as opposed to traveling out of the area.

It’s also imperative that we continue to follow social distancing guidelines and to avoid gathering with others outside of our immediate households.

Face coverings for those over 12 continue to be a requirement in Santa Cruz County while out in public (does not apply to exercising); read the Santa Cruz order here.

Although our county’s shelter-in-place order is still in effect, most of our parks and trails are now open, including parking lots that were previously closed.

Since the situation continues to evolve, it’s best to check with the land manager for the most current update before you head out to ride in your favorite locale. Click here for a list of land managers and popular cycling locales under their jurisdiction.


The COVID-19 pandemic has certainly caused massive upheaval in our lives and community. We at Epicenter care deeply for those around us, and we’re especially concerned during this trying time.

Naturally, with any crisis comes uncertainty, stress, and anxiety. Disruptions to our daily routine, financial worries, concern over loved ones, etc. can feel insurmountable.

Current restrictions on what we can and cannot do add to the turbulence. With activities and events cancelled, favorite hang-out spots and gyms, etc. closed, and friends kept at bay by social distancing requirements, many of us feel isolated and helpless.

But, there IS a bright spot. Although many activities are not allowed per the Santa Cruz County Shelter In Place order (updated 5/1/20) being active outdoors is NOT one of them, as long as social distancing requirements are being followed.

Being active outdoors is a natural and free remedy for these challenging times! But it’s super important that we engage in our outdoor activities in a safe and responsible manner to protect ourselves, our loved ones, our community, and the world at large.

Bikes to the rescue!

Here’s how bikes can ease the strain during the coronavirus crisis:

  • Getting out on a bike will lift your spirits — even just a short pedal around the neighborhood will do wonders. Do it! 

  • Riding a bike can help keep you centered ... literally, as it improves your alignment, stability, strength and balance.

  • As with any type of exercise, riding a bike will help keep your immune system strong — which is more important than ever right now! Of course, it’s a given that being physically active keeps you fit and healthy, and regular exercise combats obesity, cancer, heart disease, arthritis, diabetes, mental illness, and more. If you don’t already ride a bike regularly to reduce your risk of health problems, now’s a great time to start!

  • Pedaling as a family or couple is a healthy way to keep connection strong and spirits high during this tough time. And of course, spending some time outside on two wheels gives kids (and adults) an alternative to being sedentary while off school (or work). An electric bike will level the playing field in couples and families with differing fitness and/or ability levels.  

  • Setting some cycling goals can offer a sense of purpose when things may feel out of control.

  • Running your essential errands — like food shopping and banking — by bike is a safer bet than public transportation or Uber/Lyft. Even if you have a car, opting for your bike will fill you up with good vibes. And, of course, you’ll save on gas and parking at a time when every little bit of savings helps.

Where to ride off-road? Although most of our local park trails and roads are again open for recreation, some parking lots may be closed or have a limited number of parking spots available. Be sure to check with the land manager for current status, as regulations change quickly. Of course, it’s best to leave your car at home and ride to the trail head anyway! #GoByBike 🚲🙌

* In other words, if you can bike/walk to the trailhead. The best way to flatten the curve is to stick to your own area until the Shelter In Place order is lifted!

You to the rescue!

While getting out on your bike is clearly a healthy activity, we need to be especially diligent during this uncertain time. It’s up to US to flatten the curve. We each have the power — and responsibility — to do what we can to improve this crisis.

Here are some things to consider (updated 6/9/20):

  • Social distancing is crucial. When out riding your bike, it’s imperative that you adhere to Social Distancing Requirements, defined in the Santa Cruz County Shelter In Place Order (5/1/20 update). The main thing to be careful of while cycling is to maintain at least six-foot distance from other individuals. Spread out folks!

    Of course, be sure to wash your hands with soap and water for at least twenty seconds as frequently as possible, or to use alcohol-based hand sanitizer if soap and water aren’t available. Cover coughs and sneezes (into sleeve or elbow, not hands), and of course, refrain from touching others, particularly their hands.

  • Speaking of coughs and sneezes … this is not a good time to hack up a loogie or send a snot rocket onto the road or trail!

  • If you’re sick or suspect you’ve been exposed to the virus, it goes without saying: STAY HOME. No matter how careful you might be, it’s simply too much risk to your community. Also, contrary to popular belief, you cannot “sweat out” a virus or fever with exercise.

  • Although earlier Shelter-In-Place orders meant sticking strictly to home trails and routes, as counties throughout California and beyond open back up to tourism, you’ll be tempted to hit the road. Of course, it’d be best if everyone remained in their own areas, but if you’re looking to adventure away from home, be very diligent about following social distancing guidelines, wearing your mask in public, and practicing good hygiene. It’s up to all members of our community to minimize the risk of spreading infection!

  • Don’t share food, water, or tools with others. Be fully prepared with all you need for your ride.

  • This one’s so important we’re going to repeat it: Social distancing is crucial. When you’re out on your bike, whether on trail or road, make sure you maintain a solid six-foot distance between you and other riders.

    This applies to passing; you probably won’t be able to do so with a six-foot buffer. Carry a mask for passing and pop it on when you encounter other users. Faster riders, communicate kindly and clearly. Slower riders, hop off your bike and step off trail so the faster rider can pass safely.

  • Ride solo or with members of your own household. Avoid group rides or post-ride gatherings outside of the people you live with.

  • Bring a face covering (such as a mask). Santa Cruz County updated its health order on 5/1/20 to include the 4/23/20 order to wear a face covering when in public. Although wearing a face covering is NOT required while exercising, put one on when passing and otherwise finding yourself in closer contact with others.

  • Be careful out there! Ride conservatively to lower your risk of injury, which can put undue pressure on our health care facilities.

  • Mountain bikers, please review guidelines for riding in the rainy season and opt for a road ride when the trails are too wet. If you leave tracks: TOO WET.

We’re here to support you

Epicenter Cycling is committed to supporting the Santa Cruz County cycling community — many of whom depend on a bicycle as their sole means of transportation — by staying open as a federally and locally approved “essential business” during the COVID-19 crisis.

Currently, our Santa Cruz store is open 7 days a week from 10am-6pm, our Aptos store is open daily from 10am-5pm, and our new location in Monterey is open Tuesday through Sunday 10am-6pm (closed Monday).

We are allowing two customers or families at a time to guarantee social distancing. Please wait on outside dot and purple lines and we will come outside to let you in.

Santa Cruz County now requires all customers to wear a face mask inside and while waiting outside. Curbside pick up is available; please call if you want us to meet you at your car. Free local delivery also available.

Call us at (831) 423-9000 (Santa Cruz), (831) 662-8100 (Aptos) or (831) 920-1804 (Monterey).

Shine the light

As you experience the support that riding a bike offers during this trying time, please take a moment to share the positivity and make a difference to those around you.

Tag us in your social posts — we’d love to soak up your stoke and share it on our networks. @rideepicenter #bikestotherescue #ride831

Additional reading

The COVID-19 pandemic is, of course, a rapidly developing situation. For the most up-to-date information, check resources such as Centers for Disease Control and Prevention (CDC) and World Health Organization (WHO) regularly.

We found this Bicycling Magazine article very informative and used it as a reference for this post — give it a read!

Update 3/24/20: this article by Mountain Bikers of Santa Cruz has some updated information and important tips. Please review!

Many people in the Santa Cruz County rely on a bicycle as their sole means of transportation. Epicenter Cycling is open during the COVID-19 crisis in support of our cycling community, especially those who need to ride a bike for essential errands, a…

Many people in the Santa Cruz County rely on a bicycle as their sole means of transportation. Epicenter Cycling is open during the COVID-19 crisis in support of our cycling community, especially those who need to ride a bike for essential errands, and/or to and from employment at an essential business. Photo: Trek.

Where You Can Ride an Electric Mountain Bike in Santa Cruz

Wilder Ranch State Park, located along the coast on the north end of Santa Cruz, is an electric mountain bike enthusiast’s dream zone.

Wilder Ranch State Park, located along the coast on the north end of Santa Cruz, is an electric mountain bike enthusiast’s dream zone.

IMPORTANT COVID-19 UPDATE: Be sure to check with the land manager for current status, as regulations change quickly. Of course, it’s best to leave your car at home and ride to the trail head anyway! #GoByBike 🚲🙌 Get guidelines for cycling during the COVID-19 pandemic here.


When electric mountain bikes (eMTBs) hit the scene, their popularity took off. That’s no surprise, considering the numerous benefits e-bikes offer. Yet, despite eMTBs being all the rage, it’s often difficult to pinpoint just where you can legally ride them. Land managers are working hard to catch up, and policies are slowly but surely being clarified and publicized. In the meantime, however, regulations remain murky.

The crew at Epicenter Cycling wants you out there enjoying your electric mountain bike, not glued to the Google trying to figure out where it’s allowed. So, we contacted land managers throughout the Santa Cruz area for the official word on where eMTBs are welcome.

The good news is that electric mountain bikes can be ridden in more places than you might expect. Keep in mind that most trails that allow eMTBs are multi-use. Be courteous and yield to equestrians, runners, and hikers; obey speed limits; and stay on legal trails.

Also, the class of electric mountain bike you ride might play a factor in where you can ride. If you aren’t familiar with the various classes, discover them in our e-bike guide.

Now, let’s take a look at where you can ✅and cannot ❌ride eMTBs in Santa Cruz!


California Department of Parks and Recreation

✅ Wilder Ranch State Park

Wilder Ranch State Park, located off Highway 1 heading northbound from Santa Cruz, is an eMTB enthusiast’s dream zone. Class 1 electric mountain bikes are welcome on all 35 miles of the park’s multi-use singletrack trails and dirt roads. Whether you’re a beginner or advanced rider, this locale has something for everyone. Explore the coastal bluffs, sunny meadows, and redwood forests.

Learn more about Wilder Ranch State Park here. View the trail map here, and don’t hesitate to ask our crew for a recommended route. Wilder Ranch State Park is an easy ride from our Santa Cruz store.

Address: 1401 Coast Road, Santa Cruz Get directions

Phone: (831) 423-9703

Hours: 8am - Sunset

✅ Forest of Nisene Marks State Park

The Forest of Nisene Marks State Park offers amazing rides through the majestic redwoods.

Class 1 electric mountain bikes are welcome on all trail routes currently open to traditional bicycles.

Please note that eMTBs are strictly forbidden at Soquel Demonstration State Forest located adjacent to the Forest of Nisene Marks SP.

Learn more about the Forest of Nisene Marks State Park here. View the trail map here, and don’t hesitate to contact our crew with any questions.

Address: Aptos Creek Road, off Soquel and State Park Drive, Aptos Get directions

Phone: (831) 763-7063

Hours: Sunrise - Sunset

✅ Henry Cowell Redwoods State Park

Henry Cowell Redwoods State Park — chock full of redwoods as its name implies — welcomes Class 1 pedal assist bikes wherever traditional bikes are allowed.

Specifically, this means Pipeline Road, Ridge Fire Road, Powder Mill Fire Road, Rincon Fire Road, and Rincon Connector Trail. These routes vary in difficulty; learn more and view the trail map here. Learn more about Henry Cowell Redwoods State Park here

Note: Bikes — whether electric or traditional — are NOT allowed in the Fall Creek Unit or in the Santa Cruz Sandhills habitat.

Address: 101 North Big Trees Park Road, Felton Get directions

Phone: (831) 335-4598

Hours: Sunrise - Sunset

❌ Big Basin State Park

E-MTBS ARE NOT ALLOWED. Although traditional bicycles* are allowed in some areas of Big Basin State Park, electric mountain bikes are strictly forbidden.

⚠️*The park is currently closed even to traditional bicycles due to the CZU Lightning Complex Fires until further notice. ⚠️


City of Santa Cruz

✅ Pogonip

One of Santa Cruz’s most popular mountain biking trails — the Emma McCrary Trail (EMT) — is located in the Pogonip, and welcomes eMTBs of all classes. EMT is a beginner-friendly, 1.5-mile multi-use trail that winds through some of the prettiest scenery around.

Other trails in the Pogonip that allow electric mountain bikes are the UCon Trail, Rincon Connector Trail, and a portion of the Rincon Trail (north of where it intersects with EMT and UCon).

We enjoy an epic loop that starts at our Santa Cruz store and goes through Wilder Ranch State Park on up to UCSC, then down UCon to EMT. The ride finishes with an easy pedal through west side neighborhoods back to the shop. Ask our crew for detailed directions.

Note: All other trails in the Pogonip are off-limits to electric and traditional bikes alike.

Learn more about the Pogonip here. View the Pogonip trail map here

Address: 333 Golf Club Drive, Santa Cruz (also can be accessed from Henry Cowell’s Rincon parking lot via Rincon Connector Trail or UCSC’s Fuel Break Road)

Phone: (831) 420-5270

Hours: Summer (April through October) Sunrise to 7pm; Winter (November through March) Sunrise to 4pm

✅ DeLaveaga Park

DeLaveaga is a fun and easily-accessed park right in the heart of Santa Cruz. The park’s multi-use trail system is open to all classes of electric mountain bikes. Although some sections of trail are beginner-friendly, most require solid handling skills.

Learn more about DeLaveaga Park here. View the trail map here.

Address: 855 Branciforte Drive, Santa Cruz

Phone: (831) 420-5270

Park Hours: Sunrise to Sunset


Bureau of Land Management (BLM)

✅ Ft. Ord National Monument

Ft. Ord National Monument (Ft. Ord) near Monterey is a popular winter destination for Santa Cruz-area mountain bikers. Ft. Ord’s sandy terrain is ideal for riding when wet; and its expansive trail network offers something for everyone from beginner to advanced.

The BLM is in the process of modifying regulations that classify electric bikes as “motorized vehicles” which are currently prohibited from the non-motorized trails and roads at Ft. Ord.

In the interim, the BLM is granting a “blanket exemption” for riding Class 1 and Class 3 pedal assist mountain bikes on the Ft. Ord trails and roads that are also open to traditional bicycles.

Furthermore, Class 2 (throttle-operated) electric bikes are also allowed, although they must be operated by pedaling.

Learn more about Ft. Ord National Monument here. Read more about the interim e-bike rules at Ft. Ord here. View the trail map here.

Address: There are several access points to Ft. Ord National Monument; see map for trailheads

Phone: (831) 582-2200

Park Hours: Sunrise to Sunset


California Department of Forestry and Fire Protection (CAL FIRE)

❌ Soquel Demonstration State Forest (Demo) 

E-MTBS ARE NOT ALLOWED. Although traditional bicycles are allowed* in this wildly popular mountain biking destination in the Santa Cruz mountains, electric mountain bikes are strictly forbidden. It’s our understanding that this policy serves to limit the number of riders, balancing out user groups and keeping the trails from being over-crowded.


We hope this information inspires you to explore the amazing eMTB-legal trails in and around Santa Cruz.

Please keep in mind that although the content above has been confirmed by land manager representatives and is accurate to the best of our knowledge, Epicenter Cycling assumes no responsibility or liability for any errors or omissions in the content.

Furthermore, policies regarding eMTB access are ever-changing, so if in doubt, be sure to contact the land manager directly. We’re happy to share our contact information; email us at contact@epicentercycling.com.

Happy eMTB’ing!


Bicycle Laws in Santa Cruz, California

Two cyclists ride down the road on their Trek electric bikes with big smiles on their faces.

Here at Epicenter Cycling, we truly believe bikes are key to healthy people, healthy communities, and a healthy planet. We recognize that sometimes it’s difficult to get clear and accurate information, and that confusion might hold you back from fully embracing the cycling lifestyle.

One example is bicycle law. Where can you ride? Is it legal to “take the lane”? Can you wear headphones while biking? Are electric bikes allowed on bike paths? Must you have lights?

We’re here to clarify things for you. Following is a summary of California and Santa Cruz city-specific bike laws that — to the best of our knowledge — is up-to-date and accurate. A list of references can be found at the end for further exploration.

Of course, if you travel to another state, be sure to review their cycling laws and regulations because they do vary from state to state.

Same Rights & Responsibilities as Motorists

State laws that detail where and how bikes must operate are found within the California Vehicle Code. An important thing to note is that, for the most part, cyclists in California have the same rights and responsibilities as motorists (CVC 21200).

This means cyclists must follow traffic signals, obey speed limits, signal for turning and braking, stop at stop signs, and ride on the right-hand side of the road. This also means cyclists are subject to the same penalties as motorists for not adhering to the rules, such as fines and points on the offender’s DMV driving record.

Where You Can Ride

Electric bike being ridden in a bike lane.

As with all non-bicycle traffic, bikes must be ridden on the right half of the road in the same direction traffic is flowing. Exceptions include when passing, making a legal left turn, riding on a one-way street, riding on a road that is too narrow, or when the right side of the road is closed due to road construction. (CVC 21650)

According to CalBike, if you’re riding as fast as vehicular traffic, you may ride wherever you feel most comfortable, whether that’s in the middle of the motor vehicle travel lane (also referred to as “taking the lane”), in the bike lane if available, or along the side of the road.

If you’re traveling slower than the flow of traffic, the law mandates that you ride as close to the right side of the road as practicable. That said, you may legally “take the lane” when a lane is too narrow for a vehicle and bicycle to share safely.

Other conditions in which you may “take the lane” even if you’re not moving as fast as car traffic include: when passing; when preparing for/making a left hand turn; when avoiding a hazard; and when approaching a place where a right turn is authorized. (CVC 21202)

Driver Awareness: Many motorists (and, reportedly, even traffic officers) aren’t aware of cyclists’ right to “take the lane” even for the conditions itemized in the law. We urge you to ride with caution and within your comfort zone. And, of course, it’s something to keep in mind when you are a motorist yourself!

If there is a bike lane available, cyclists moving slower than traffic are required to travel in it (CVC 21208). You may move out of the bike lane for the same conditions listed above: when passing; when preparing for/making a left hand turn; when avoiding a hazard; and when approaching a place where a right turn is authorized.

What about sidewalks? California Vehicle Code mandates that individual cities and counties control whether bicyclists may ride on sidewalks. View Santa Cruz area regulations in this chart published by the Santa Cruz County Transportation Commission (SCCTC).

Bicycles may NOT be ridden on freeways and expressways, or across toll bridges, unless permitted to do so by the California Department of Transportation. (CVC 21960, CVC 23330)

Driver Awareness: The Three Feet for Safety Act (CVC 21760) went into effect in 2014. This requires  motorists to give at least three feet of clearance when passing bicyclists. When passing with a three-foot buffer is not feasible, drivers must slow down and wait to pass when it’s safe to do so. We urge cyclists to stay alert at all times; don’t assume that all motorists will abide by this law — take charge of your own safety. 

Clarifying Right Turn Safety 

The section above specifies that a cyclist may ride in the motor vehicle travel lane when approaching a place where a right turn is authorized. But what exactly does that mean? 

Simply put, this means cyclists may (and should!) move into the motor vehicle traffic lane in anticipation of a car making a right hand turn, or to pass safely around the left side of the motor vehicle as it makes the turn.

Note that California law requires drivers of motor vehicles to merge into the bicycle lane prior to making a right hand turn (CVC 21717). This must be done anywhere from 200 to 50 feet before the turn, yielding of course to any other traffic in the lane. Motorists must first signal the lane merge, then merge right into the curb lane, and finally make the actual turn once it is deemed safe.

This seems to be a widely misunderstood traffic rule in California, so for the safety of cyclists, we want to spell the law out further for total clarity. In California, motorists may NOT make a right turn directly from their motor vehicle traffic lane, cutting across the bike lane.

“Turning from the Curb” (CVC 22100) mandates that both the approach for a right-hand turn and a right-hand turn shall be made as close as practicable to the right-hand curb or edge of the roadway. Bike lanes ARE lanes.

Riding in Groups

Although there is apparently no language in California Vehicle Code preventing bicyclists from riding two or more abreast (side-by-side), if they do so, they must be traveling as fast as vehicular traffic since the innermost cyclist will be taking the lane.

Riding side-by-side is not allowed in the City of Santa Cruz as Santa Cruz Municipal Code clearly requires single-file riding, “except on paths or parts of a roadway set aside for the exclusive use of bicycles.” (10.68.040 Group Operation)

What About Electric Bikes?

Electric bike being ridden on the street.

E-bikes have access to bike paths, bike lanes, designated bike routes, and protected lanes, but the class of the e-bike determines which bikeway can be used. 

Basically, California state law allows the use of Class 1 and 2 electric bikes (top assisted speeds of 20 mph) wherever traditional bikes are allowed unless a sign specifically prohibits them.

Class 3 electric bikes (top assisted speeds of 28 mph) may be used in bike lanes or separated bikeways adjacent to the roadway, but NOT on bike paths.

Get detailed information on the four classes of California bikeways, and which class(es) of electric bikes are allowed on them in our Guide to Electric Bikes.

Currently, regulations for electric mountain bikes (eMTBs) are a little murky, as land managers and lawmakers work toward continuity and clarity.

eMTBs are generally allowed on any “natural surface trail that is designated as open to both motorized and non-motorized uses.” Some land managers allow eMTBs on singletrack and fire roads that traditional bikes are allowed on. Be sure to check with land managers about their eMTB policies.

Bicycle Licensing

If you bike within Santa Cruz city limits (which includes the UCSC campus), you are required by Santa Cruz Municipal Code to register your bike. Registration is free and never expires.

Besides complying with the law, registering your bike can help keep it safe. The license sticker issued by the Santa Cruz Police Department may deter bike thieves, and having your bike registered may aid police in finding your bicycle if it is ever lost or stolen.

Review bicycle licensing requirements for Capitola, Watsonville, and Scotts Valley in this chart published by the SCCTC.

Bicycle Equipment

Most of this is common sense, but you may find it interesting that there are laws governing bike equipment.

Brakes

Bikes must be equipped with a brake that will enable the operator to make a one braked wheel skid on dry, level, clean pavement. (CVC 21201)

Handlebars

Handlebars cannot be higher than the cyclist’s shoulders. (CVC 21201)

Bike size

The bike must be small enough for the rider to stop, support it with one foot on the ground, and start safely. (CVC 21201)

Lights and reflectors

When cycling on the road in the dark, the bike must be equipped with ALL of the following:

  • Front lamp with white light that illuminates the road ahead of you and is visible from a distance of 300 feet in front and from the sides of the bicycle. This can be a light attached to the bicycle or the cyclist (such as a helmet-mounted light).

  • Rear red reflector or solid or flashing red light with built-in reflector that is visible from a distance of 500 feet to the rear when directly in front of a motor vehicle’s headlights.

  • White or yellow reflector on each pedal, shoe, or ankle visible from the front and rear of the bicycle from a distance of 200 feet.

  • White or yellow reflector on each side forward of the center of the bicycle, and a white or red reflector on each side to the rear of the center of the bicycle. Bikes that are equipped with reflectorized tires on the front and the rear need not be equipped with these side reflectors. (CVC 21201)

Seats

The bike must have a permanent, regular seat, unless it is designed by the manufacturer to be ridden without one. Passengers who are four years of age or younger, or weigh less than 40 pounds, must have a seat that keeps them in place and protects them from moving parts. (CVC 21204)

Operating Your Bike

Again, much of this is common sense, but they are laws, too!

Hi-vis yellow Bontrager helmet being held by a cyclist.

Helmet

All cyclists and bicycle passengers under the age of 18 MUST wear an approved helmet when riding a bike. (CVC 21212)

Headphones

Cyclists may not wear earplugs or a headset covering both ears. (Hearing aids naturally are allowed.) (CVC 21212)

Drugs and alcohol use

As with motorists, cyclists may not operate their bikes under the influence of alcohol or drugs. (CVC 21200.5)

Hitching rides

Cyclists may not attach themselves to another vehicle on the roadway. (CVC 21203)

Carrying articles

Cyclists may not carry items which keep them from using at least one hand upon the handlebars. (CVC 21205)

Pedestrians

Bicyclists must yield the right-of-way to pedestrians within marked crosswalks or within unmarked crosswalks at intersections. Cyclists must also yield the right-of-way to totally or partially blind pedestrians carrying a predominantly white cane or using a guide dog. (CVC 21950) and (CVC 21963).

Parking

Bicyclists may not leave bicycles on their sides on the sidewalk or park bicycles in a manner which obstructs pedestrians. (CVC 21210)

Bike path obstruction

Cyclists may not stop on or park a bike on a bicycle path. (CVC 21211)

A female cyclist smiles as she rides her Trek bike on a sunny day.

In Conclusion

We hope this information helps you understand the laws that apply to cycling in California and Santa Cruz County. Knowledge is power — ride with confidence!

Please keep in mind that although the content above has been collected from various credible sources and is accurate to the best of our knowledge, Epicenter Cycling assumes no responsibility or liability for any errors or omissions in the content.

Furthermore, this content is for informational purposes only and not for the purpose of providing legal advice. Contact an attorney (CalBike provides a list of bicycle-friendly lawyers here) to obtain advice with respect to any particular issue or problem.

We recommend browsing the websites listed below as references to further familiarize yourself with ever-changing laws and regulations.