Epicenter Cycling | Bike Shop - Electric & Traditional | Santa Cruz

Electric and traditional bike sales, rentals and service in Santa Cruz County

1730 Mission St, Santa Cruz 831.423.9000 - 8035 Soquel Dr, Aptos 831.662.8100

We love bikes and are your one stop for all things bicycle-related! We offer electric and traditional bikes for purchase; rental/demo bikes; cycling apparel, parts & accessories, an exceptional service department, and a mountain bike shuttle service from our Aptos store. Owned by local Shawn Wilson, and operated by friends & family.

Filtering by Category: Electric Bikes

How to Preorder Bikes 

The world at large has changed post-Covid, and so has the bike industry, for better or for worse. The good news is that Epicenter Cycling HAS bikes in stock, unlike many other bike shops and brands currently. We also have more bikes on order for 2022, which is approaching quickly.

Looking for a new bike? Here is what you need to do:

  1. Short and simple, please call sooner rather than later, as bikes are snatched up quickly. 

  2. Be prepared to put down a fully refundable deposit on your bike of choice. 

  3. Understand that bikes we can get to the store for 2022 are bikes we already have on order. 

This is simply the new “norm” for the foreseeable future. But here at Epicenter Cycling, we are on top of getting orders in quickly so that our stores have bikes readily available. Give us a call or visit us at one of our store locations. Contact us here.

Introducing Trek Rail’s New Bosch Smart System

Bosch is taking a big step into a digitally-connected e-bike. With the new Smart System, Bosch now combines the physical experience of e-biking with the digital experience of using smartphone apps. The Smart System uses the e-bike Flow app, the LED remote Kiox 300, the PowerTube 750 battery, and the Performance Line CX motor. All components are fully connected to each other.

What makes the Smart System so impactful is that it's the first entirely digitally connected e-bike to a smartphone app, such as the Flow app – not just through the display. This comes with a huge advantage for ease of use: software updates can conveniently be installed through the smartphone app at any time. Now, your e-bike will stay up to date even after purchase.

The E-bike Flow App 

The smartphone app connects to your e-bike automatically after registering as a user. The home screen of the app displays everything you need to know about how your Smart System is working, including the e-bike’s battery charge level, the next recommended service appointment, and the total mileage ridden during your ride.

Once you have the app set up, just hop on your bike. The app will automatically start tracking your ride’s analytics. Gone will be the days of forgetting to start your watch, Garmin, or fitness tracking app. In the near future, Bosch plans to connect the Flow app to popular fitness tracking apps so your rides are automatically uploaded.

The LED Remote

Attached to your handlebars, so you can easily take a glance, is the LED remote. This display shows 5 LED lights indicating the charge of your ebike’s battery, as well as the setting of the ride mode which is displayed in different colors. The LED remote is discreet and tidy on your handlebars, so it’s subtle, and not in the way while riding. Many riders prefer the clean look of the new LED remote as opposed to a bulky display. But if you prefer having an on-board computer display for training purposes, you can have this fitted to your e-bike by one of Epicenter Cycling’s shops after purchase.

The Kiox 300

The on-board computer display of the Smart System is perhaps the most compact display on the market. The Kiox 300 is simply the ideal training tool for riders that want to hit markers and set personal bests by tracking their analytics throughout the ride. With the Smart System, the Kiox 300 seamlessly connects to the Flow app so you can track your performance and optimize every e-bike ride. Lastly, the Kiox 300 can be updated through the Flow app after registering. It’s never been easier to own and operate an e-bike.

So there you have it, folks. The new Bosch Smart System redefines e-bike riding for total efficiency, power, and fun. Although recently released, Bosch already has plans for extending the capabilities of the Smart System. Curious what Bosch has in the works for the Smart System in 2023? You can get a sneak peek by clicking here. Moving forward, all new capabilities with be fully compatible with the Smart System.

Contact one of Epicenter Cycling’s stores to learn more about the Bosch Smart System and how to purchase. 


‘Tis the Season to be Merry and Bright 

As the fall leaves change to vibrant red and gold colors, we revel in the days of milder temperatures, tacky dirt, and long miles on the pavement. Back to our earth science lessons, the leaves change colors due to their lessening ability to produce chlorophyll thanks to the dimming sunlight as our hemisphere tilts away from the sun. While trees drop their leaves, cyclists break out their bike lights to adapt to the shorter days.

With that being said, it’s time to get a refresher on safety tips while riding in the dark. Knowing how you can increase your visibility during the winter months sets you up to increase road cycling safety. Read on to learn more recommendations for how to dress for rides and change your bike’s setup to increase your visibility. 

Riding Visibility Tips During the Day

The number one tip to increase daylight visibility while riding is to wear fluorescent colors. Wearing fluorescent colors only works effectively in ultraviolet light, or more commonly known as sunlight. There is 200% more light from a fluorescent color than a normal color because ultraviolet light excites the neurons of fluorescents. 

It’s important to note, an automobile’s headlights will not create the same effect that ultraviolet light does on fluorescent colors. Studies show that riders overestimate the effectiveness of wearing fluorescent colors in the late afternoons and evenings. This presents a danger as the rider wearing fluorescents is likely to be less cautious than a rider wearing all black, who already assumes that cars cannot see them very well. Bottom line: As the sun sets, the effectiveness of wearing fluorescent clothes decreases more and more

Another tip: use daytime running lights. Use very bright LED lights with a wide beam angle, focus optics, and a visible distance of 400 or more meters. Drivers are often distracted, and research yields that cars need at least that distance to slow down. A flashing light also helps catch the eye of a driver compared to a steady beam of light. Anything that helps set you apart from the background is beneficial.

Browse daytime running lights right here: Daytime Running Lights

Our final tip for daytime riding visibility: Biomotion. Increase your likelihood of being seen by up to 83%. We are wired to recognize other humans more than any other creature or object. Use fluorescent colors around your feet, ankles, knees, and so on to highlight your body’s contour. 

Riding Visibility Tips During the Evening

As you likely guessed, the best tip for evening and night riding is to deck out your bike with lights. By law, you must have one reflector (or red light) mounted on the back of your seat post and one white light positioned on the front of your bike, such as on your handlebars.

You must also have reflectors mounted on the following places while riding at night: 

“Visible from the side: 1) white or yellow reflector on the front half of the bicycle and 2) a red or white reflector on each side of the back half of the bike. These reflectors are not required if the bike has reflectorized front and back tires. CVC 21201(d)”. (CalBike).

This is the bare minimum. You can read more about California’s bicycle laws by clicking here.

The brighter, the better. You want to shop for lights that are at least 400 to 800 lumens. If you plan to ride offroad, such as a mountain bike ride, you’ll want lights that are even more than 800 lumens. It is also suggested to mount one light on your helmet and another on your handlebars for optimal visibility and safety.

Our staff has picked the Bontrager Circuit Wave Cell Helmet as their top choice for evening road and commuting. Why? It’s cleverly designed with magnetic bike light mounts. You can ride equipped with the lighting you need snugly mounted on your helmet. Then you can put your focus on the road ahead of you.

Contrary to daytime riding, wearing clothing with reflective strips has been shown to work more effectively at night than wearing fluorescent colors at night. It should be a no-brainer. But the scientific finding is that fluorescent colors need ultraviolet light in order to be effective. There is next to no such light at night. Car headlights will pick up reflective strips on clothing, bikes, and shoes. 

With that said, put reflectors on the back of your pedals, on your wheel spokes, and on clothing for best practice.

Click the links below to research and buy our most popular bike lights:

Best Tire Choices for Your Electric Bike

When it comes to riding quality and efficiency, you don’t want to overlook the importance of your tire choice to optimize your ride.

Bike tires have a range of designs, so it’s up to you to know how to choose a bike tire that fits your riding style AND one that is ideal for handling the type of terrain you are going to ride on.

Let’s jump into tire choice for electric bikes. Here we will give you tips on how to pick out the best tires for your electric bike.

Why Do I Need E-bike Specific Tires? 

A tire is a tire, right? Wrong! Bike tires are now designed to optimize specific riding disciplines (cross-country, enduro, road, downhill, etc.) for many different types of terrain. So as of recently, the bike community realized the need for e-bike specific tires.

E-bikes, with their powerful battery and motor, weigh more than their traditional bike counterparts. Therefore, it’s more likely that you could puncture one of your traditional bike tires.

The solution, though, isn’t to run more PSI; this will change how the bike feels during your ride, and most likely, you’ll find that you have less traction with the ground.

Additionally, e-bikes allow riders to maintain high speeds (50km at max speed) for longer distances than traditional bikes. This naturally leads to tire tread wearing down quickly.

The solution? Bike tire manufacturers designed e-bike specific tires. While tread pattern, tire compound, and casing will vary based on e-bike riding discipline, you’ll find that e-bike tires across the board are optimized for the weight and force that is applied with e-bikes. 

Tire Choices for Electric Commuter Bikes 

First and foremost, we recommend the 2021 model of the:

Bontrager E6 Hard-Case Lite E-Bike Tire

A city/commuter e-bike tire that is designed for smooth-rolling cruises and meets the demands of e-bikes. Get your e-bike up to 50km and be thrilled to find out it keeps up with ease, provides reliable traction even on the smoothest of surfaces, and maintains its quality even with consistent use.

The Bontrager E6 Hard-Case Lite E-Bike tire comes in black, brown, or black with reflective sidewalls to increase visibility for those evening commutes. 

Tire Choices for Electric Road Bikes 

Bontrager R3 Hard-Case Lite TLR Road Tire

The Bontrager R3 Hard-Case Lite TLR Road Tire is a bike tire staple with brand new design improvements after feedback from team riders. Looking for a tire that provides fast and efficient rolling paired with strong, but lightweight casing? Look no further. Check it out by clicking on the link above!

Bontrager AW3 Hard-Case Lite Road Tire 

Claimed to be the “set it and forget it” tire for road bikers, this fast-rolling tire got an upgrade with durable Hard-Case Lite puncture protection. With proprietary TR-Endure compound supplies your bike with reliable traction in all conditions. Check out the brand new Bontrager AW3 here!

Tire Choices for Electric Mountain Bikes 

Yes, you could hypothetically slap any mountain bike tires onto your electric mountain bike’s wheels. But let’s think about it for a minute. Your e-bike is not the same as your traditional mountain bike. There are two strong reasons to pause before putting any ol’ tire onto your e-bike: 

  • Your e-bike is heavier (by at least 15-20 lbs) than a regular mountain bike. As you might have guessed, this indicates that you need a more puncture-resistant tire. 

  • You often ride faster, for longer distances, and brake harder on an e-bike which inevitability shortens the longevity of the tire’s tread more so than a regular bike. 

So, you’re going to need to know which tires are up to the task of providing you with enough durability and efficiency while you’re ripping down the trail on your e-bike. The last thing you want to be thinking about on an epic ride is how your tires are holding up! 

At Epicenter Cycling, we carry only the tried and true when it comes to tires for e-bikes and mountain bikes. We’ve consulted the experts at Trek so we can report back to you on which tires best suit the job: 

Bontrager SE6 Team Issue TLR MTB Tire 

Bontrager’s newly released SE6 mountain bike tire is currently the burliest 29” tire on the market with 120 TPI and Core Strength Protection. With an aggressive tread pattern designed to bite into the dirt and construction that holds against the harshest conditions, you get a tire that can handle rough riding and exceed expectations on your e-bike.

Bontrager LT4 Expert Reflective E-bike Tire 

A tire designed explicitly for e-bikes because Bontrager just knew there would be a need for such a tire. It’s lightweight, grips the ground, is versatile, and handles the demands of e-bike riding with Hard-Case Lite puncture protection. Best part? Go ahead and shred hard! The LT4 is designed precisely for that. Suitable for trail or pavement.

Bontrager SE5 Team Issue TLR MTB Tire 

Comparable to the SE6, the SE5 can handle whatever a rowdy trail dishes out. This versatile trail/enduro tire with 120 TPI casing provides all the traction and braking confidence you need without sacrificing rolling efficiency. Available in 27.5” and 29”.

Bontrager XR1 Team Issue MTB Tire 

If you aren’t looking for an aggressive tire, Bontrager’s XR1 delivers durability for e-bikes with the lightest weight, the smoothest, and the fastest rolling tire available. This tire has all your bases covered with improved tread design, Inner Strength puncture protection, and Bontrager’s Speed rubber compound with 120 TPI casing.

The Bottom Line on Bontrager’s New Team Issue MTB Tires

  • All of Bontrager’s new team issue MTB tires are easy for tubeless setup. 

  •  XR tire models are constructed with Inner Strength puncture protection.

  • SE tire models are constructed with Core Strength puncture protection. 

  • All new Bontrager new team issue MTB tires are made with 120 TPI (threads per inch). 

  • XR1 is available in 29x2.2

  • XR5 is available in 29x2.5 and 27.5 x 2.5

  • SE5 is available in 29x2.5 and 27.5 x 2.5

  • SE6 is available in 29x2.5 and 27.5 x 2.5

A Complete Guide to Buying the Right E-bike Rack for Your Vehicle

Kuat17WEB-2823-scaled-1.jpeg

The e-bike market is one of the fastest-growing areas within the bike industry to date. As a result, the bike industry has put a substantial focus on product design for e-bike components and accessories; this includes vehicle racks to transport your e-bike.

In this guide, we’ll talk about what e-bike rack features to look for to ensure you are buying one that is safe and sturdy enough to transport your ebike. Unless you have a folding e-bike, your only option for transportation is a hitch mount bike rack.

Be sure to scroll to the bottom of this post to check out Epicenter Cycling’s “e-bike approved” vehicle racks, or click the link to view our inventory! 

Standard Bike Rack v.s. E-bike Rack

The most significant difference between a standard bike rack and an e-bike rack is the tow bar’s weight capacity. A rack that can transport ebikes has a tow bar made from more durable materials than a standard bike rack. With that, the rack has the ability to support more weight. When researching to buy your next e-bike rack, a good baseline is looking at bike racks that can support 65 lbs per bike mount

Precautions to Keep in Mind

E-bikes tend to cost more than standard bikes, so it’s in your best interest to make sure you buy gear and accessories suitable to transport your bike. Getting your e-bike insured is a worthwhile move for a plethora of reasons as well.

If your e-bike gets damaged during transportation, and you have e-bike insurance, pay close attention to the following: it’s essential that you correctly follow instructions and recommendations with e-bike care, including proper storage and transportation. Insurance companies often may only pay out if specific criteria have been met.

When it comes to transporting e-bikes, here are some must do’s: 

  • Check the vehicle’s recommended maximum weight capacity. Calculate the weight of the bike rack and the weight of each e-bike you plan to transport.  

  • Meet the torque setting recommendations on the rack. 

  • Make sure the rack’s keys are stored in a secure location. 

  • Only transport your e-bike on a hitch mount bike rack. 

  • Do not use a hitch receiver adaptor. 

  • Lock your e-bike when you are not within sight of it. Understand the lock works to prevent your bike from getting stolen but is not guaranteed protection. 

E-bike Vehicle Rack Features to Look For

Not all racks are built to load e-bikes. Protect your e-bike by purchasing a bike rack that is up to the task of safely transporting your e-bike to your next destination. In this section, we point out what features to look for when shopping for your next e-bike rack. 

Hitch Mount Bike Rack 

When you see vehicles transporting bikes, you probably have seen three styles in particular: a hitchless trunk-mounted bike rack, a roof rack, and a hitch mount bike rack. When it comes to transporting an expensive, +/- 65lbs e-bike, we’ll make a strong case that a hitch mount bike rack is the most sturdy and reliable rack for your e-bike.

While hitchless trunk-mounted bike racks are minimalist and relatively inexpensive, I certainly would feel uneasy loading a $10,000 e-bike onto that. Many hitchless trunk-mounted bike racks have a weight capacity of around 35 lbs. Your e-bike will very likely exceed the weight capacity.

As for roof racks? Unless you’ve been doing your squat snatches during Crossfit, why don’t you save your back and the embarrassment of your e-bike toppling down the other side of your car? You don’t need the stress.

Hitch mount bike racks are the best option to find a rack with a high enough weight capacity for your e-bike, easy to load and unload, and reliable during transportation. Keep scrolling to view Epicenter Cycling’s inventory of bike racks ready to haul your e-bike to its next adventure. 

Epicenter Cycling’s Pick: Thule EasyFold XT 2The Thule EasyFold XT 2 is one of the most reliable and cleverly designed racks we have come across. Its high load capacity and easy loading make it perfect for transporting e-bikes and heavy mountain bikes. An ergonomic foot pedal tilts the rack so you can access the trunk of your vehicle without unloading the bikes. As the cherry on top, when removed from your vehicle’s hitch, the Thule EasyFold XT 2 folds compactly, like a suitcase, for easy moving and storage.

Epicenter Cycling’s Pick: Thule EasyFold XT 2

The Thule EasyFold XT 2 is one of the most reliable and cleverly designed racks we have come across. Its high load capacity and easy loading make it perfect for transporting e-bikes and heavy mountain bikes. An ergonomic foot pedal tilts the rack so you can access the trunk of your vehicle without unloading the bikes. As the cherry on top, when removed from your vehicle’s hitch, the Thule EasyFold XT 2 folds compactly, like a suitcase, for easy moving and storage.

Locking Cable 

Fortunately, almost any mid to high quality bike rack will include a locking hitch rack and locking cable for your e-bikes. While a lock does not guarantee your bikes won’t get stolen, it acts as a deterrent to any bike thief.  It’s in your best interest to buy a bike rack with locking capabilities.

Kuat NV 2.0 Hitch RackThis sturdy yet lightweight bike rack is perfect for transporting e-bikes to their next adventure. With a fully integrated locking system, you can have peace of mind that your bikes (and your hitch rack) are secure. As an added plus? The Kuat NV 2.0 comes with an integrated bike stand for easy bike maintenance. Click here to view all of the Kuat NV 2.0’s features.

Kuat NV 2.0 Hitch Rack

This sturdy yet lightweight bike rack is perfect for transporting e-bikes to their next adventure. With a fully integrated locking system, you can have peace of mind that your bikes (and your hitch rack) are secure. As an added plus? The Kuat NV 2.0 comes with an integrated bike stand for easy bike maintenance. Click here to view all of the Kuat NV 2.0’s features.

Anti-Wobbling 

Look for a bike rack that has an anti-wobbling system. This feature prevents the rack from moving while driving your vehicle. If you’ve ever seen a loaded bike rack bouncing while the vehicle is moving, it’s a scary scene. Not to mention it’s a safety issue that your tow bar does not adequately support the weight of your bike(s). 

Pivot System 

A bike rack with a pivot is a must-have for those with hatchback vehicles and need quick trunk access. Unloading and loading -/+ 65lbs e-bikes can become a chore, especially when car camping during a bike trip. 

Both the Kuat NV 2.0 and Thule EasyFold XT have a foot pedal tilt pivot system. You know a bike rack is well designed when it can tilt and hold two 60 lbs e-bikes seamlessly. 

RockyMounts’ BackStageThis one’s a treat. RockyMounts created a rack that is the perfect combination for e-bikers with a truck, SUV, or camper: the industry’s first 180-degree swing hitch rack. The Backstage allows you to move the rack with bikes loaded, a full 180 degrees away from the back of your vehicle. With a three-axis tow bar, you won’t see any wobble with the rack loaded either.

RockyMounts’ BackStage

This one’s a treat. RockyMounts created a rack that is the perfect combination for e-bikers with a truck, SUV, or camper: the industry’s first 180-degree swing hitch rack. The Backstage allows you to move the rack with bikes loaded, a full 180 degrees away from the back of your vehicle. With a three-axis tow bar, you won’t see any wobble with the rack loaded either.

Have more questions about vehicle racks for e-bikes? Give us a call!

5 Reasons to Buy a Bike from Your Local Bike Shop vs Online

There is no denying we live in a world with an unprecedented amount of convenience thanks to the Internet. Without having to leave our homes, we can purchase anything from toilet paper to food and bikes. Heck, you can buy a house while sitting on your couch!

But does this convenience of online buying always lead to a better shopping experience? Is it the best way to ensure satisfaction with your purchase? In this post, we explore the reasons why online shopping may not lead to optimal satisfaction in the long run.

Especially when it comes to purchasing your next bike, you have much to consider about how to go about finding the bike you want. Online, you have access to essentially any bike brand, new or a resale. Those reasons easily tempt anyone to buy a bike from an online source.

But here, we make a strong case that online shopping for bikes is an inherently risky move. Not only could it lead to an unsatisfying purchase, but you also miss out on perks only available from buying a bike from a local shop.

Before you decide where to purchase your next bike, use this post to help you make a final decision. 

2021 FX_86A3479.jpeg

1. You Can Demo the Bike First Before Buying

Hands down, the most obvious reason why buying a bike from a bike shop is a bright decision. Bike shops offer test rides, so you can get a feel for the bike before committing. After all, the more bikes you hop on, the more you realize that not all bikes are created equal. Some will suit your riding style more than others. 

Don’t get stuck with a bike that makes you feel “meh” while riding. Demo it first. Your local bike shop understands that testing a product out (especially a bike) is the best way to ensure customer satisfaction. If you buy online, what you got is what you get …

See our available bike models here and call us about setting up a free test ride. 

712A1274 copy.JPG

2. Unbeatable Customer Service 

You get one-on-one customer service in real-time at a bike shop. Ask as many questions as you’d like. When you buy your next bike from a local bike shop, you’ve got someone helping you who lives and breathes bikes and will make sure your questions are answered. 

Not to mention, you get custom fittings and set-up with each bike you test ride. With a bike dialed for your body, you get a proper read on how a new bike will suit your riding style. Your online deal will never be as sweet.

Additionally, chatting with a bike shop employee can give you invaluable insight on the local trail and road scene, suggestions on which trails to ride, and where the best brews in town can be found.

True that you can search for just about anything on Google, but a bike shop employee has knowledge about a cycling area you can only get from being a local bike nerd.

3. Professional Set-Up and Maintenance

After purchasing your new bike from a local bike shop, the best perks of purchase are about to come your way. Across the board, bike shops provide service and warranty with your bike. Many bike shops may also include bargains and free tune-ups included with your purchase.

While we can’t speak for all bike shops, Epicenter Cycling provides killer perks to our customers, and we might as well let you know what those are here:

  • Professional set-up of your new bike to ensure optimal performance and ergonomic comfort. 

  • Free and unlimited tune-ups for the life of your bike purchased at either of our shop locations. 

  • Here at Epicenter Cycles, we are authorized and able to service any Trek and Electra bike we sell. Not all shops can say the same. Please do your research ahead of time. 

  • Free test rides. 

  • One-on-one expert customer service, 7 days a week. 

Give us a call now to set up your free test ride or to hear more about our services: contact us

4. Bike Shops Will Only Sell Brands Committed to High-Quality Products

Let’s think about this critically for a moment; ahem: it’s a fact that there are a fair number of online brands that come and go, thus making sourcing replacement parts challenging to do.

A bike shop with a physical place of business has to source bike brands that have been in the game the longest to ensure their chances of staying open are as secure as possible.

Therefore, the brands that have been producing the longest are likely to have been around for as long as they have because they are both high-quality and popular with cyclists. So, your local bike shop stocks the best engineered bikes, gear and components in the industry. 

See our full inventory here

5. You Can Feel Good About Supporting a Local Business

The world is in rapid change post COVID-19. We saw online shopping skyrocket, particularly for some already colossal and global corporations. We saw our beloved hometown restaurants, shops, and businesses close their doors for good. But with the reasons listed in this post, online shopping does not always equate to quality and satisfactory shopping experience.

By supporting local businesses, local bike shops, in this case, we preserve a service that is invaluable to communities everywhere. Often bike shops are a social hub for bike enthusiasts to connect with one another, set up social rides and events, create fundraisers for local trail systems, and much more. These aspects just cannot be recreated in the same fashion by online brands.


To conclude, bike shops offer professional services, top quality products, expertise and personanbility that cannot be replicated by an online shopping experience. Buying online may offer cheaper pricing, but with that can come lesser quality, lesser reliability, and some uncertainty in what you are really purchasing.

Best chances of enjoying the bike you wish to buy? Go visit your local bike shop. You can find Epicenter Cycling in three convenient locations: Santa Cruz, Aptos and Monterey.

We’re here and ready to set you up with your dream bike.

712A3370 copy.jpeg

Bosch 625w Battery Upgrade Available for Compatible E-bike Models

2021_Trek_Powerfly_29.jpeg

“Ready for any adventure,” the Bosch PowerTube 625 battery is available for compatible electric bike models. If you purchased a Trek or Electra e-bike with a 400w or 500w battery from Epicenter Cycling, now is the time to upgrade that puppy.

If you currently have a 400w Bosch battery, bump your e-bike up to a 500w battery and experience a more powerful ride. Our technicians at Epicenter Cycling are ready to help level up your e-bike’s potential.

Curious about the future? The PowerTube 625 lithium ion battery puts maximum range and altitude in easily attainable reach. Securely locked onto the bottom of your e-bike’s frame, this lightweight and powerful battery is ready for an extended adventure over any terrain.

The Bosch 625w battery fully charges in 4.9 hours, while it charges up to 50% in only 2.1 hours. With a quick charging time, you can enjoy more blissful and adventure-packed hours on the e-bike. 

Screen Shot 2021-09-04 at 9.42.33 AM.png

Why Upgrading Your E-bike Battery Matters

Upgrading your e-bike’s battery is important first and foremost for these two reasons: You increase the power and the range of your e-bike per charge.

Who doesn’t want a more powerful e-bike that can keep up an efficient pace for longer stretches? Additionally, no matter how well you care for your e-bike’s battery, it inherently loses efficiency over time. E-bike battery upgrades are a cost efficient way to enjoy your e-bike for years to come rather than buying a whole new e-bike. 

Keep in mind, you should consult your local dealer on whether or not your e-bike’s components are compatible for an upgrade. All Epicenter Cycling e-bikes are powered by Bosch motors and batteries and therefore when you upgrade, only use a battery from the same manufacturer.

View our contact information here to schedule your e-bike’s upgrade. 

WARNING: If you use an e-bike battery from a different manufacturer, you run the risk of shortening the life of the battery while also lessening the e-bike’s efficiency per charge. Bosch’s batteries are perfectly designed to match the components on the e-bike’s battery port. Read Bosch’s complete e-bike battery guide here

Maximizing Your E-bike’s Battery

After you have upgraded your e-bike’s battery, you still have a great amount of influence on how to maximize the range of your e-bike, just by how you ride it and take care of it.

The range of your e-bike per charge is determined by three main factors: battery capacity, the level of pedal-assist you choose to use, and motor efficiency. Obviously, the more pedal-assist used during a ride will drain your charge faster, so be sure you are using the appropriate level of pedal-assist needed.

For further reading on maximizing your e-bike battery, continue on to our post on Understanding Electric Bike Battery Range. You will learn loads of useful tips including how to calculate the range of your e-bike’s battery. Knowing this can assist you while planning out your rides.

P.S. Need a quick refresher on e-bike batteries and maintenance? These two articles will cover all the basics about e-bike care: How to Care for Your Electric Bike and Understanding Electric Bike Tech: Motors and Batteries


Basic Bike Tire Maintenance

TK20_Verve 3_St_Petes_Still-life_DR19802179.jpg

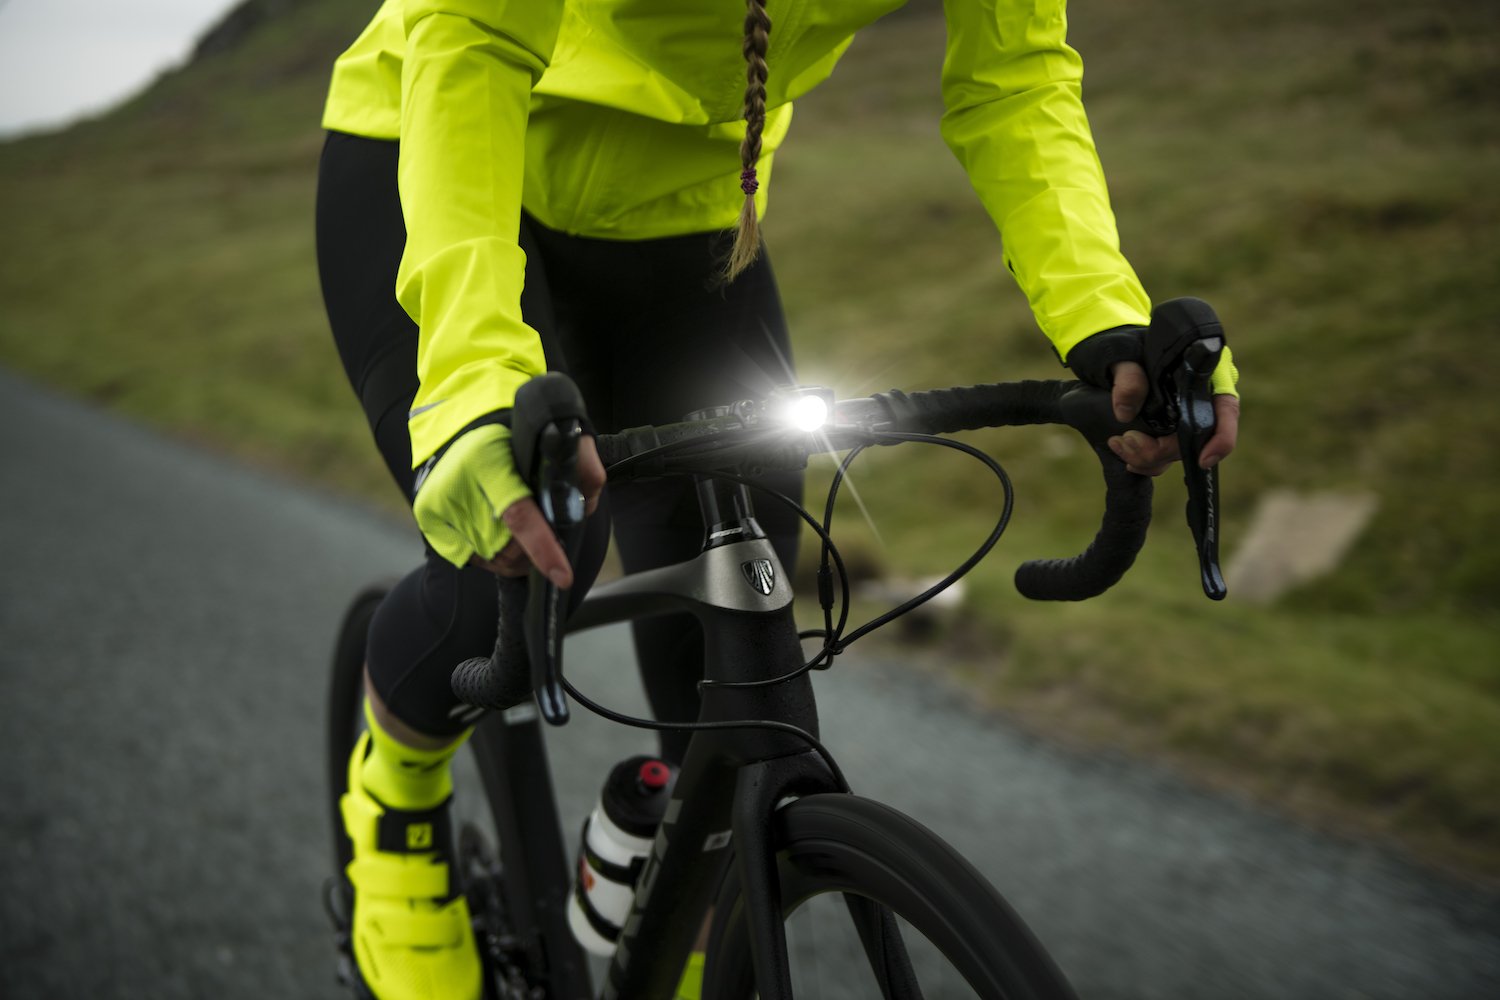
You can’t go wrong by informing yourself of essential bike maintenance. The more attuned you are to your bike, the more likely you’ll be able to troubleshoot mechanicals and keep your bike in ride-ready condition.

It may seem overwhelming getting started with bike maintenance. So let’s start with the basics: tires. By the end of this guide, you shall be provided with enough know-how to feel comfortable tackling the basics of bike tire maintenance. 

What to Have in Your Tool Bag for Tire Maintenance

If you ride a bike frequently, it’s in your best interest to pack a few essential bike tools if you get a flat (or some other mechanical) while on your ride. Here are suggestions for what should be readily available in your bike tool bag:

Multitool 

A multitool is compact and handy enough to provide a wide range of minor fixes and unforeseen trailside mechanicals. From allen wrenches to hexes and chain breakers, you won’t want to leave this tool at home. 

Tire Levers

Good luck trying to fix a flat without two of these babies. Tire levers are crucial to removing your flat tire from your wheel and assisting you with guiding a fresh tube or tire back onto your wheel. Many bike-specific multitools will come with tire levers but be sure to double-check before your purchase. 

Hand Pump or CO2 Cartridge & Inflator

You don’t have to wait till you are near a floor pump to inflate your tire. There are plenty of nifty hand pumps small enough to fit into your pack and efficient enough that you’ll have a completely flat tire reinflated before your arm tires out. 

Some cyclists prefer the convenience of using a CO2 cartridge and inflator over a hand pump; this uses pressurized CO2 to fill a tube in a flash.

Spare Tube 

If you get a flat on your ride, a spare tube can save the day. Make sure that your spare tube is the correct size for your tire (27.5”, 29”, etc.). Also, pay attention to the valve type of your tube. Tubes either have a Presta or Schrader valve. Many bike pumps have a feature to convert the type of valve it can inflate but not all. Some pumps only can inflate with Presta valves or Schrader valves. Keep scrolling for our guide on how to fix a flat! 

Tire Plugs 

Having a plug kit with you could be a bright idea if you run tubeless tires. With tubeless tires, tiny punctures are filled by the sealant inside the tire, preventing a flat. But occasionally, we rip a tire too wide for the sealant to do its job. In this case, carrying a plug kit will allow you to plug up that leak so you can finish your ride. 

Tube Patch Kit

If you get a flat with an inner tube in your tire, with no spare tube available, don’t panic. If you brought a tube patch kit, you could still run that tube after patching up the puncture. Patch kits are incredibly user-friendly and offer a speedy fix. 

Basic Tire Maintenance

Checking PSI 

Checking your bike’s tire pressure is good practice, and eventually, this will be second nature before each ride. Finding the proper tire pressure for you is calculated based on your weight, plus the weight of your riding gear, with respect to the conditions of the surface you choose to ride on. 

Each cycling discipline has its recommended tire pressure:

  • Mountain Bike Tires (25-50 PSI)

  • Gravel Bike Tires (40-80 PSI)

  • Road Bike Tires (80-120 PSI)

Start at the lowest recommended PSI (based on the average weight of a cyclist:160 lbs). Cyclists weighing less than 160 lbs may want to run less than 25 PSI, cyclists more than 160 lbs may prefer riding with more than 25 PSI. Mountain bikers and gravel cyclists, also keep in mind the rougher the terrain, the more pressure you may want to run in your bike tires to mitigate the chance of getting a flat.

Pro Tip: A handy dandy tool for PSI is a digital tire pressure gauge. Many pumps will have a gauge built into them, but often they can read inaccurately, or the gauge becomes inaccurate over time. A digital tire pressure gauge is easy to read and sensitively accurate.

Tubeless vs Tubed Bike Tires

Whether it’s tubeless or has an inner tube, your tire set-up is a personal preference along with your bike tire choice. But there are pros and cons to each which you should be aware of. 

A tubeless tire setup is designed to allow the tire and valve to seal on the rim of your wheel without losing air. While setting the tubeless tire, pour a liquid, tire-specific sealant into the tire. Sealant is tubeless tire magic; it fills any small punctures (generally any puncture size under ¼”), thus keeping your tire from losing air! To go tubeless, you either need tubeless-ready wheels or use a tubeless conversion kit with your current wheels.

Need help going tubeless? Bring your bike to one of our Epicenter Cycling locations! Our professional bike mechanics will get you set up quickly. 

While tubeless tire set-ups are faring more on the side of popularity, there are still advantages of riding with a tubed setup. Riding with a tubed tire setup means that there is an inflated rubber tube inside of your tire. This inner tube should match the size of your tire’s diameter size (26”, 27.5”, or 29”). 

Let’s look at the pros and cons of tubeless and inner tube setups: 

Inner Tube Pros

  • Setting up tires with tubes is easier and faster.

  • Worldwide, there are more bikes with tubes, so it’s easy to find replacement tubes almost anywhere. 

  • Patching a tube is easy. 

  • All tires and wheels are designed to use tubes. 

  • Road bikes ride better with tubes than tubeless due to the tendency to run high tire pressure.

Inner Tube Cons

  • Must run more tire pressure to avoid pinch flats. 

  • Tires with tubes are heavier than tubeless. 

  • You’ll likely ride slower. While having to run more pressure in your tire to avoid flats, you’ll also experience less traction and thus are more at risk for washing out on your bike. 

Tubeless Pros

  • You will have fewer flats on average than riding with a tubed tire. 

  • You can run less tire pressure, have more traction, and ride smoother. 

  • Tubeless is lightweight. 

  • Often can repair a flat without taking the tire off the rim. 

Tubeless Cons 

  • They are more expensive and can be tedious to set up. 

  • You should still carry a tube on a ride in case you flat. 

  • Maintenance is more frequent (ex. sealant dries out, and occasionally punctures continue to leak air despite the liquid sealant in the tire).  

  • Tire burps are more frequent.

Fixing a Flat Tire

Flats happen. Bike tires are quite durable these days, but trail and road conditions can still present an unlucky scenario that leads to a flat tire. Bike mechanics will tell you one of the most important repairs you should know is how to fix a flat bike tire. So let’s guide you through the steps.

If you skimmers don’t feel like reading through a list of instructions, no worries.  We’ve got the perfect video on how to repair a flat from Trek. Click here to watch!  

These instructions are for fixing a rear tire flat. The steps are the same for a front tire but easier since you don’t have to move the chain and gears.

Tools and Materials Needed: A multitool, two tire levers, a spare tube, and a pump. 

  1. Keep your bike upright and shift into your most difficult gear.

  2. Stand on the non-chain side of the bike and remove your back tire by loosening the quick release or thru axle on the rear wheel. Hold the wheel down with one hand and lift your bike from the wheel with the other hand.  

  3. Grab your tire lever with the scooped end. Work this end of the lever underneath the edge of your tire. Then attach the hooked end of this lever to the nearest spoke. 

  4. Next, use your second tire lever and work the scooped end underneath the edge of the tire just a few inches away from your first tire lever. Then, continue to work the second tire lever around the whole wheel to remove the tire from one side of the rim completely. 

  5. Beginning at the valve stem, pull the old tube out of the tire. 

  6. Carefully check the inside of your tire for any sharp debris. Then visually check the outside of the tire for anything sticking out of the rubber that may have caused the flat and remove it. 

  7. Get your replacement tube. Inflate it with just enough air to give it some shape. 

  8. Find the valve stem hole on your wheel and place the valve of your replacement tube through it. Then work your way around the tire, tucking the tube carefully into the tire. Avoid having the tube getting pinched in the process. 

  9. Start at the valve stem again and use both thumbs to press the tire back onto the rim of the wheel. This becomes increasingly difficult as the edge of the tire sets back into place. You can use the scooped end of a tire lever to help press the rest of the tire back onto the rim. 

  10. Using a pump, inflate your tire to your desired PSI. The flat is now fixed! Time to get your wheel back on your bike. 

  11. Thread your axel through your hub and tighten it properly. Guide your bike frame back onto the wheel. Spin your wheel to check over the tire and your wheel. 

  12. Take a quick pedal around to make sure everything is running smoothly. 

  13. Resume your ride and have fun! 

Patching Up a Bike Tube

Let’s say you are running tubed tires and flat. With no spare tube? Hopefully, you brought a patch kit. Your ride will be saved, and it will be a really quick and easy fix!

Tool and Materials Needed: A multitool, two tire levers, a patch kit (or patches, glue, sandpaper), and a pump.

Pro Tip: If you are patching a tube at home, fill a tub or bucket with water. Inflate the tube and submerge it into the water. Watch for bubbles – they will indicate when the puncture is. 

  1. Find the leak. Closely inspect the tube for air hissing or submerge the tube into water to detect the puncture site. 

  2. Decide whether to fix the tube or replace the tube. Some punctures are too big to patch. 

  3. Clean the area where the patch will go. Rough up the surrounding spot with sandpaper to help with adhesion. 

  4. Spread the glue and apply the patch. Hold the patch firmly in place until the glue is dry. 

  5. Inflate your repaired tube with a pump. 

  6. Start with Step 7 of this article’s section on Fixing a Flat. This will provide instructions on how to put your replacement tube back into your tire. 

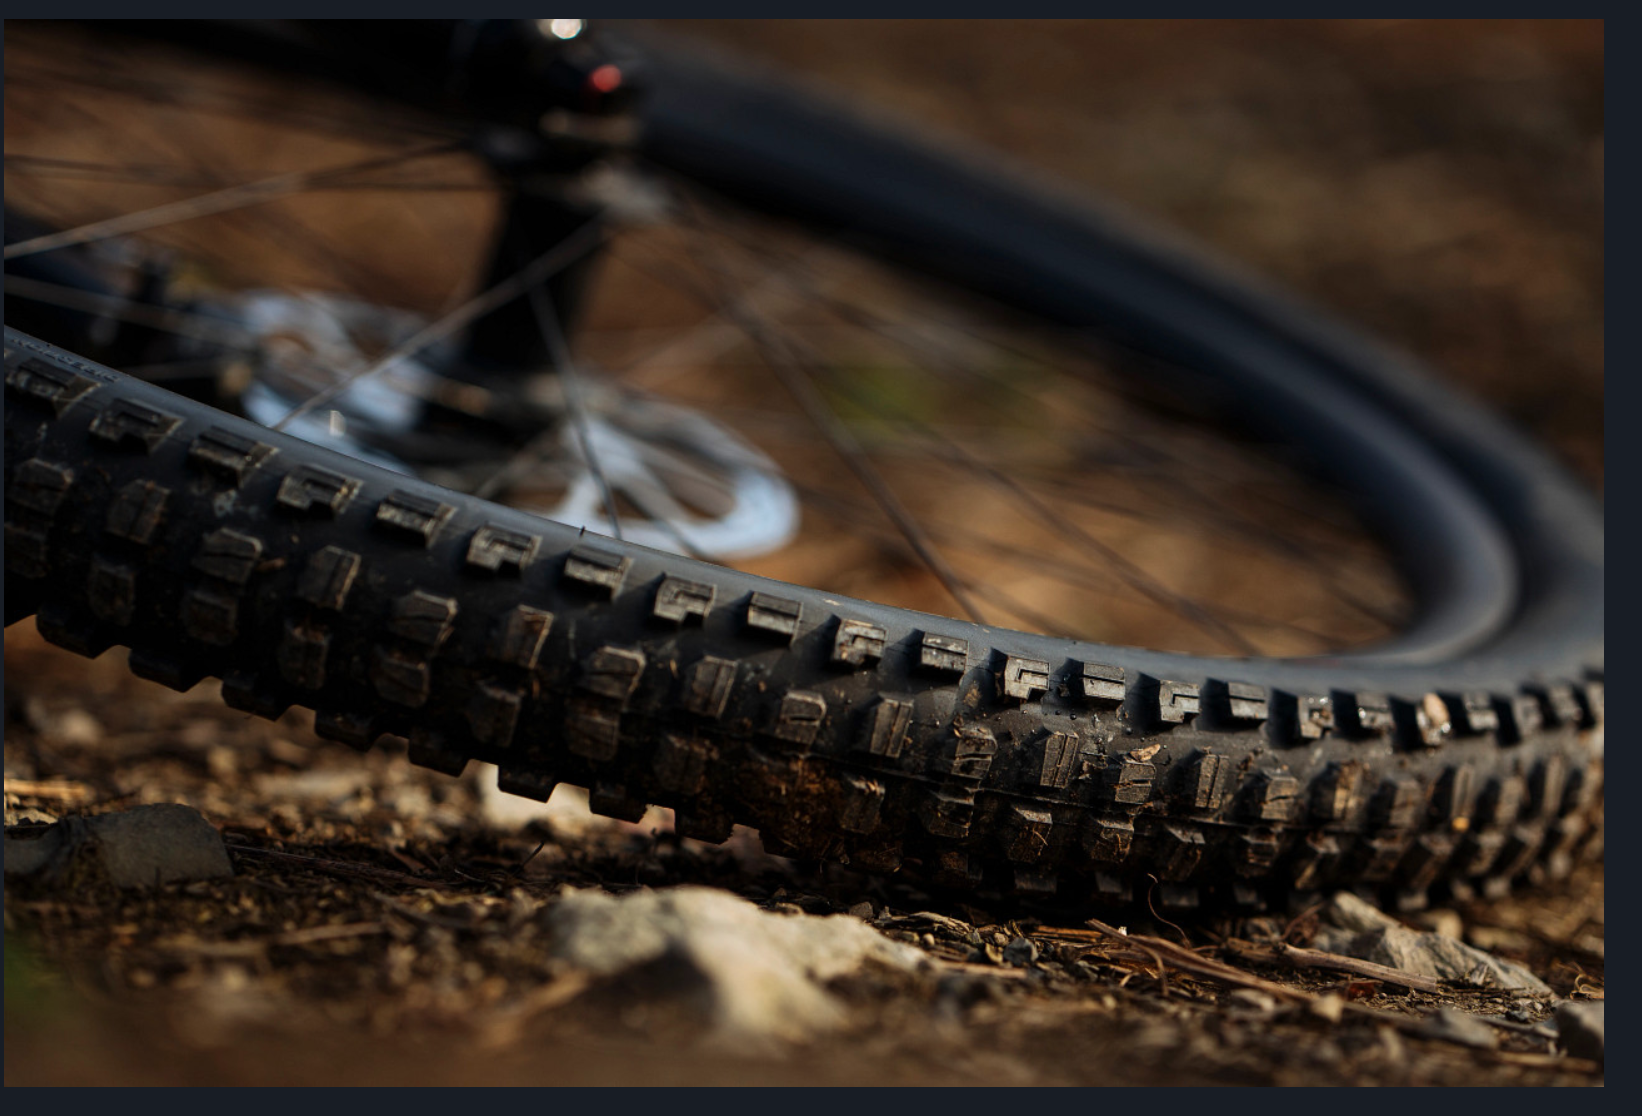
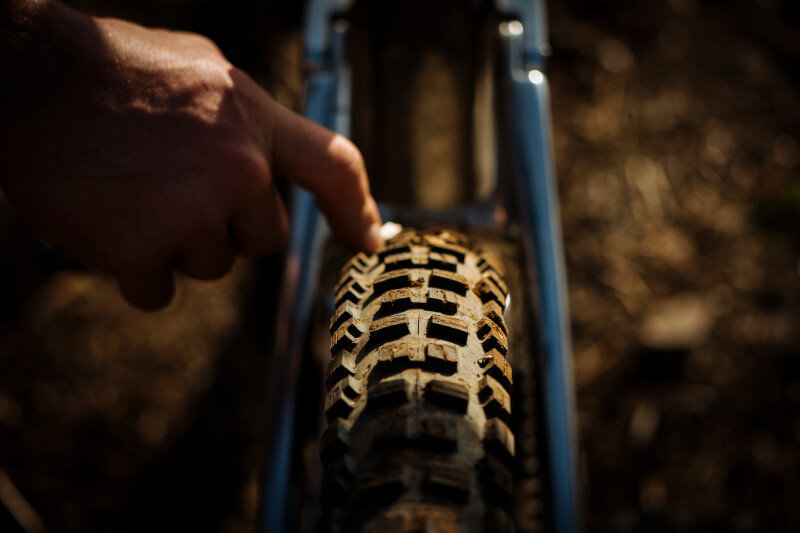
When to Replace Bike Tires 

The tell-tale signs of when it’s time to replace your bike tires are something you should know off the top of your head. Running old and worn-out bike tires increases your risk of flatting, losing traction, and having a generally less safe riding experience.

Signs that it’s time to replace your bike tires: 

  • Worn out tread. 

  • The fabric inside your tire pops out. 

  • Bumps form on the sidewall of your tire. 

  • Asymmetries appear while spinning your tire. 

  • Tire labels are starting to fade. Your tires have been put to work!

You may also consider replacing your tires if you are riding in different trail conditions. Stay tuned for our guide to choosing mountain bike tires – coming soon. In the meantime, give us a shout or stop by for more info.

Additionally, you may want to switch out tires when going for long rides to accommodate the conditions you’ll be riding in and save the tread pattern on the tires you typically run. 

Cyclists that race frequently switch out their tires to optimize for their race experience. Worn tires are less efficient, unsafe, and less fun to ride on. When racing, you’ll want to increase your odds of riding well in any way you can. Running fresh tires is a surefire way of making sure you do. 

Feel free to browse Epicenter Cycling’s impressive selection of bike tires from top brands next time you come by the shop. Or give us a call to hear what we have in stock. We are happy to assist you.

BONTRAGER_SE5-00452.jpeg

Coming soon: Our comprehensive guide to choosing the right mountain bike tires!

A Mountain Biker’s Guide to Electric Bike Etiquette

SLorencePhoto_pwrflyday2_139 copy.jpeg

Before we get started, if you’re new to mountain biking (whether it’s an ebike or not), be sure to check out our post on Mountain Bike Etiquette.

There you will learn the basics of mountain bike etiquette and get helpful tips on ride preparation. It will save you from making a few rookie mistakes.

We also cover best practices during COVID-19 to keep you and others safer on the trails. 

Okay, now let’s drop electric mountain bike etiquette. “DROPPING IN!” 

Electric Mountain Bike (e-mtb) Etiquette

It’s not easy being the new kid. In the mountain bike world, electric mountain bikes (eMTBs) are the new kid, the young whippersnapper. It’s still a bit of an adjustment for some to accept that e-bikes are here to stay. 

A short history lesson for you: in North America, particularly the United States, there are thousands of miles of trail designated as “non-motorized vehicles only.”

Yet at many trail systems, it took years of negotiation to even allow traditional mountain bikes on the trails. This permission remains shaky in some regions.

So if you’re an eMTB owner, know that you are somewhat automatically a steward for the sport. You help shape the future of e-bikes by your conscientiousness and ability to inform yourself on e-bike regulations.

Powerfly Wilder.jpeg

E-bike Regulations: A Must-Know for eMTB Etiquette

State Regulations

Not all states regulate e-bikes the same way. Hence, you’ve got to do some research before that next out-of-state road trip. Heck, you should know e-bike regulations for the state you live in. Know your rights!

Let’s look at California’s regulations on e-bikes for example:

In California, e-bikes are regulated the same as traditional bikes. You obey the same rules of the road.

California defines e-bikes into 3 classes: 

  • Class 1: Bicycles with a motor that provides assistance only when the rider is pedaling, and that ceases to assist when the e-bike reaches 20 mph.

  • Class 2: Bicycles with a throttle-actuated motor, that ceases to assist when the e-bike reaches 20 mph.

  • Class 3: Bicycles equipped with a motor that provides assistance only when the rider is pedaling, and that ceases to assist when the e-bike reaches 28 mph.

Individuals younger than 16 years old are prohibited from riding a Class 3 e-bike. 

Additionally, it’s not needed for e-bike owners to meet the registration, licensing, and insurance requirements of a typical motorized vehicle within California.

If you wish to see California’s law on e-bikes to the letter, more power to you. Dive in here.

Not sure which class your e-bike falls into? Give us a call or visit one of our locations at Epicenter Cycling.

Local Regulations

Lastly, and VERY importantly for e-bike etiquette, research local and regional laws on ebike trail access. Local governments reserve the power to prohibit e-biking on their trail systems.

Know whether or not eMTBs are allowed on the trails you’re riding and you’ll avoid that very uncomfortable experience of sticking out like a sore thumb among local riders on their traditional mountain bikes.

There’s a good chance you’ll be asked not to ride your eMTB there as well. Remain respectful and remember they are protecting their hard-earned ability to have access to the trails themselves.

Learn where you can lawfully ride an eMTB in the Santa Cruz area here

Powerfly-1500.jpg

The Basics of e-MTB Etiquette

Preparation

Before you ride your eMTB at any (new to you) trail system, research to find out which trails if any, allow eMTB access. Perhaps that’s redundant at this point, I certainly hope so!

If eMTBs are given the green light at your chosen trail system, bring a map! Or just as easy, download a third-party app such as TrailForks. You’ll have the ability to look up trails, know your location, and track your ride, right in your pocket.

Pack snacks to fuel yourself, check the weather, wear gear appropriate for the ride, and bring bike tools in case of a mechanical issue. Refer to Guide to Mountain Bike Etiquette for more in-depth tips. Set yourself up for success! 

Trail Traffic School

Understanding the right of way while riding trails is crucial to all users but especially to eMTBers due to the difference in speed we can reach. This is where e-bike etiquette and courtesy go a long way.

Yielding

To break it down, eMTBs yield to other cyclists and pedestrians (hikers, runners, walkers, anyone on foot) as well as equestrians. To safely yield, slow down to a complete stop and pull over onto the side of the trail to allow them to pass. 

Passing from Behind

Passing another trail user from behind may be a common occurrence while on an eMTB. Best eMTB etiquette to pass another cyclist goes as follows: 

Slow down, give ample warning such as shouting out “On your left!” and wait to allow the other cyclist enough time to move to the right of the trail. Remember your manners, say thank you, and wish them a pleasant ride!

If you come across a pedestrian or equestrian, give ample warning, allow them to move to the right of the trail, and dismount from your eMTB for safest practice. Same deal as well, thank yous are nice to exchange afterward.

Uphill/Downhill 

Whether you are riding an eMTB or a traditional mountain bike, the rule stands that downhill traffic yields to uphill traffic.

While this is the long-standing rule, situational awareness is called for. Sometimes, it’s not realistic for the trail user on the downhill to yield, but they should do their best to slow down as they make their way down the descent.

The uphill user should move to the side of the trail to allow the downhiller a safe line to exit the situation. Do your best to communicate clearly as you navigate passing each other.

Lastly, you should never assume the uphill trail user will yield for you. Cyclists are always required to yield to pedestrians and equestrians.

Mechanical IssueS 

Perhaps one of the biggest buzzkills to a fantastic ride is a darn mechanical issue. But mechanicals happen.

If you remembered to pack your tools and can fix the issue, great! Just remember basic trail etiquette by getting your eMTB fully off the trail to leave room for other trail users while you attend to your bike issue.

While you do that, you’ll be pleasantly surprised by how many cyclists passing by will check in with you and offer to help. Another basic tenant of trail etiquette: we help each other out!

Stucki_Ecal_Full_Riding-25 copy 2.jpg

e-MTB Etiquette Conclusion

If you are riding an eMTB you should automatically be primed to err on the side of caution. You have to weigh the fact that you are likely moving more quickly than other trail users and eMTB use is heavily regulated in comparison to other trail uses.

Hence, knowing your eMTB etiquette will guarantee you more joyful, stress-free and safe rides with more cheerful interactions with other trail users. There is room for everybody as long as we all respect the rules of the sport.

  • Know the eMTB regulations in the state you are going to ride in. 

  • Research the local and regional trail systems. 

  • Appropriately prepare for your ride. 

  • Review the right of way under “Trail Traffic School.” 

  • Remember you are an ambassador of eMTB.

Electric Bike Postures: What Suits You and Why

Before we talk about posture on an electric bike, what type of riding are you interested in?

Do you see yourself sliding through berms and sending it down singletrack? Or are you looking for an e-bike that will double as your daily commuter and source of early morning joy?

Click on How to Choose the Right Electric Bike for Your Lifestyle to get some answers quickly. 

Once you’ve got that sorted, let’s talk about:

Electric Bike Postures

Getting an e-bike that positions your body in the optimal posture for you is very important. Purchasing the wrong e-bike can not only wear down your body but your bike as well.

If you were to purchase a comfort/cruiser bike and went off-pavement, chances are your knees and hands will be feeling it the next day after getting jostled down a dirt trail. Not to mention, your bike was not designed to be ridden off-road.

Read further to determine what type of e-bike posture is meant for you. 

Upright Position: Comfort/Cruiser Electric Bikes 

1200-800-TowniePathGo5iStepThru_20_29099_E_Accessory2.jpg

Picture yourself hopping on your e-bike for a leisurely pedal to the market, a coffee shop, or to work? Consider Electra or Trek’s city cruiser e-bikes. Perfect for city touring or commuting. Equally important, if you experience lower back pain, you will be most comfortable in an upright position. Comfort and exercise can co-exist! 

Also, if you prefer a lower standover height than a standard bike, Trek’s Verve+ Lowstep and Townie Go! models are for you. With one of these e-bike choices, you’ll avoid having to swing your leg over the saddle and will stand over your bike at a stop with complete ease.  

The upright position on these e-bikes ensures you’re engaged with your surroundings, taking it all in. Handlebars on cruiser e-bikes are shaped into a gentle upward curve for effortless steering. Riding a cruiser e-bike has never felt so pleasant! 

Active Position: Hybrid Commuter e-Bikes 

2019-07-22_Allant-481-crop.jpg

Meant for cyclists who desire high-performance on the pavement as they power past morning traffic. These e-bikes are designed to be sleek and lightweight for commuters.

In the active position, your body is leaned slightly forward for optimal pedaling efficiency and speed. This forward position increases your aerodynamics as well.

Need a reliable mode of transportation that will get you there quickly? Trek’s Allant+ models are for you. 

Active Position: Electric Mountain Bikes

Powerfly-1500.jpg

Like a regular mountain bike, Trek’s electric mountain bike geometry is designed for stability, control, and smoothness on the rowdiest of trails.

Seated, your body is slightly leaning forward to allow for pedaling efficiency.  On the downhill, your legs are in a squat position, chest over the handlebars, and eyes forward as your maneuver your way down some single-track.

Active position equals adventure position here.

Performance Position: Electric Road Bikes

TrekDomanePlus_Oct2019_Nice_-929-crop.jpg

Your electric road bike gets you moving at top speed, for a distance you thought unachievable on a traditional bike.

With drop handlebars, you have the ability to tuck low over the e-bike and let it fly. Your body is as leaned forward from the hips as you can get: it’s time to get serious.

High-performance, smooth, and designed to set the pace, check out Trek’s electric road bikes.

Conclusion

With many e-bike options, it’s important to know what type of riding experience you want.  Additionally, knowing what your body prefers in terms of posture on a bike makes or breaks those long rides.

If you purchased the type of electric bike best suited for your needs, you can be sure to have an experience where you are present in the moment, enjoying every pedal stroke.

But you don’t want to make any guesses! Refer back to this blog post and be sure to connect with our professional mechanics here at Epicenter Cycling to ensure you get the electric bike best suited for you.

Rule of thumb: the e-bike for you should be functional, stylish, comfortable, and fun. 


How to Care for Your Electric Bike

Stucki_Ecal_Full_Riding-13.jpeg

So you’ve brought home your new electric bike. It’s as capable and shreddable as a traditional bike – only you’ll now smash out after-work laps in half the time! You’re already planning out an epic ride for the weekend when you realize, “I better learn how to take care of an e-bike …”

You have come to the right place then. Here is a quick guide on how to maintain an e-bike. You’ll find that they are extremely user-friendly and with just a few pointers, you’ll have a solid foundation on how to maintain your ebike in ride-ready shape. 

The e-Bikes

Here at Epicenter Cycling, we offer the newest Trek electric mountain bike and Electra urban commuter e-bike models to cover all your e-cycling bases. Click here for more info on our e-bikes. And just a reminder: when you buy your e-bike from us, we offer free test rides and unlimited free tune-ups for the life of your bike.

Both Trek and Electra e-bikes are powered by Bosch motors and rechargeable batteries. Bosch offers a competitive edge with some of the most durable batteries on the market. With Bosch’s updated software on the Performance Line CX, experience a ride with more flow and control than ever before. Learn more about Bosch motor, display, and battery 2021 updates here

Before Your Ride

It’s so easy to hop on your e-bike and feel tempted to start your ride “full throttle.” But before you leave, do a quick check on your e-bike’s set up:

Check your tire pressure. Tire pressure greatly influences your ride. Pump up your tires to at least the minimum psi. Doing so reduces rolling resistance. You can find the psi recommendations conveniently located on your tire’s siding.

Keep in mind, the terrain you ride on, your weight + riding gear, and the type of tires on your bike, influence your optimal tire pressure setting. Feel free to give us a shout if you need any help determining this.

Lubricate your chain. Making it a habit to do so after cleaning your e-bike is a small task that can save you from spending more on bike maintenance due to chain wear. Chain wear can also cause wear on your cassette and front chainring.

The chain transfers energy from your pedal stroke to your e-bike motor. Getting regular checks for chain stretch, at least every 3 months, will reduce the need to replace your drive train. And if not more importantly, the checks help ensure your e-bike motor stays in superb condition.

We also suggest checking the tightness of the bearings on your e-bike just like you would with any other bike before your ride. Carry a multitool with you in case any mechanical issues occur.

And of course, make sure your e-bike battery is locked into place and you have plenty of battery power to reach your destination.

For more information on mountain bike maintenance: epicentercycling.com/resource/blog/mtb-care

For more information on commuter/urban bike set up: epicentercycling.com/resource/blog/road-bike-care

How to Clean Your e-Bike

Before getting busy hosing down your freshly muddied e-bike, remove the battery and the displays located on your handlebars. Bosch e-bike Systems have a Removable Integrated Battery (RIB), a one-piece battery that can easily be removed and reinstalled into the bottom-bracket of the frame with no tools and no struggle.

While spraying off your e-bike, don’t aim for the electrical contact points. A light wipe around the plug pins with a cleaning solution appropriate for e-bikes will be sufficient in preventing build-up or corrosion. Keeping these plug pins free of build-up helps transfer power from the battery to your e-bike motor.  Now, if your bike is washed off, use a soft towel to dry it off.

Once your frame is squeaky clean, don’t forget to lube your chain! A rusty chain will mess up your cassette, and rust looks awful on a beautiful e-bike …

Lastly, grab your battery and reinstall it into your bike frame. Or, if you see that your battery power is running low, refer to our section on how to properly charge your e-bike battery. 

Bosch Motor and Battery

Taking care of a bike with a motor and battery may sound complicated, but they are designed to be downright intuitive. All of our models are pedal assist, meaning that the motor is powered by your pedal stroke. The battery and motor are installed on the bottom bracket of your bike’s frame. This placement ensures optimal balance and stability.

Bosch lithium-ion batteries are powerful, ranging from 400 Wh to 625 Wh of energy. Not to mention, they are one of the lightest e-bike batteries on the market, weighing 5.5 lbs. With such battery efficiency and lightweight design, you’re guaranteed maximum miles per charge. If you’re curious about ride factors that influence efficiency of battery charge, check out Bosch’s e-bike range calculator.

Next, 

Here are some tips to optimize the lifespan of your e-bike battery:

  • Store the battery in a space that is 50-68 degrees Fahrenheit. Like humans, e-bike batteries like it “not too hot and not too cold” when parked in the garage.   

  • Keep the charge between 30%-60% when stored for extended periods (1 - 5 months).  

  • Do not park your e-bike in direct sunlight. 

  • Cover your battery in a neoprene sleeve during rainy and wintery rides. Doing so protects it from the elements and improves battery efficiency in cold temperatures. 

  • Remove the battery from the bike frame before washing your bike. 

  • Store your battery in your vehicle when transporting your e-bike. 

  • The level of pedal assist you select determines how quickly the battery charge decreases during your ride. 

Just know that every battery naturally degrades over time. But following these tips will set you up to extend your battery’s life as much as possible.

Charging Your e-Bike’s Battery 

It’s the end of a wonderful afternoon of e-biking and your battery percentage on the display indicates that it is indeed the end of the ride. But don’t worry. Depending on the Bosch battery, your e-bike can fully charge between 3.5-8.8 hours. 

Essential e-bike charging tips: 

  • Do not use a charger from a different manufacturer. You run the risk of causing the e-bike system to malfunction as well as shortening the battery lifespan. 

  • Charge your battery at room temperature. 

  • You can double the battery life by charging it up to only 80%-90%. 

  • The battery should be charged at 30%-60% if it’s stored for an extended period of time.

  • If two battery packs are mounted on one e-bike, both battery packs can be charged using the unsealed connection. To begin with, both batteries are charged one after the other until they reach approx. 80−90 % capacity, then they are both charged at the same time until full (the LEDs on both batteries flash).

While these tips are best practices, always refer to your user’s manual.

When Should I Get a Tune-Up on My e-Bike? 

A good rule of thumb is every 6 months or every 1,200 miles, whichever comes first. If you ride aggressively, or in rough conditions, consider getting tune-ups more than twice a year as a safety precaution. Checking the e-bike motor should only be done by an expert mechanic. If you bought your e-bike from Epicenter Cycling, enjoy unlimited free tune-ups for the life of your bike. 

How Often Should I Replace the Firmware on My e-Bike? 

Bosch recommends updating the firmware on the bike every 6 months. This ensures you’ll always have the latest features on your ebike.

Conveniently, Bosch offers the Bosch e-bike Connect  app which not only allows you to track your activities, but also automatically updates your display (Kiox & Nyon) software for you. After downloading the app, sign up and create a user I.D. to enjoy the full benefits of the operating system. You can create a user I.D. directly at eBike-Connect.com then track your data, create routes and get the latest news from Bosch.

Once you know the basics, how to care for your e-bike becomes second nature. Visit us in person or give us a call to schedule your first tune-up on your e-bike. 

TK20_Verve+3_St_Petes_Riding_DR1168.jpg

eMTB Motor Review: Bosch’s Performance Line CX System with 2021 Update

Rail97NX_21_32813_D_Alt2-copy.jpg

If you’re looking to enhance your life with an electric mountain bike, a stellar experience starts with a state-of-the-art pedal-assist motor that will make the most out of your pedal strokes, no matter what mode you’re traveling in.

Enter Bosch’s Performance Line CX system which debuted in 2019 to high acclaim. Bosch took the mountain biking experience to a new level with this system that is incredibly powerful and sensitive while being lightweight and compact. Made out of superior materials, it’s built to last, even with the most aggressive riding.

What’s more, Bosch swiftly upgraded this already-impressive motor not long after its 2019 release. The redesigned 4th generation system is nearly half the size of its antecedent, and significantly lighter. With a range from 31 to 94 miles per charge depending on battery size and riding factors, get ready for more fun than ever!

csm_DU_2019_1.1_a388d1e9e9.png
csm_DU_2019_1.25_682d20ad24.png
csm_DU_2019_3.25_16f4781ce2.png
DU_2019_6.25.png

Keeping up the momentum, this past summer Bosch also released a significant software update (model year 2021). This update increases the torque up to 85 Nm, and introduces Advanced eMTB mode for the ultimate in control, and Extended Boost which makes rocks, roots, steps and other technical sections smooth, even on the climbs.

These three improvements combine to make your ride feel remarkably natural no matter the terrain. Let’s take a look at each to see what they mean to your riding experience.

Increased Torque

An increase in torque to 85 Nm (from 75 Nm) equals a motor that’s more powerful than ever. This means faster and more powerful acceleration when in eMTB and Turbo mode, felt over a wide cadence range. 

It’s at especially low cadences that this new feature is especially helpful; imagine the edge you now get on those pesky uphill starts.

Also, you’ll be sure to notice a difference as you take technical sections smoothly, naturally, and powerfully. Plus, delayed gear shifting and acceleration out of tight turns won’t derail your ride.

Advanced eMTB Mode

The all-new advanced eMTB mode is all about motor sensitivity. This innovative technology allows for sublime control due to new sensor and motor control functions. We’re talking optimum traction no matter what gear you’re in, and “power on demand” for a remarkably powerful, responsive, and smooth ride. 

You’ll feel like the motor is right in tune with your effort, particularly in low gears, and you won’t even have to switch riding modes. This synchronistic mode allows for an extraordinarily dynamic and natural feel on the trail, enabling you to feel comfortable and confident on a wide range of trail conditions.

Extended Boost

Extended Boost is another new upgrade that will take your riding to a new level. This unique function in eMTB mode enables you to navigate those tricky, techy sections easily and nimbly, even when climbing — with no pedal jam.

Imagine clearing those steep, rocky, rooty singletrack climbs gracefully! Simply apply a certain level of pressure to the pedal, and la voila.

For example, you’ll feel confident on that step-up … just get that front wheel on the step, apply a slight amount of pedal pressure, and you’ll get that perfect amount of kick to smoothly make your way onward and upward.

extended-boost-graphic.jpg

e-MTB lite: a trek Exclusive

Also new as of this past year, Trek eMTBs equipped with the Gen 4 Bosch motor feature an eMTB Lite mode — exclusive to Trek — which replaces Tour mode. eMTB Lite offers dynamic variable assist just like eMTB mode, but at a lower torque range.

This allows for a powerful, organic experience, but with extended battery life. It’s ideal for for riders who enjoy longer rides and aren’t adverse to putting in a bit more power, yet would like more assistance than Eco mode offers.

So how do you get some, so you can get after it? 

Buy the bike with the upgrade already installed

This 2021 software update is standard on 2021 electric mountain bikes with the Performance Line CX drive unit. Swing by to check out the Trek Rail eMTBs we carry at our three convenient stores.

Retrofit your existing motor

If you own an eMTB bike with model year 2020 and later CX drive units, we can update your software. Contact us for details!

About Bosch

Bosch has led the world in motor (and battery) innovation for decades. Their eBike Systems division was established in 2009, and their drive systems power the majority of the Trek and Electra electric bikes we carry at Epicenter Cycling.

The Bosch warranty is quite impressive — two years on the motor, battery, and computer. Compare that to what most other brands that offer — just one year on the motor and 90 days on the battery.

95510496_10158593981958296_1698945996936970240_o.jpg

Stay Warm Cycling this Fall and Winter

1905E_BK_D3A0464.jpg

2020 sure turned out to be the Year of the Bike. People of all ages and abilities discovered — and rediscovered — the numerous benefits of cycling during COVID-19 stay-at-home orders in the spring. Bikes quickly became essential for transportation, physical fitness, mental health, family connection, and of course, plain old fashioned FUN.

As the year progressed, bikes continued to boom even as stay-at-home orders were lifted. Summer weather made it easy to choose the bike over the car, and getting around by bike was certainly safer than using public transportation or ride sharing considering the ongoing pandemic.

With cold and wet weather ahead of us, though, will the momentum continue? We know cycling is good for our health (mental, physical and emotional!), our community, and our planet no matter the season or weather. However, to many, the idea of riding in inclement weather can be quite daunting.

If you're one of these people, these tips on staying warm and dry will keep you on track and reaping the biking benefits throughout the colder months.

Stay Dry to Stay Warm

There’s an old Norweigian rhyme, “Det finnes ikke dårlig vær, bare dårlige klær” which translates to a saying we all know well, “There is no such thing as bad weather, only bad clothing.” 

It’s so true. The right apparel choices make all the difference when cycling in the colder months. Layers in season-appropriate materials are key.

Certainly, being wet on a chilly day will quickly make you miserable. We can get wet while cycling by sweating and/or getting caught in the rain. Stay warm by staying dry! The most important body parts to pay attention to in this regard are your core, head, hands and feet.

Core

Your body considers your core (torso) its most important part, as it’s where your vital organs reside. A cold core will hoard blood to keep those organs and your brain warm. A warm core generously shares that warming blood with your hands and feet.

So, pay special attention to keeping your core happy. Keep in mind that a few light layers will warm you up better than one thick layer.

Base Layer

Start with a light-weight moisture-wicking base layer top  to pull moisture (read: sweat) away from your skin and to the fabric’s exterior where it will evaporate faster.

This primary base layer should be snug but not tight. Choose quick-drying active wear made of polyester, nylon, polypropylene or even merino wool; skip anything made of cotton as that tends to soak up and hold moisture against your skin.

It’s a good idea to have long sleeve, short sleeve and sleeveless options available depending on the weather forecast and your ride ambitions for that particular day.

Middle Layer

Your second layer will serve as insulation. If your base layer has long sleeves, this middle layer could be a wool vest. Alternatively, if your base layer is sleeveless, this middle layer might be a wool long-sleeve.

Every body is different, so you’ll want to try different combinations to find your personal sweet spot. Anyway you do it, though, it’s helpful if this layer can be unzipped, either all the way or partially, for ventilation as you warm up along the way.

Jacket

Top your base layers off with a breathable jacket. Obviously, choosing a waterproof, breathable jacket/shell is crucial for a rainy ride. Some jackets are specially designed to protect you from wind; others are a hybrid, offering protection from both rain and wind.

A couple of our most popular jackets are the Bontrager Circuit Cycling Wind Jacket and the  Bontrager Vella Women’s Cycling Wind Jacket.

Head

That well-vented helmet is wonderful for cooling down your head in the summer heat, but in the cold months, you’ll want to cover up with a thin cap.

The best cycling caps for cold weather cover your ears as well, such as the Bontrager Windshell Cycling Skullcap or Bontrager Thermal Cycling Cap.

A balaclava such as the Bontrager Windshell Cycling Balaclava will offer ultimate warmth and protection from the cold as it covers your head, ears, and neck and can even be pulled up to cover part of your face. 

If fully covering your head is too much, a headband such as the Bontrager Thermal Cycling Headband or neck gaiter such as the Bontrager Convertible Cycling Neck Gaiter may be just the ticket.

Hands and Feet

Cold hands and feet are a common deterrent to outdoor exercise during the chilly months. As we talked about earlier, it’s important to keep your core warm which in turn keeps your extremities warm.

But that’s usually not enough. Keep your hands from going numb with cycling gloves designed especially for cold weather. Some cycling gloves even boast a special pocket for hand warmers.

For super cold rides, layer up with a liner and outer glove ... or invest in the  Bontrager OMW Winter Glove with all its bells and whistles. Bar mitts are another option, giving your hands a warm shelter on your handlebars.

Layers for your feet work wonders as well. As with layering for your core, you’ll want to try different combinations of layers to find the sweet spot. Generally, you’re looking at a thin moisture-wicking base sock with a thicker layer on top.

Be sure your shoes are roomy enough and that your socks aren’t too tight. Too much snugness will restrict blood flow, and also make your feet sweat a great deal. And sweat = moisture = cold!

It’s not a bad idea to pack an extra pair of socks in case your feet do sweat. Changing out your socks can make the difference between a great ride and a miserable one.

2021_Trek_Powerfly_Equipped26 copy.jpg

A few more tips

REMOVe layers

It’s important to note that removing layers is just as important as layering up when it comes to staying dry and warm. Be proactive and don’t wait until you’re already sweating to peel off a layer or unzip your jacket.

Take advantage of any built-in venting features that your apparel might have, as well.

CARRYING THE LAYERS

As you shed layers, you’ll want to have a place to stash them. Conversely, if your ride starts out warm, you may want to pack extra layers for a colder finish.

Be sure to outfit your bike with a set of panniers or a basket, or wear a roomy enough backpack to fit your things.

Be organized

It also helps to keep your clothing organized at home, so it’s easily accessible when it comes time to ride.

warmers

During transition seasons, when the early part of your ride will be chilly but the day warms up fast, arm, leg and knee warmers with your normal cycling kit might be all you need. These items can be removed easily and stashed in a jersey pocket.

We carry an assortment of warmers including the Bontrager Thermal Cycling Knee Warmer, Bontrager Thermal Cycling Arm Warmer, Pearl Izumi Elite Thermal Arm Warmer, Pearl Izumi Elite Thermal Knee Warmer, and the Fox Knee Warmer.

Fenders

Lastly, to keep rain and mud from splashing on your back as you ride, install fenders on your bike. There are many different types of fenders to choose from; ask us about styles we carry that are designed for mountain biking, road riding, and bicycle commuting.

Bokanev-Trek-03756.jpg

#GoByBike

So, keep up that momentum from the fair weather days and stick to your cycling habit all year ‘round — the benefits far outweigh the little bit of effort you’ll put into dial in your comfort.

Don’t forget that our crew is here to support your journey … give us a shout or swing by with any questions or concerns you might have.

Let’s not stop with the Year of the Bike … imagine the 20s as the DECADE of the Bike … and beyond!

2021_Trek_Slash_53.jpg


Why Do YOU #GoByBike?

TowniePathGo5iStepThru_20_29099_E_Accessory2.png

Why do YOU #GoByBike? For the physical health benefits such as boosted energy, increased focus, better sleep, and improved fitness?

Perhaps you #GoByBike for your mental health. Let’s face it, the less traffic congestion you have to deal with, the less stress and frustration in your life. Cruise on by those vehicles moving at a snail’s pace and get to your destination faster and happier.

Pro tip: Opt for an electric bike to get there sweat-free and smelling like a daisy. 😉

Of course, many of us #GoByBike for our community and planet since the less you use your car, the less emissions pollute the air. Imagine the ripple effect as more people opt for two wheels over their motor vehicles!

And last but surely not least, how about for the money you save when you ditch the car? Gas and parking expenses are cut considerably — plus the expense of registration, insurance, maintenance and repairs for those of us who bid farewell to cars entirely.

Join the #GoByBike movement by tagging a photo of your ride on social media, and encouraging your friends and family to do the same. Let’s all inspire others to discover all the benefits of cycling ... for ourselves, for our communities, and our planet!

Check out trek.bike/GoByBike-Blog for more info and inspiration!

Getting Around by Bike: Carrying Your Stuff

TK _BLX_Action_X500TREK _9155.jpg

Riding a bike is an excellent alternative to driving a motor vehicle for a number of reasons including personal well-being (great exercise!), community health (less traffic!), and the welfare of our planet (reduced emissions!).

Cycling has also become a popular alternative to using public transportation and ridesharing (Uber and Lyft) amid concerns about COVID-19.

If you, too, are interested in getting around by bike, you may be wondering how to carry your essentials. For example, how do you haul groceries home, bring your laptop and lunch to work, or even take your cat to the vet?

The good news is there are lots of options — read on to discover the best option for your needs.

Bontrager City Shopper Pannier: a simple, elegant pannier that is quickly installed or removed and includes a handy shoulder strap for easy shopping and loading for the ride home.

Bontrager City Shopper Pannier: a simple, elegant pannier that is quickly installed or removed and includes a handy shoulder strap for easy shopping and loading for the ride home.

Pannier

We’re giving the pannier the spotlight in this post because it’s an incredibly versatile option for carrying your things, with an extensive range of styles to choose from. It’s hands down the most popular choice among experienced bicycle commuters.

The pannier is a bag that attaches to a rear rack on your bike, securely hanging alongside the rear wheel. It’s roomy, stylish, and easy to pack … you can carry just about anything in a pannier!

Many cyclists opt for a pair of panniers which distributes weight more evenly and offers added storage. That said, even a single pannier keeps weight distributed more efficiently and allows for much easier steering than is the case with a heavy front basket or bag.

Fun fact: the word pannier derives from a Middle English borrowing of the Old French panier, meaning “bread basket.” (Electra Rattan Pannier Basket)

Fun fact: the word pannier derives from a Middle English borrowing of the Old French panier, meaning “bread basket.” (Electra Rattan Pannier Basket)

Some panniers are even designed with a rear trunk for optimal carrying capacity. Scroll down for more information on rear trunks.

Pannier styles range considerably to suit just about any situation or budget. From simple grocery bags to elaborate set ups with compartments designed to hold specific items such as laptops and other essentials, the ideal pannier is out there for you.

The Ortleib Back-Roller Classic (shown above in yellow-black) and Sport-Roller Classic panniers are a crew favorite. Also available in Ortleib’s High Visibility Line (HVL) in which the entire bodies of the bike bags are manufactured to reflect …

The Ortleib Back-Roller Classic (shown above in yellow-black) and Sport-Roller Classic panniers are a crew favorite. Also available in Ortleib’s High Visibility Line (HVL) in which the entire bodies of the bike bags are manufactured to reflect light.

As would be expected, panniers come in a wide variety of sizes and are constructed from a myriad of durable materials. For example, if you’re planning to use your bike as transportation during the rainy season, a waterproof pannier or one that comes with a built-in rain cover is clearly a must. For a romantic picnic at the beach, a rattan basket pannier perfectly serves mood and purpose.

Most panniers are designed to be easily removed once you arrive at your destination and park your bike. Some feature a haul handle or shoulder strap; others can be worn as a backpack or messenger bag.

Other features to look for in a pannier are reflective and hi-vis materials that increase visibility, quick release systems, and add-on accessories.

Tips for using panniers:

  • For best balance while riding, choose a pair of panniers and try to keep the weight even on both sides

  • Choose the appropriate size for what you’re using them for

  • Pack the heavier cargo at the bottom of the bag to keep your center of gravity low

  • Pack the items you need fast access to (such as rain jacket or wallet) at the top.

Bring your feathered friend or other small pal along for your two-wheeled ride with Electra’s Basil Pet Carrier.

Bring your feathered friend or other small pal along for your two-wheeled ride with Electra’s Basil Pet Carrier.

Rear Rack

A rear rack can accommodate a number of storage/carrying alternatives. Your setup can be as simple as a crate, basket, tray or pet carrier secured to the rack with cargo netting or bungees. Of course, there are racks that securely accommodate a child seat, as well.

The next level up would be a crate, basket, tray or pet carrier designed to work specifically with a particular rack. This type of set up offers superior security and is designed with a quick release that makes it super easy to attach and remove.

The ultimate set up for getting around by bike is a rear trunk or trunk/panniers combo designed specifically for a specific rack with quick release and other convenient features.

A roomy front basket is just the thing for carrying your yoga props.

A roomy front basket is just the thing for carrying your yoga props.

Front baskets, trays and bags

The Bontrager Interchange Handlebar Basket features mesh construction, a padded handle and easy installation/removal.

The Bontrager Interchange Handlebar Basket features mesh construction, a padded handle and easy installation/removal.

Front baskets, trays and bags are all great options for carrying lightweight items such as towels, snacks, and sunscreen for a morning at the beach.

You can choose from a wide range of styles and materials from the classic basket to a modern bag. There are styles that are secured to the bike in a more permanent manner (i.e. needing tools to remove) and others that feature a quick release to make it easy to attach and remove.

Keep in mind that the heavier the front load, the harder it is to steer your bike; opt for rear storage if you’re regularly carrying heavier loads.

The durable Bontrager Adventure Frame Bag is made with water resistant construction that’s ready to add versatility and adventure to your bike.

The durable Bontrager Adventure Frame Bag is made with water resistant construction that’s ready to add versatility and adventure to your bike.

Frame, Handlebar and Seat Bags

The Bontrager Hilo Speed Box is one of our best selling frame packs.

The Bontrager Hilo Speed Box is one of our best selling frame packs.

Frame, handlebar and seat bags are usually used for bikepacking, but bicycle commuters and find them useful as well.

As their names suggest, these bags secure to the bike frame, handlebars, and back of the saddle.

Some of these bags are designed with a quick-release system, but most are secured by straps that take a little time to fuss with. 

The OG way to schlep your things … a good ole backpack.

The OG way to schlep your things … a good ole backpack.

Backpack / Messenger Bag, Hip Pack, Hydration bags

When you need to bring just a few essentials, the Bontrager Rapid Pack does the trick.

When you need to bring just a few essentials, the Bontrager Rapid Pack does the trick.

Of course, there’s the OG method of schlepping your stuff: a backpack, messenger bag, or hip pack works just fine for the basics. Choose from a wide range of styles and sizes, with or without hydration bladders included.

The downside to carrying your stuff on your person is, well, you’re carrying it on your person. (Hello sweaty back or wonky balance.) The upside, though, is the sheer simplicity: get to where you’re going, hop off the bike, lock it up, and off you go. 

Bontrager’s Integrated Tool Storage (BITS) is the easiest and cleanest way to carry a flat kit, and it tucks right into the in-frame storage of select Trek bikes.

Bontrager’s Integrated Tool Storage (BITS) is the easiest and cleanest way to carry a flat kit, and it tucks right into the in-frame storage of select Trek bikes.

Other handy accessories

Securely mount your phone to your handlebar or stem cap with the Delta Smartphone Holder and easily access apps and maps while riding.

Securely mount your phone to your handlebar or stem cap with the Delta Smartphone Holder and easily access apps and maps while riding.

Let’s not overlook some small but mighty storage accessories such as drink holders for that coffee on the go and phone/cycling commuter holders to track your ride or provide navigation.

For the smallest of essentials, consider a storage bottle designed to slip into the bottle cage on your bike frame. This is ideal for your flat repair kit, snacks, even an emergency rain poncho.

Similarly, some higher-end bikes now feature in-frame storage for these smaller items. 

The Xtracycle Edgerunner Swoop electric cargo bike lets you carry virtually anything … only with superhuman strength.

The Xtracycle Edgerunner Swoop electric cargo bike lets you carry virtually anything … only with superhuman strength.

bike Trailer / cargo bike

The Burley Travoy trailer is the perfect tool for nimbly hauling the day’s groceries, luggage, or gear by bike.

The Burley Travoy trailer is the perfect tool for nimbly hauling the day’s groceries, luggage, or gear by bike.

Finally, for the ultimate hauling capability, consider a bike trailer or even a cargo bike.

Trailers range from simple designs built for securely transporting your most precious cargo (kids and/or pets) to more elaborate set-ups constructed to accommodate specific styles of bags and boxes.

Cargo bikes come in both traditional and electric styles, and can “haul it all” including groceries, kids, sports equipment and more.

#GOBYBIKE

Now matter how you decide to schlep your stuff, now that you’re getting out by bike so much more, inspire a cultural movement by tagging a photo of your ride on social with #GoByBike. Plus, have some added fun by playing #GoByBike Bingo by downloading your free bingo card here!


“Carrying Your Stuff” is part of a series of blog posts designed to help you get the most out of riding a bike as an alternative to driving. Check out our first post “Route Planning” here, and stay tuned for posts on bicycling laws, safety, what to wear, and more.

Cycling, Wildfire Smoke and Staying Safe

BT17_Spring_Summer_Womens_Apparel_23.jpg

Many people in our community are rightfully concerned about exercising outdoors because of the smoke from the wildfires in our area.

With more folks now than ever using a bike for transportation, exercise and recreation, cycling has become a crucial aspect of life. How do we determine if it’s safe to ride?

There’s a number of factors that contribute to the answer to that question. But before we get into those factors, let’s take a look at how smoke affects our health.

The Not-So-Good News

What’s of most concern in an area affected by wildfire are the fine particulates in the smoke which can have a serious and lasting effect on our lungs. These particulates (PM2.5) are too small to see, and require a special filter or mask* to remove from the air we breathe.

Even just a minimal amount of smoke can irritate and inflame our eyes and respiratory tract, causing a scratchy throat, coughing, and increased mucus. Breathing high levels of smoke can reduce lung function, and increase the risk of stroke, asthma and heart attack.

Naturally, effects are more serious for those who already suffer from lung-related medical issues, as well as chronic heart disease or diabetes. Children (under 18), seniors (over 65), and expectant mothers are also considered to be at higher risk, no matter how healthy they might be.

Likewise, active people may be at risk because exercise causes deeper breathing which causes more particulates to move through our respiratory system.

The Oh-Yay-This-Is-Good News

On the upside, there are plenty of resources and tips to help inform those of us who depend on a bike for transportation and physical and mental health.

With a little research, planning, and flexibility, you should be able to spend quality time with your beloved two-wheeled steed while protecting your health as well.

Assess the AQI

The best gauge for determining whether it’s safe to hop on your bike is to assess your area’s Air Quality Index (AQI).

Established by the Environmental Protection Agency (EPA), AQI provides real-time updates and forecasts on the pollution levels in our air. This is very useful information when planning for outdoor activities.

The EPA reports the AQI for five potentially harmful air pollutants that are regulated by the Clean Air Act. Those pollutants are ground-level ozone, particle pollution, carbon monoxide, sulfur dioxide, and nitrogen dioxide.

During a fire event, we’re most concerned with particle pollution, which is also referred to as particulate matter (PM2.5 and PM10). Refer to this EPA guide for more information on particle pollution and how you can reduce your exposure, protecting your health.

For your local air quality forecast, visit airnow.gov or purpleair.com. Don’t despair if the forecast is unhealthy. There may still be times during the day when air quality is okay for outdoor activities.

Since air quality can change rapidly, be sure to check regularly to see if it’s a good time to be active outdoors.

Monitor Wind Direction

It may take some practice and patience, but tracking wind direction via weather satellites can help in planning a route that avoids downwind smoke.

Take Advantage of Clear Windows

Longer smoke events generally have windows of time during which air quality improves. If your schedule allows, be ready to hop on that bike at any given opportunity.

Prepare for these opportunities by having your cycling kit ready, essentials packed, tires pumped up, chain lubed, etc. You don’t want to waste a blue sky on digging around for that favorite chammy!

Be Flexible, Take It Easy

For those riding for recreation or exercise, it’s best to reschedule smoky rides for a better time. Alternatively, consider reducing your exposure by choosing a less strenuous route, or shortening your ride time.

It’s not so simple for those of us who rely on our bike for transportation and don’t have control of our schedules. If you absolutely must pedal your bike in unhealthy air, reduce your exposure by going as slow and easy as you can.

Remember, the more exertion, the more particles you inhale. Try to breathe through your nose vs. your mouth if possible. Our nasal passages boast a natural filtering ability which can help cut down on the pollution delivered to your lungs.

If you can’t avoid traveling by bike during a smoke event, perhaps check with your doctor to see if a respirator such as the N-95 mask is a viable option for you.*

Keep Hydrated

Consistently drinking water can reduce the amount of smoke that travels into your lungs. This is a good tip for anyone in a smoke zone, whether you’re active or sedentary.

Stay Informed

Another safety precaution worth mentioning here is to stay in the loop on updates about the fire’s perimeters and growth, as well as any road closures and damage that might affect your route.

In Conclusion

We hope this information helps you plan your bike rides and stay safe during the wildfire crisis in our area.

Please keep in mind that although the content above has been collected from various credible sources and is accurate to the best of our knowledge, Epicenter Cycling assumes no responsibility or liability for any errors or omissions in the content.

Furthermore, this content is for informational purposes only and not for the purpose of providing medical advice. Contact your doctor to obtain advice with respect to any particular issue or problem.

We recommend browsing the websites listed below as references to further familiarize yourself with wildfire smoke-related issues.


*Regular dust masks, surgical masks, and the face coverings we’re using for COVID will not filter out the fine particles. Masks that are effective for smoke, such the N-95, may be hard to come by during the pandemic as there’s a great demand for them for frontline health care workers. Moreover, keep in mind that this type of mask can make it more difficult to breathe, so you have to be especially careful with your level of exertion; it’s meant for slow, regular breathing. It’s also important to consider that wearing a respirator may increase the risk of heat-related illness, especially when active.


Bike Commuting Essentials

More and more people every day are discovering the benefits of commuting to work and otherwise getting around town by bicycle.

More and more people every day are discovering the benefits of commuting to work and otherwise getting around town by bicycle.

Bikes are booming these days as more and more people discover (and rediscover!) the benefits of cycling. Freedom, joy, fitness, health, transportation, family connection — whatever the reason for opting for two wheels, one thing is for certain: bikes are essential. 

But what are the essentials you need for your rides?

This is part three of a three-part “Essentials” series. Get road riding essentials here and mountain biking essentials here!

The bike

The first essential needed for commuting and otherwise getting around town by bike is, of course, a bike!

Any type of bike in good working condition will do, but a model designed for specific needs will prove to be more comfortable and efficient.

Factors to consider when choosing a commuter bike include how far you’ll be traveling, how fast you’d like to go, how much effort you want to put into your ride, and how much cargo you’ll be carrying.

For example, consider an electric bike if you’d like the option of arriving at your destination fresh as a daisy yet work up a sweat on the way home.

If you’re planning to use your bike for groceries and other cargo, you’ll want to choose a model that can accommodate appropriate carrying options.

Is an exceptionally comfortable ride your priority? You’ll want a model designed to seat you upright, with nice wide handlebars and a plush seat.

Learn more about the wide range of electric and traditional urban bikes we carry here.

Express your style with one of Electra’s many unique helmet designs.

Express your style with one of Electra’s many unique helmet designs.

Helmet

Besides a bike, the most essential thing you need for getting around by bike is a helmet. Even if you’re just taking a quick spin down to the corner store, pop that lid on your noggin. It goes without saying, your brain is far too important to risk injury to it.

Your helmet should be no more than three to five years old (depending on use) as the materials it’s made from degrade over time. Also, be sure to replace it any time it’s in a crash, even if there’s no visible damage. For ultimate visibility, choose a style in hi-vis yellow.

Learn more about helmets and the models we recommend here.

Bontrager’s ultra-bright, all-weather headlights and tail lights provide visibility at night and help you stand out during daylight hours.

Bontrager’s ultra-bright, all-weather headlights and tail lights provide visibility at night and help you stand out during daylight hours.

Lights

A set of lights is up there in importance with a quality helmet. Be sure to run front and rear day-time running lights (DRLs) day and night, and don’t forget to keep them charged. Learn more about how DRLs significantly boost your visibility here.

Tire care and tools

Don’t let a flat or other minor mechanical derail your day. Carry a flat repair kit and multi-tool, and know how to use them. Check out this video from Trek that shows you how to change a flat, and feel free to ask our crew for the lowdown.

Apparel

You can get around town in just about any type of clothing that’s comfortable to ride in (consider something bright for safety), but it’s good to have some essentials on hand in case of inclement weather. A breathable, waterproof jacket or shell is a must. Add rain pants and water resistant shoe covers for optimal comfort.

If you’re breaking a sweat on your commute to work, a change of clothes and a way to spruce yourself up are essential as well. And on those especially long commutes, you might find a chammy indispensable, too.

Get detailed suggestions on what to wear when getting around town by bike here.

Panniers are a simple, easy and convenient way to carry groceries, whatever you need for work, and so much more.

Panniers are a simple, easy and convenient way to carry groceries, whatever you need for work, and so much more.

Storage

Whether you’re commuting to work or running errands by bike, you’ll need to have a way to carry things. There’s a wide range of options that boil down to personal preference. Choose from panniers, baskets, backpacks, hydration packs (with room for extra items), and messenger bags.

Cargo bikes have even more carrying capacity and can even haul the kiddos when necessary! 

Of course, if you’re committed to a rain or shine commute, it’s imperative that your storage be waterproof.

Nutrition and hydration

Definitely eat a decent meal and hydrate before setting out, as not having the appropriate fuel in the tank can cause you to make poor judgment calls that affect your safety.

Unless you’re commuting a long way, carrying water and nutrition isn’t absolutely vital; however it sure wouldn’t hurt to do so just in case.

Bike lock

Bike thieves are everywhere so a solid lock is crucial if you don’t have access to a bike locker or secure parking at your destination. Check out the section on keeping your bike safe in our Guide to Getting Around Town by Bike for more details and recommendations.

bike law lowdown

You should be up to date on bike law in your state and community when using your bike to commute and run errands. Review this post to learn current California and Santa Cruz bike laws.

Fenders minimize water and mud spray … and look pretty dang stylish, too!

Fenders minimize water and mud spray … and look pretty dang stylish, too!

Beyond essential

Certain accessories may not be “essential” but certainly offer added safety, convenience and/or comfort.

Consider a mirror to easily check on traffic behind you, a bell to alert a pedestrian or other cyclist that you’re approaching, a handlebar holder for your smartphone, a GPS cycling computer for navigation and to track your ride stats, and/or fenders to minimize water and mud spray.

Hi-vis and/or reflective leg bands and/or hi-vis shoe covers will boost your visibility a great deal. These items stand out especially well due to your legs and hands being in motion.

Protect your hands and absorb shock from the road with a good pair of cycling gloves. Gloves come in many different styles and materials; come by to check out our selection and feel free to try them on. Be sure to protect your eyes as well with cycling eyewear which reduces glare and protects from UV rays and debris. 

If you’re wearing loose pants, a leg band around the bottom of your right leg to prevent the chain from catching on the fabric. Choose hi-vis and/or reflective for added safety.

Finally, cycling gloves absorb shock from the road, while eyewear can reduce glare and protect your eyes from UV rays and debris.

For more information on bikes, apparel, protection, and accessories, browse the Trek website, then swing by or give us a call to see what we have in stock. Special orders available.

Enjoy commuting and otherwise getting around town by bike! Tag us in your social posts — we’d love to share your stoke!


Understanding and Maximizing Electric Bike Battery Range

TK20_Verve 3_St_Petes_Riding_DR1147.jpg

Electric bikes can travel 20 to 100+ miles on a fully charged battery. That’s obviously a pretty wide range, so how do you know just how far you’ll be able to go?

The range depends on a number of factors. The main things to consider are the battery capacity, the level of pedal-assist you’ll be using, and motor efficiency.

Capacity

Range Boost adds a second battery to compatible Trek e-bikes to significantly extend your range.

Range Boost adds a second battery to compatible Trek e-bikes to significantly extend your range.

Naturally, the more battery capacity, the more juice, and the farther you’ll be able to go.

For ultimate mileage, there are even e-bikes that can accommodate an additional battery which can double your range in the right conditions. For example, Range Boost (left) seamlessly attaches an extra 500 WH battery to compatible Trek e-bike models.

It’s important to note that the more pedal-assist you utilize, the faster the battery will drain. So, if you’re looking to extend your range, be mindful of what mode you’re in and use only what you really need. Save the higher levels of assist to keep a smile on your face during the climbs, and bump down to a lower level for the flat stretches.

A state-of-the-art pedal-assist motor will make the most out of those pedal strokes, no matter what mode you’re traveling in. Bosch has led the world in motor (and battery) innovation for decades, and their drive systems power the majority of the Trek and Electra electric bikes we carry.

There are several other factors to take into consideration when trying to maximize your e-bike battery range.

Some factors may be out of your control, like weather conditions and the terrain you’re riding. If you choose to ride on a windy and/or cold day, be aware that your range may be reduced. Likewise, if you choose a ride on especially rough terrain with a lot of climbing, your range will be affected as well.

Other factors that you DO have control over are cadence, weight, bike set up, and battery care.

A state-of-the-art pedal-assist motor will make the most out of your pedal strokes, especially as you find a nice, balanced cadence.

A state-of-the-art pedal-assist motor will make the most out of your pedal strokes, especially as you find a nice, balanced cadence.

Cadence

Finding a nice, balanced cadence is something you may have to play around with, but finding that sweet spot will go a long way in extending your range. (Pun TOTALLY intended.) 

Keep in mind that the motor will have to work harder the slower you pedal. Shift into a lighter gear from the start and of course on the climbs. Getting your cadence to about 50-80 rpm is optimal. You should be doing more work, but obviously find a balance that doesn’t do you in. It’s supposed to be fun, right?! As your speed builds, you can shift up to a higher gear, but keep that high cadence nice and steady.

Weight

How much weight your motor is working for makes a huge difference as well. You may not have control over rider weight; if you’re packing a few extra pounds, just keep riding your bike and as the weight slowly but surely comes off, you’re sure to notice your battery range is lengthening.

The weight you CAN control is how heavy your pack and other cargo are. Don’t skimp on carrying the essentials and anything that will make your ride safer and more comfortable. Certainly DO use your bike to haul as much stuff as possible — nothing better than kissing your car goodbye. But do keep in mind that the more you carry, the less miles you’ll get on a charge, so plan your trips accordingly.

Bike set up

For eMTBs, bike set up is key, as well, particularly when it comes to your tires (especially the rear) and tire pressure. Of course, you’ll want to match up your tires and pressure to trail conditions, but you’ll certainly get more miles out of your battery running a 29er XC over a beefy 27.5" tire.

Suspension pressure and settings can affect range, too. Pay attention to how your range varies based on the terrain you’re riding and how aggressively you’re getting after it.

Trek’s Removable Integrated Battery (RIB) system makes it very convenient to charge and store your e-bike battery.

Trek’s Removable Integrated Battery (RIB) system makes it very convenient to charge and store your e-bike battery.

Proper care

Lastly, proper battery care is crucial to extending range as well as the life of the battery. Be sure to check the charging, storing, and cleaning protocol for the specific brand and model of your battery.

Most of the e-bike models we carry are equipped with state-of-the-art Bosch batteries which are exceptionally efficient and durable.

Bosch recommends charging and storing at room temperature in a dry location where a smoke detector is installed. Get the full scoop on caring for your Bosch battery here.

Calculate your range

To help you plan your rides, use Bosch's range assistant tool to calculate the approximate range.

You’ll input info about the rider (weight and cadence), the e-bike (style, drive, shifting system, battery, and tires) and the environment (terrain, surface, wind conditions, temperature), as well as anticipated riding mode(s), speed, effort, and frequency of start-ups.

To learn more about the technology that makes riding a bike so much more fun and accessible, read our blog post Understanding E-Bike Tech: Motors and Batteries.


Understanding Electric Bike Tech: Motors and Batteries

Electric bikes differ from traditional bicycles in that they utilize a motor and battery to help power your bike. You can choose the level of assist to suit your mood and ride. Get some solid exercise one day, and an easy sweat-free spin to the store the next!

A motor and battery might sound a bit complicated, but really, they’re not. Let’s take a look at this amazing technology that makes riding a bike so much more fun and accessible.

The Motor

Bosch PerformanceLine CX mid-drive motor on a Trek electric mountain bike.

Bosch PerformanceLine CX mid-drive motor on a Trek electric mountain bike.

E-bike motors are engaged either by pedalling (pedal assist) or using a throttle (lever or dial on the handlebars).

Here at Epicenter Cycling, we carry only pedal assist e-bikes because they feel like a regular bike and are remarkably intuitive to ride. All you have to do is start pedaling as with a regular bike, then the motor kicks in and simply turns up the effort you’re putting in to the pedals. You’ll feel like someone is gently pushing you from behind, giving you a smooth and steady boost.

Some of the e-bikes we carry offer three levels of assist (Shimano STEPS), while others boast four (Bosch). YOU determine how much effort to put into pedaling and adjust the level of support accordingly.

Select a higher level of assist to make short work of a big hill. Select a lower level (or none at all!) to get your heart pumping. Pedal assist e-bikes give you the freedom to choose from ride to ride, and moment to moment during your ride.

Another example of a mid-drive motor; the battery is located just above the motor.

Another example of a mid-drive motor; the battery is located just above the motor.

E-bike motors are located either at the bottom bracket between the pedals (mid-drive motor) or in the front or rear wheel hub (hub motor). Most e-bike models we carry are equipped with mid-drive motors. Because of their low and central center of gravity, you experience a more balanced feel and predictable handling than with an e-bike that utilizes a hub motor.

Power output ranges from 250 to 350 watts, while assisted speed is as high as 20 or 28 mph, depending on the model of the e-bike. 

E-bikes designed with mid-drive, pedal assist motors offer a natural feel, consistent power, and effortless shifting. You’ll feel like you’re riding a traditional bike, only with the legs of a superhero!

The Battery

E-bike batteries vary in capacity; the bigger the battery, the faster and/or farther you can travel.

To determine what the battery power is, take a look at the watt hours (Wh). The higher that number, the more power capacity the battery has.

A electric bike can go from 20 to 100+ miles on a full battery charge, depending on the model of the e-bike, the size of the battery, how efficient the motor is, and the level of pedal assist you choose.

The Trek Allant+ features an integrated, removable battery for convenient charging and safe keeping.

The Trek Allant+ features an integrated, removable battery for convenient charging and safe keeping.

Keep in mind that the less assist you select (such as “Eco” mode), the less power you’ll need from the battery, and the longer it will last. Conversely, the more assist you use (such as “Turbo” mode), the more power the battery will be cranking out, and the faster it will drain.

Other factors that determine range are the rider’s weight, any additional weight such as a pack or rack, the terrain you’re riding on, and the weather such as wind direction and temperature (battery capacity tends to decrease with colder temps).

Batteries are mounted in different spots on the e-bike depending on the brand and model. For optimum balance, choose a design that has the battery mounted on the downtube, or better yet, integrated into it. 

E-bike batteries are charged with a cable that plugs right into your regular household electrical outlet. Some electric bike models boast a removable battery, which is very convenient as you can charge it on or off the bike.

Depleted batteries can be fully charged within 3-5 hours. Keep in mind that e-bike batteries are temperature-sensitive, and store accordingly when it’s extremely cold or hot.

E-bike batteries are easy to charge via a regular household electrical outlet.

E-bike batteries are easy to charge via a regular household electrical outlet.

Most e-bike batteries are controlled from the handlebar, although some models have a power switch on the side of the battery. Furthermore, they are waterproof, lockable, and replaceable.

Want to ride even longer, commute even farther, and take on more epic adventures? Choose an e-bike model that can accommodate an additional battery to double your e-bike’s range!

To get a feel for riding range determined by different factors, check out Bosch’s eBike Range Assistant. Learn how to optimize your e-bike range in this video courtesy of Trek.

The Display

This Electra Townie Go! display is situated in the center of the handlebars for easy access and reference.

This Electra Townie Go! display is situated in the center of the handlebars for easy access and reference.

Another crucial component of e-bikes is the display (or controller), which is a mini screen mounted on your handlebars. The display helps you keep track of your battery level, range, and speed. You also change your level of pedal assist via the display.

This electric mountain bike controller is also located on the handlebars, but close to the left hand grip.

This electric mountain bike controller is also located on the handlebars, but close to the left hand grip.

E-bike displays on the brands we carry are super intuitive. Some even integrate with your smartphone to access directions, music, and other enhancements for your ride.

Clearly, electric bike technology is changing lives for the better. Are you ready to reap the benefits of pedal assist? Check out our guide to choosing the right e-bike for your lifestyle here, and get the scoop on models we carry here.


Coastal Bluffs Mountain Bike Ride | Cycling in Santa Cruz

Enjoy incredible coastal views on this beginner-friendly mountain bike ride along the bluffs at Wilder Ranch State Park.

Enjoy incredible coastal views on this beginner-friendly mountain bike ride along the bluffs at Wilder Ranch State Park.

This mellow mixed terrain ride from our Mission Street store is ideal for beginners and is a family favorite; it’s also e-MTB friendly!

The beauty of this route (besides the remarkable scenery, that is!) is that you can make the ride as short or long as you like (go all the way to 4 Mile Beach for a 9+ mile round trip ride!) … just be sure to take time to enjoy the views and local fauna and flora!

You’ll start out on surface streets, pick up a paved bike path, then enter Wilder Ranch State Park for a pedal on dirt double track. Enjoy a ride along Wilder’s scenic coastal bluffs for as long as you like before turning around to retrace your route back to the shop.

To get there, turn right onto Baldwin Street from our parking lot; then turn left onto King Street. Pedal along King until you hit Mission Street; then turn right. Turn left onto Swift Street, then take an immediate right to stay on Mission which comes to an end at Shaffer. Cross Shaffer and you’ll be on the County Bike Trail, a paved bike path.

Enjoy this beautiful pedal alongside fruit and vegetable fields until the paved path comes to an end at Wilder. Turn left, hop off your bike and walk it through the farmstead. On the other side of the farmstead, turn right and pedal up to the state park’s parking lot.

Here’s where you pick up the dirt, starting at Old Cove Landing Trail on the west end of the parking lot; the route will continue on to Ohlone Bluff Trail. Both trails are wide and relatively level, so there’s plenty of space for getting into your groove if you’re fairly new to riding dirt.

Old Cove Landing Trail runs out toward the ocean where you’ll discover a perfect photo spot pretty early in your ride. You’ll continue along this double track as it hugs the coastline before turning inland to skirt a ravine.

When you arrive at the railroad tracks, follow them until you pick the trail back up. The trail is now Ohlone Bluff Trail and it’ll take you back out to the bluffs where you’ll soak up even more spectacular views of the ocean and beaches below. Keep your eye out for whales, dolphins, sea lions, seals, sea otters, pelicans, cormorants, and more.

The trail will again turn inland and follow the railroad tracks once more, but in no time you’ll be back out on the coastal bluffs.

Ride as far as you like, then turn around and enjoy a whole new perspective as you make your way back!

Tag us in your social posts — we’d love to see your pics from this ride! @rideepicenter #ride831